Properly disassembling a DAF XG
DAF’s new XG series represents a real leap forward for the manufacturer. Drivers in Europe have never had more space at their disposal. A look at our highways confirms the decision to go ahead with the model series, its market share after just one year already extremely high in its segment. In order to design individual models for your own collection, Frank Hadel shows you step-by-step how to dismantle the Herpa model without breaking it.
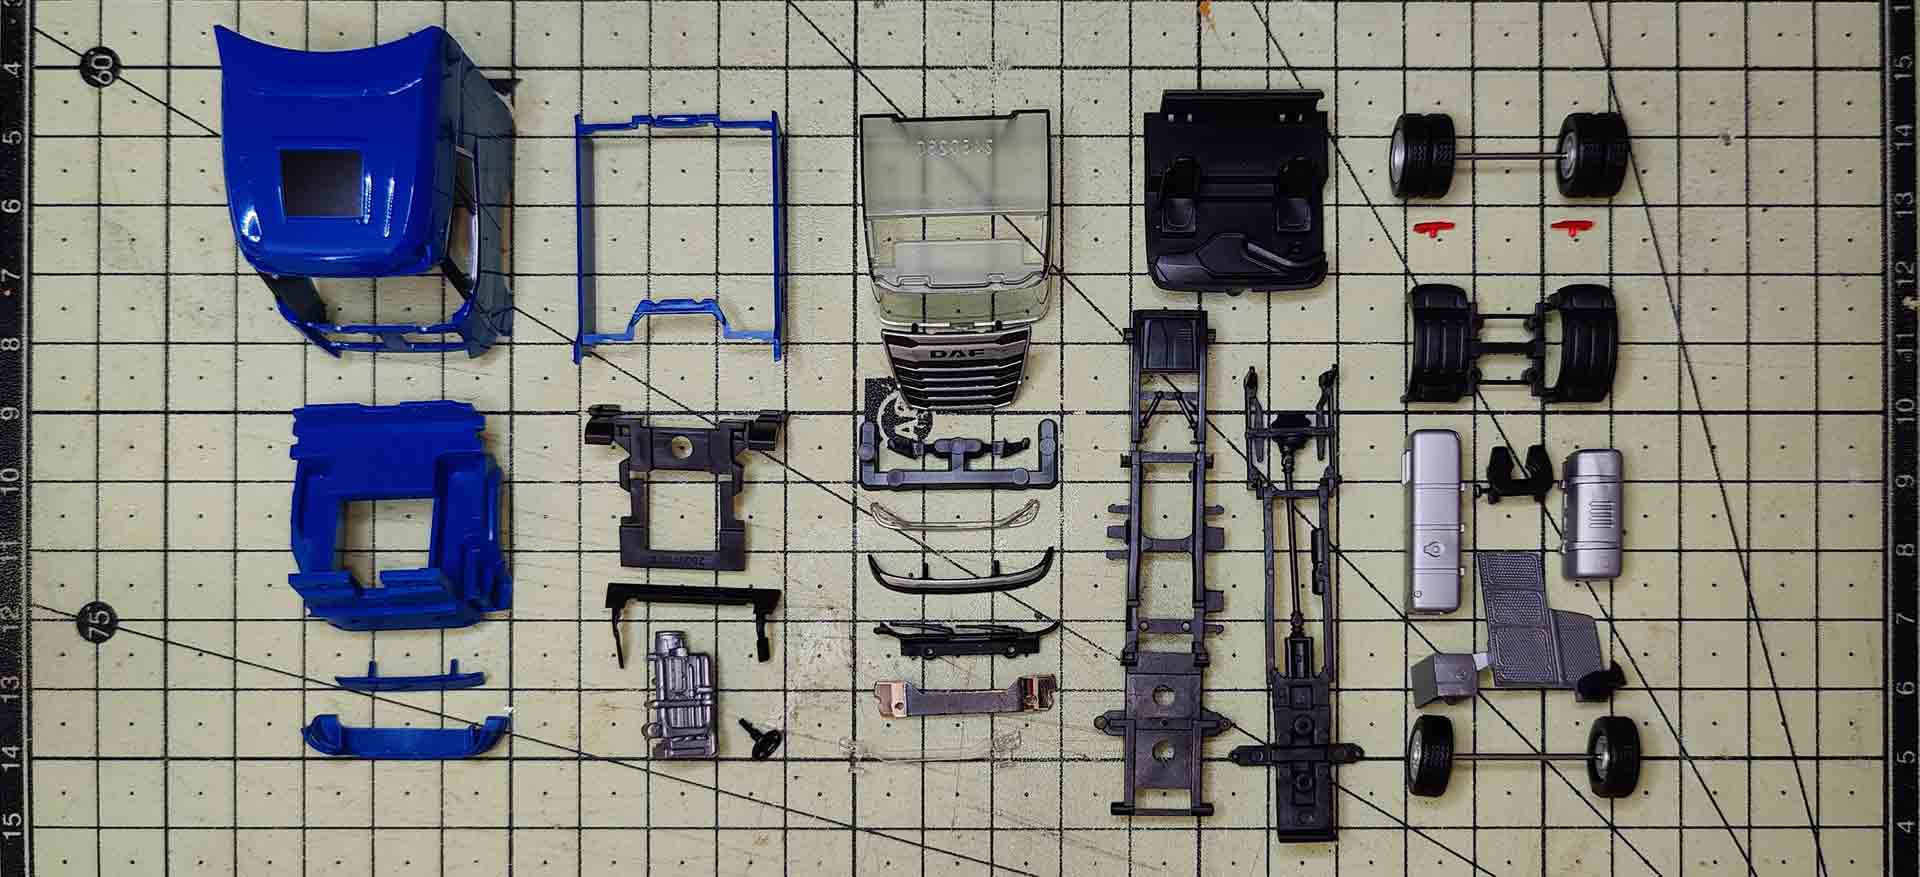
After the market launch, the mold makers at Herpa in Dietenhofen set about shrinking the giant to a 1/87th scale. Since then, further interesting models have appeared with the new DAF XG and XG+ tractor units. Monochrome variants without trailers expand the range and are aimed at hobbyists, because not every successful vehicle can be included in the model range. White is the ideal basis for custom paint jobs, while red, blue and other colors are often used in freight forwarding and support all converters without their own airbrush equipment.
Starting is easy
As has always been the case, Herpa still does not use any glue. This is not only very reassuring for tuners, but also helpful. No owner of a Herpa truck need worry about parts stuck tight together, or about destroying their model. However, mold making for the increasingly sophisticated miniatures makes certain special tricks a must when disassembling. The tractor units have long since ceased to be square tin cans on axles and are now highly developed design objects, allowing the models to feature ever smaller parts and necessitating much more complicated assembly.
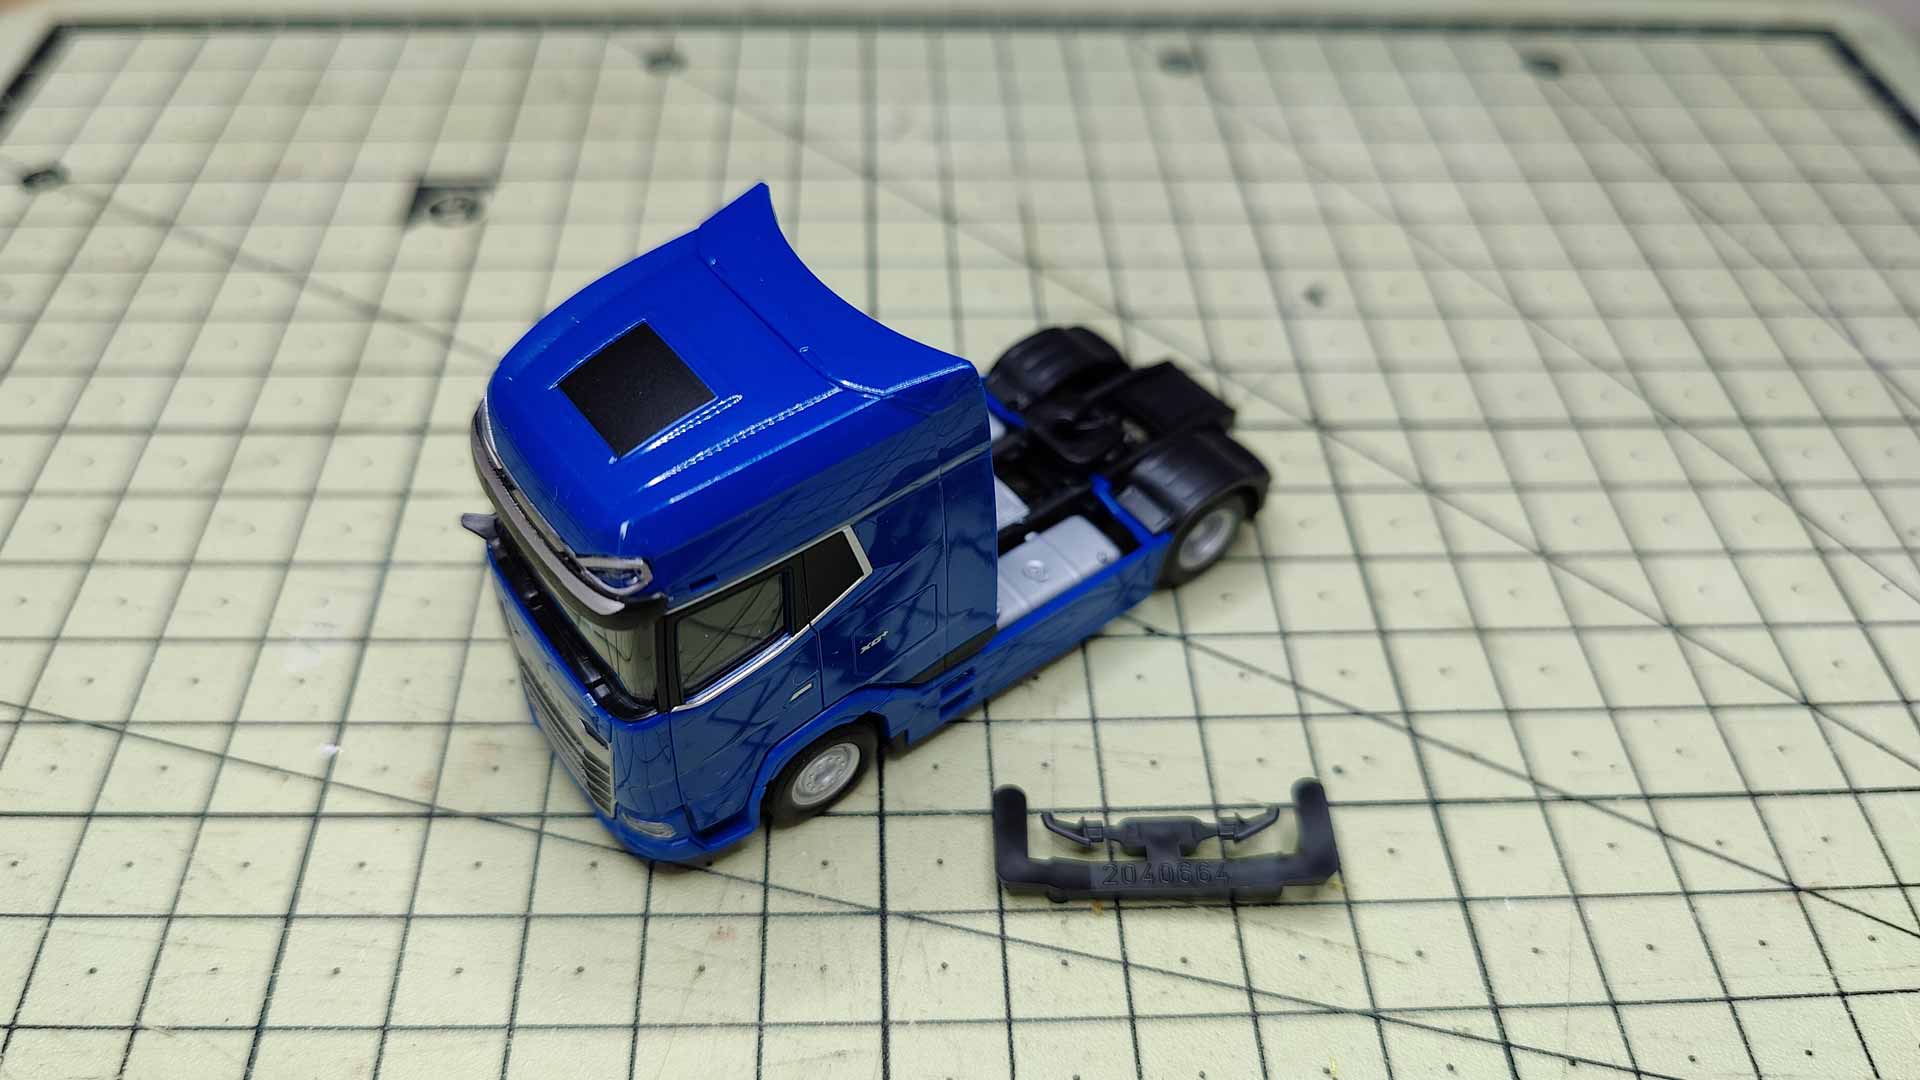
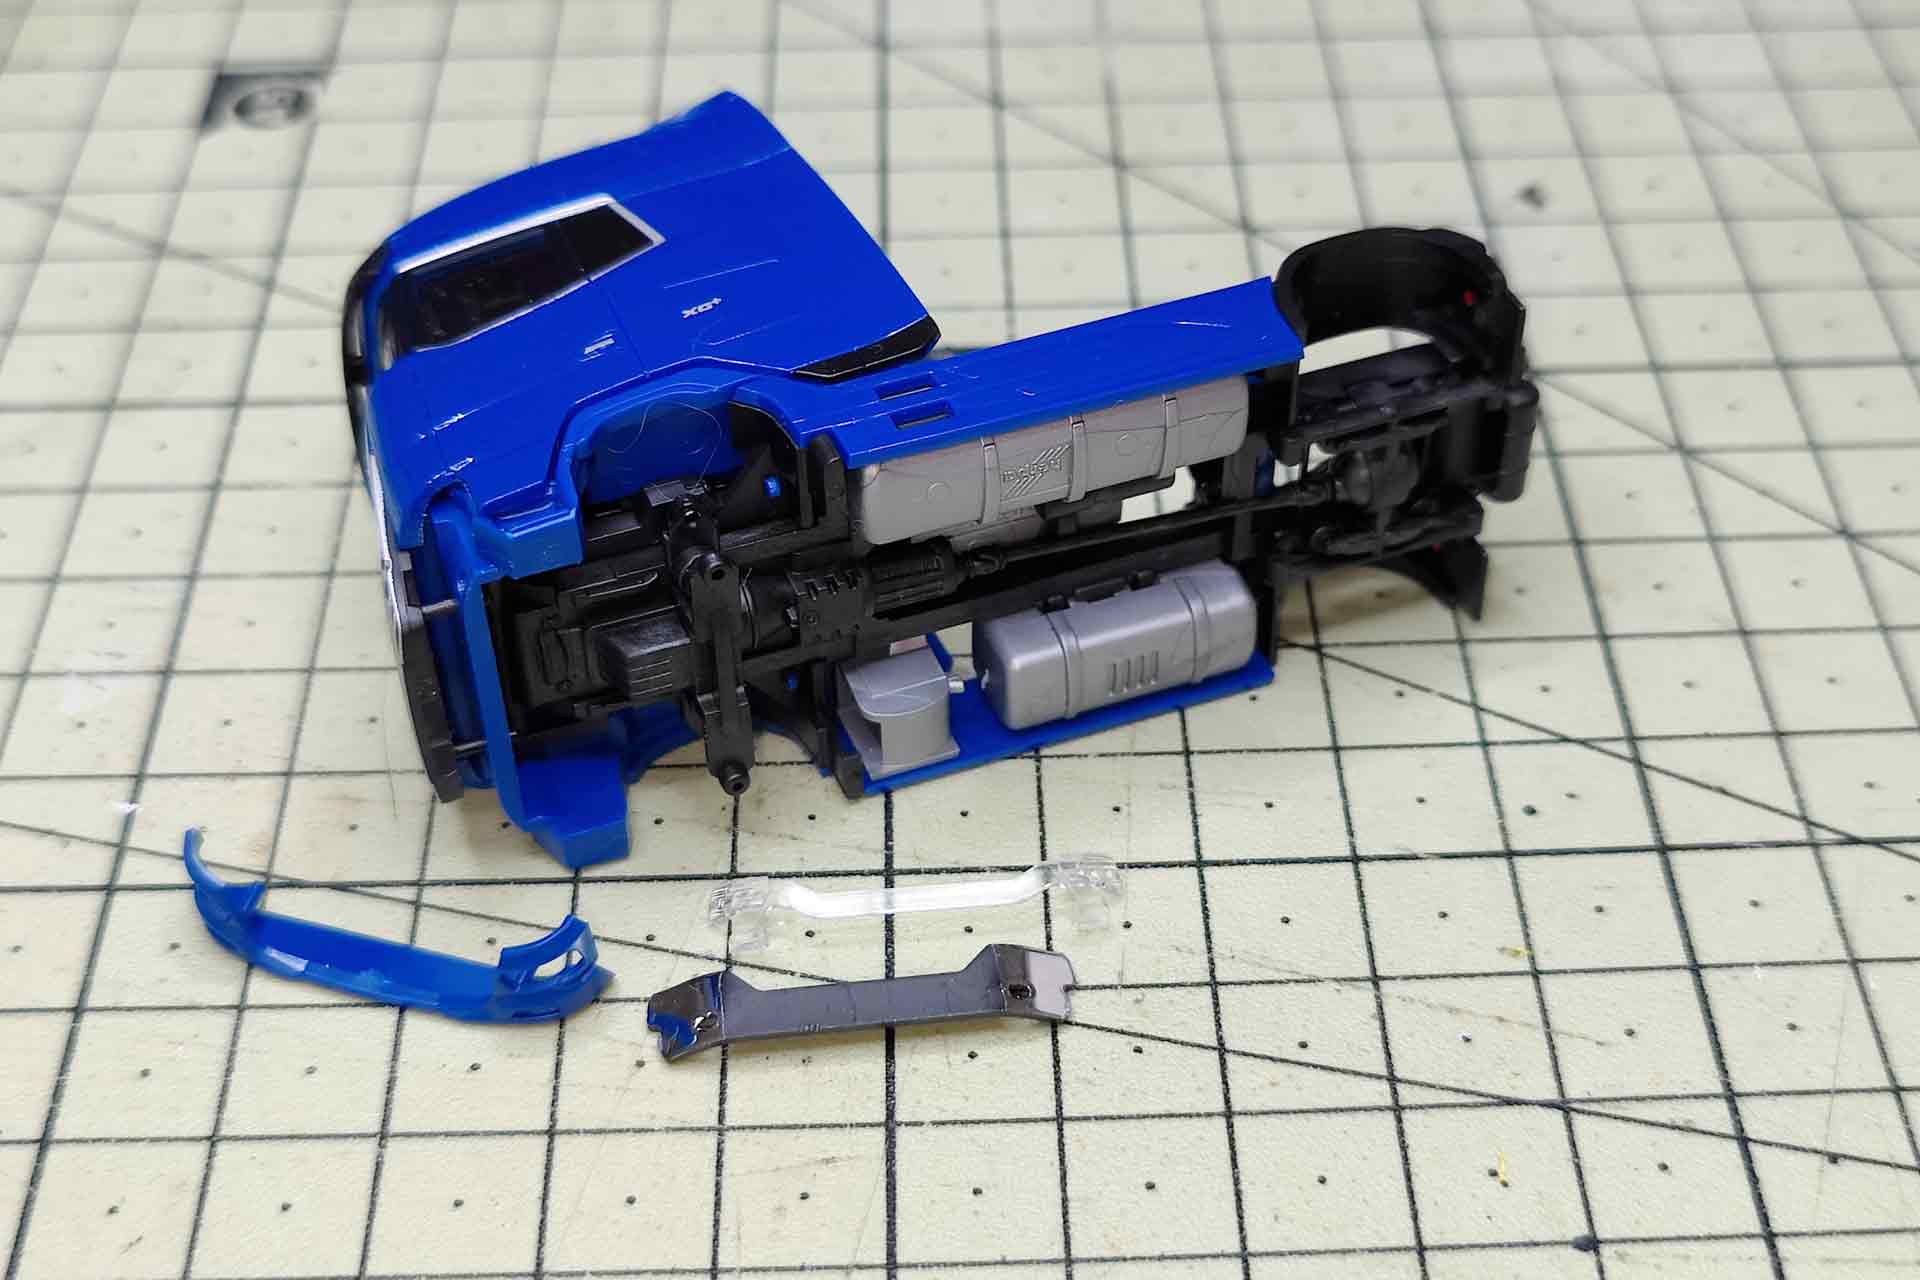
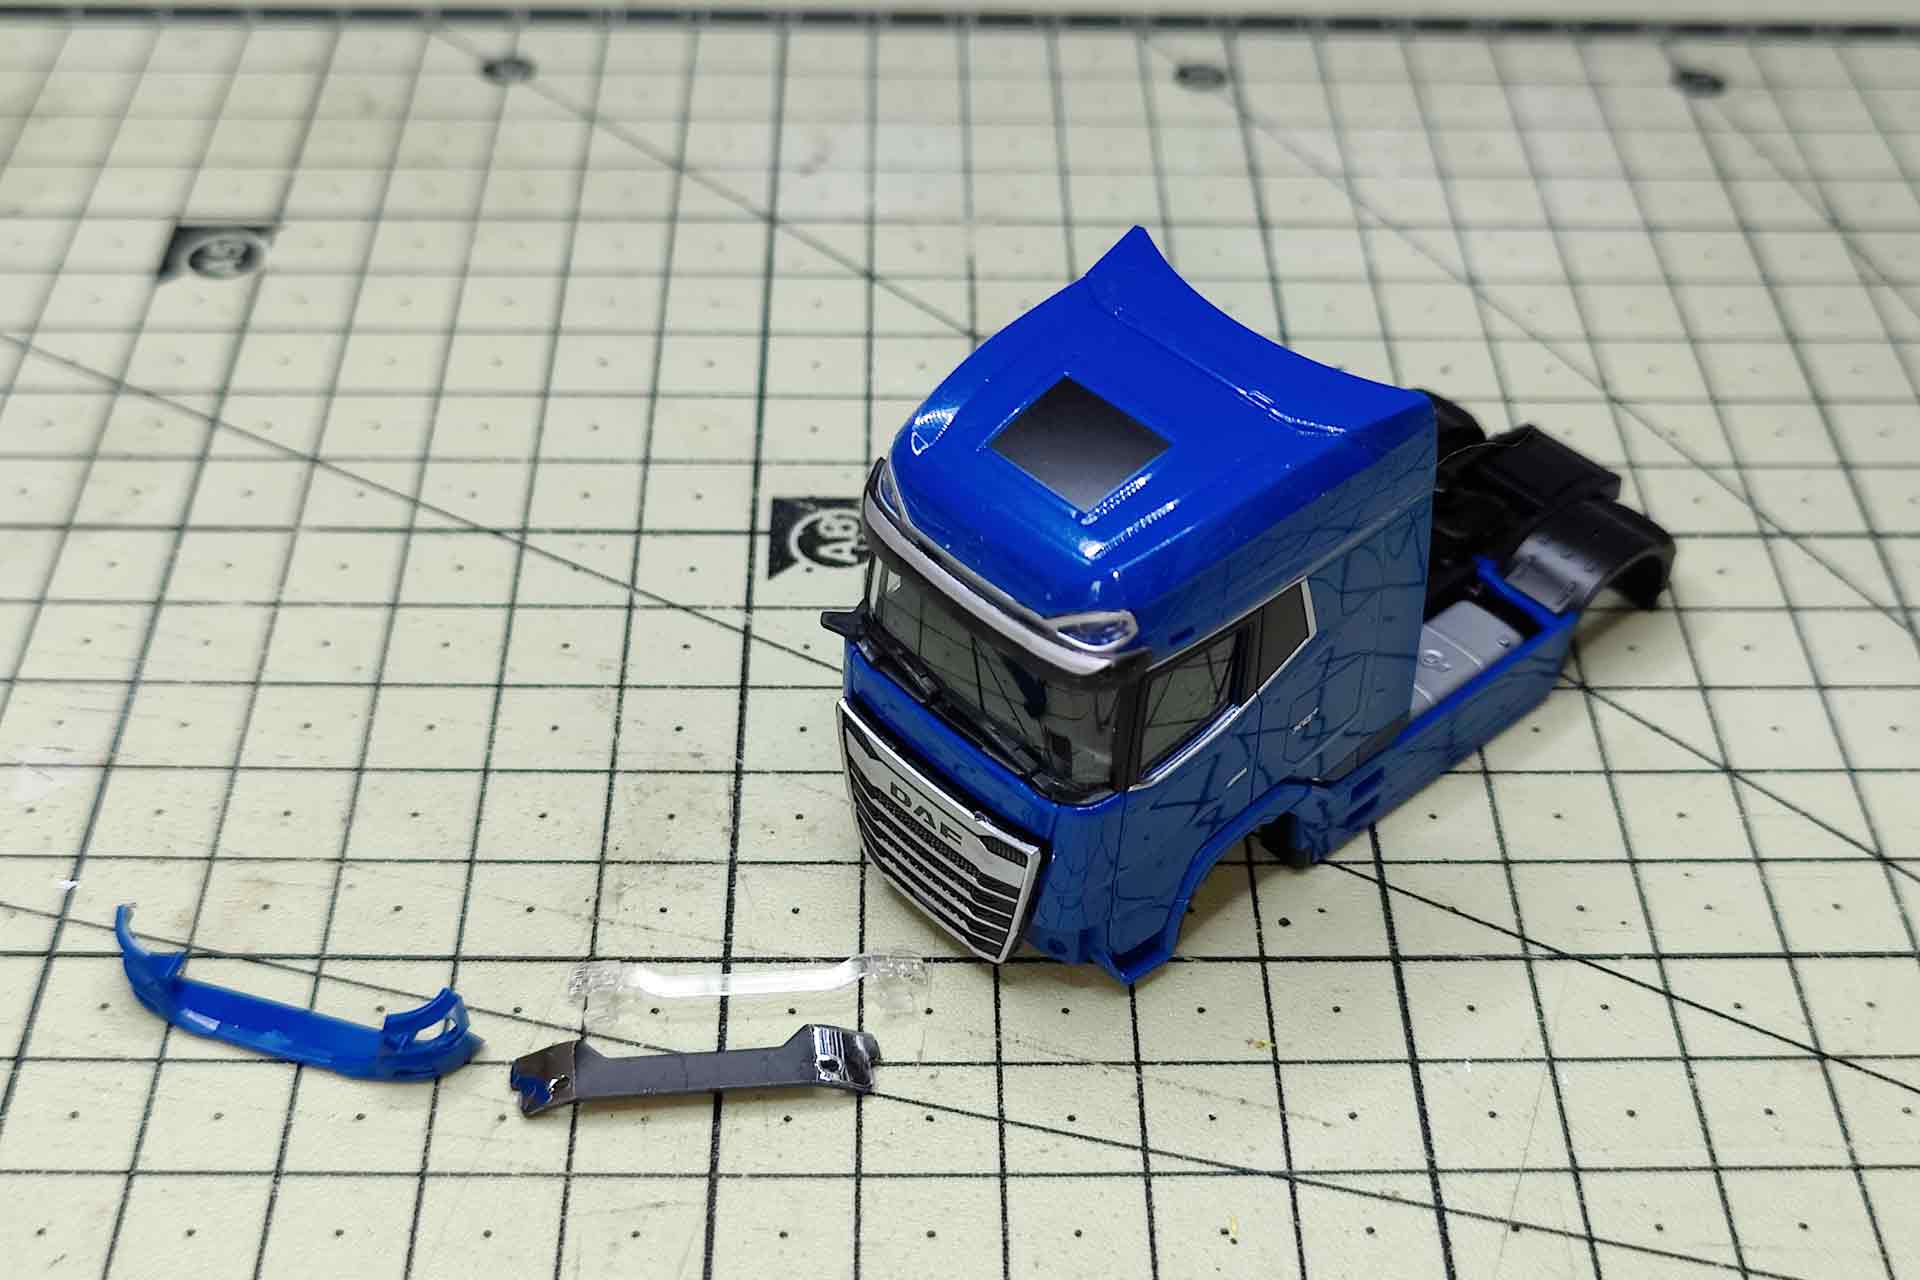
After the wheels have been pulled off the axles and removed from the chassis, the bumper is levered forward. The gap in front of the steps provides a good point of attack. Two long pins hold the bumper to the vehicle and the headlight glazing and chrome part are attached to them.
The large radiator grille requires particular attention due to its four plug-in pins. The lower ones are easy to loosen, but a flat tool is required to reach the upper ones. By pushing from deep behind the grille, it can be loosened bit-by-bit. The position of the tool should be changed several times in order to loosen all pins evenly. Remember, overlooked or overloaded pins are likely to "thank" you in their own way by breaking off and getting stuck in the model.
Discovering the key component
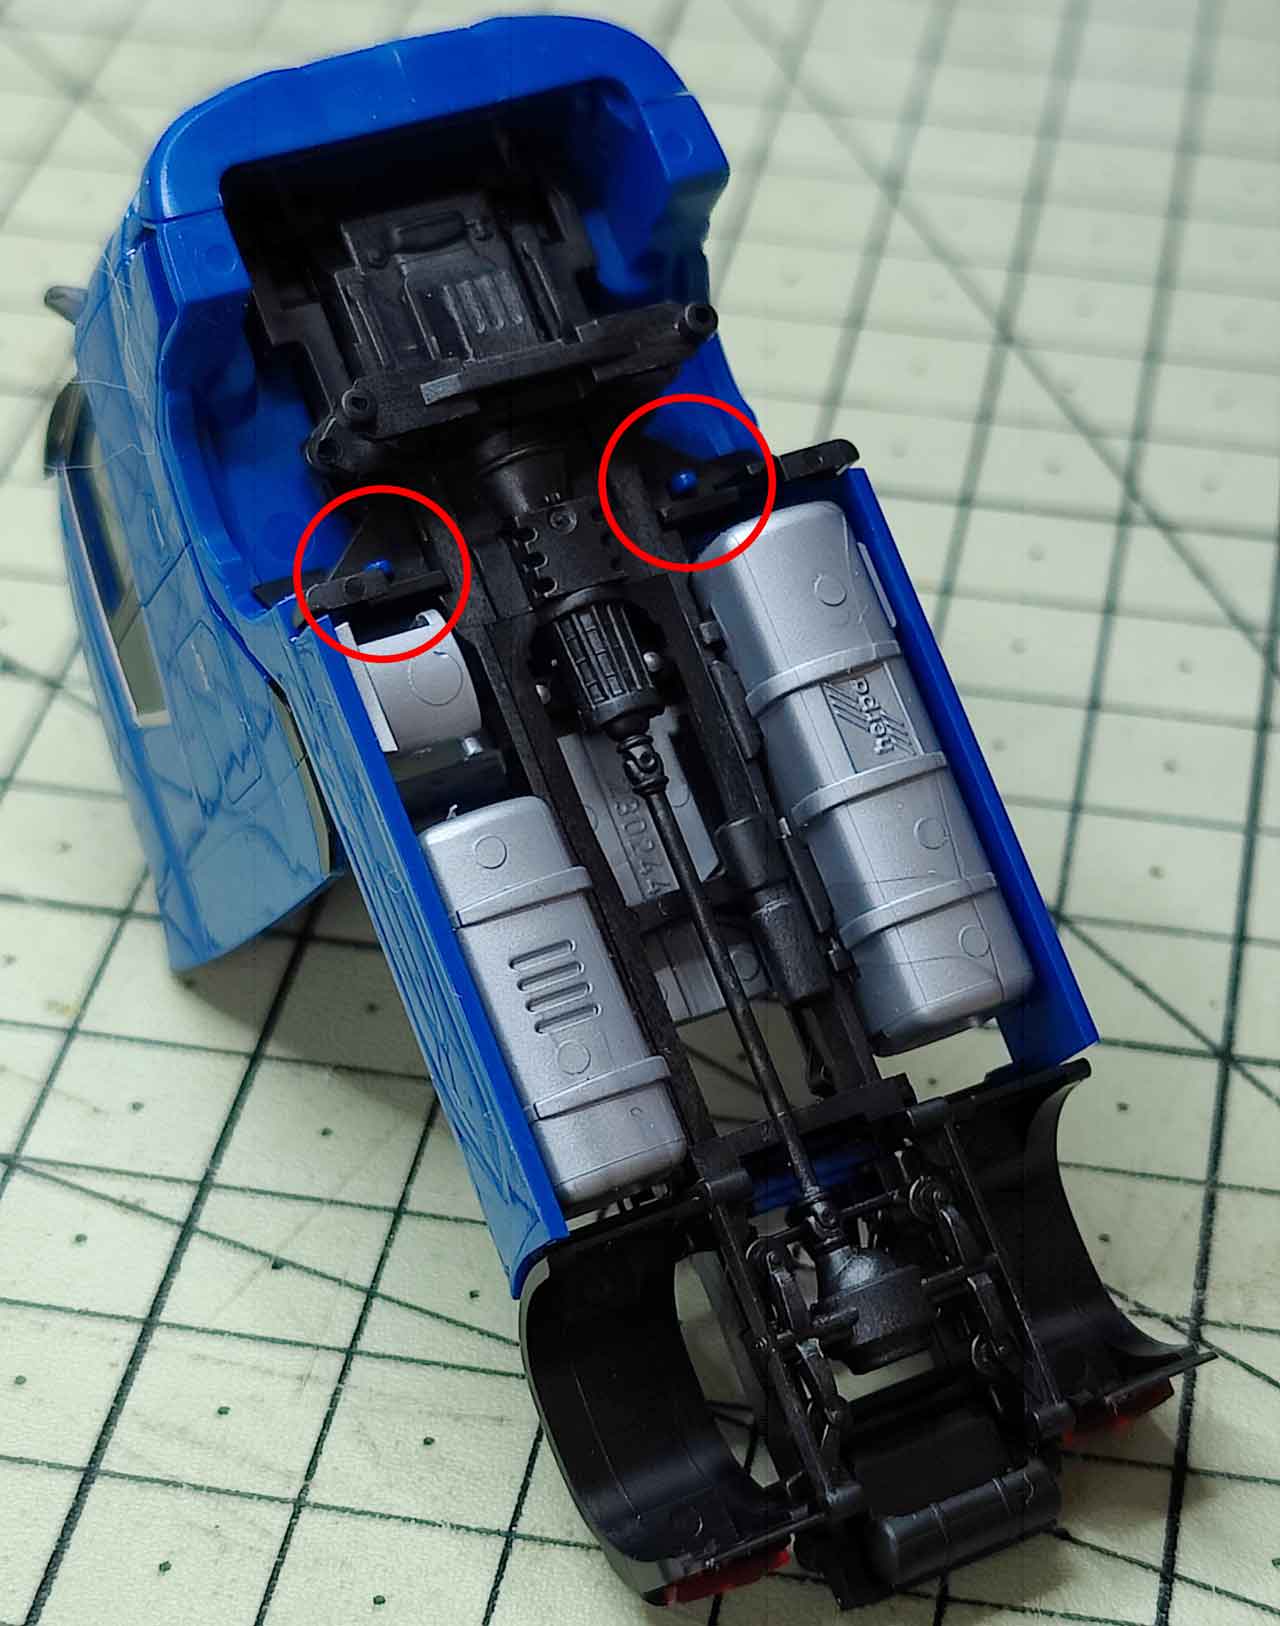
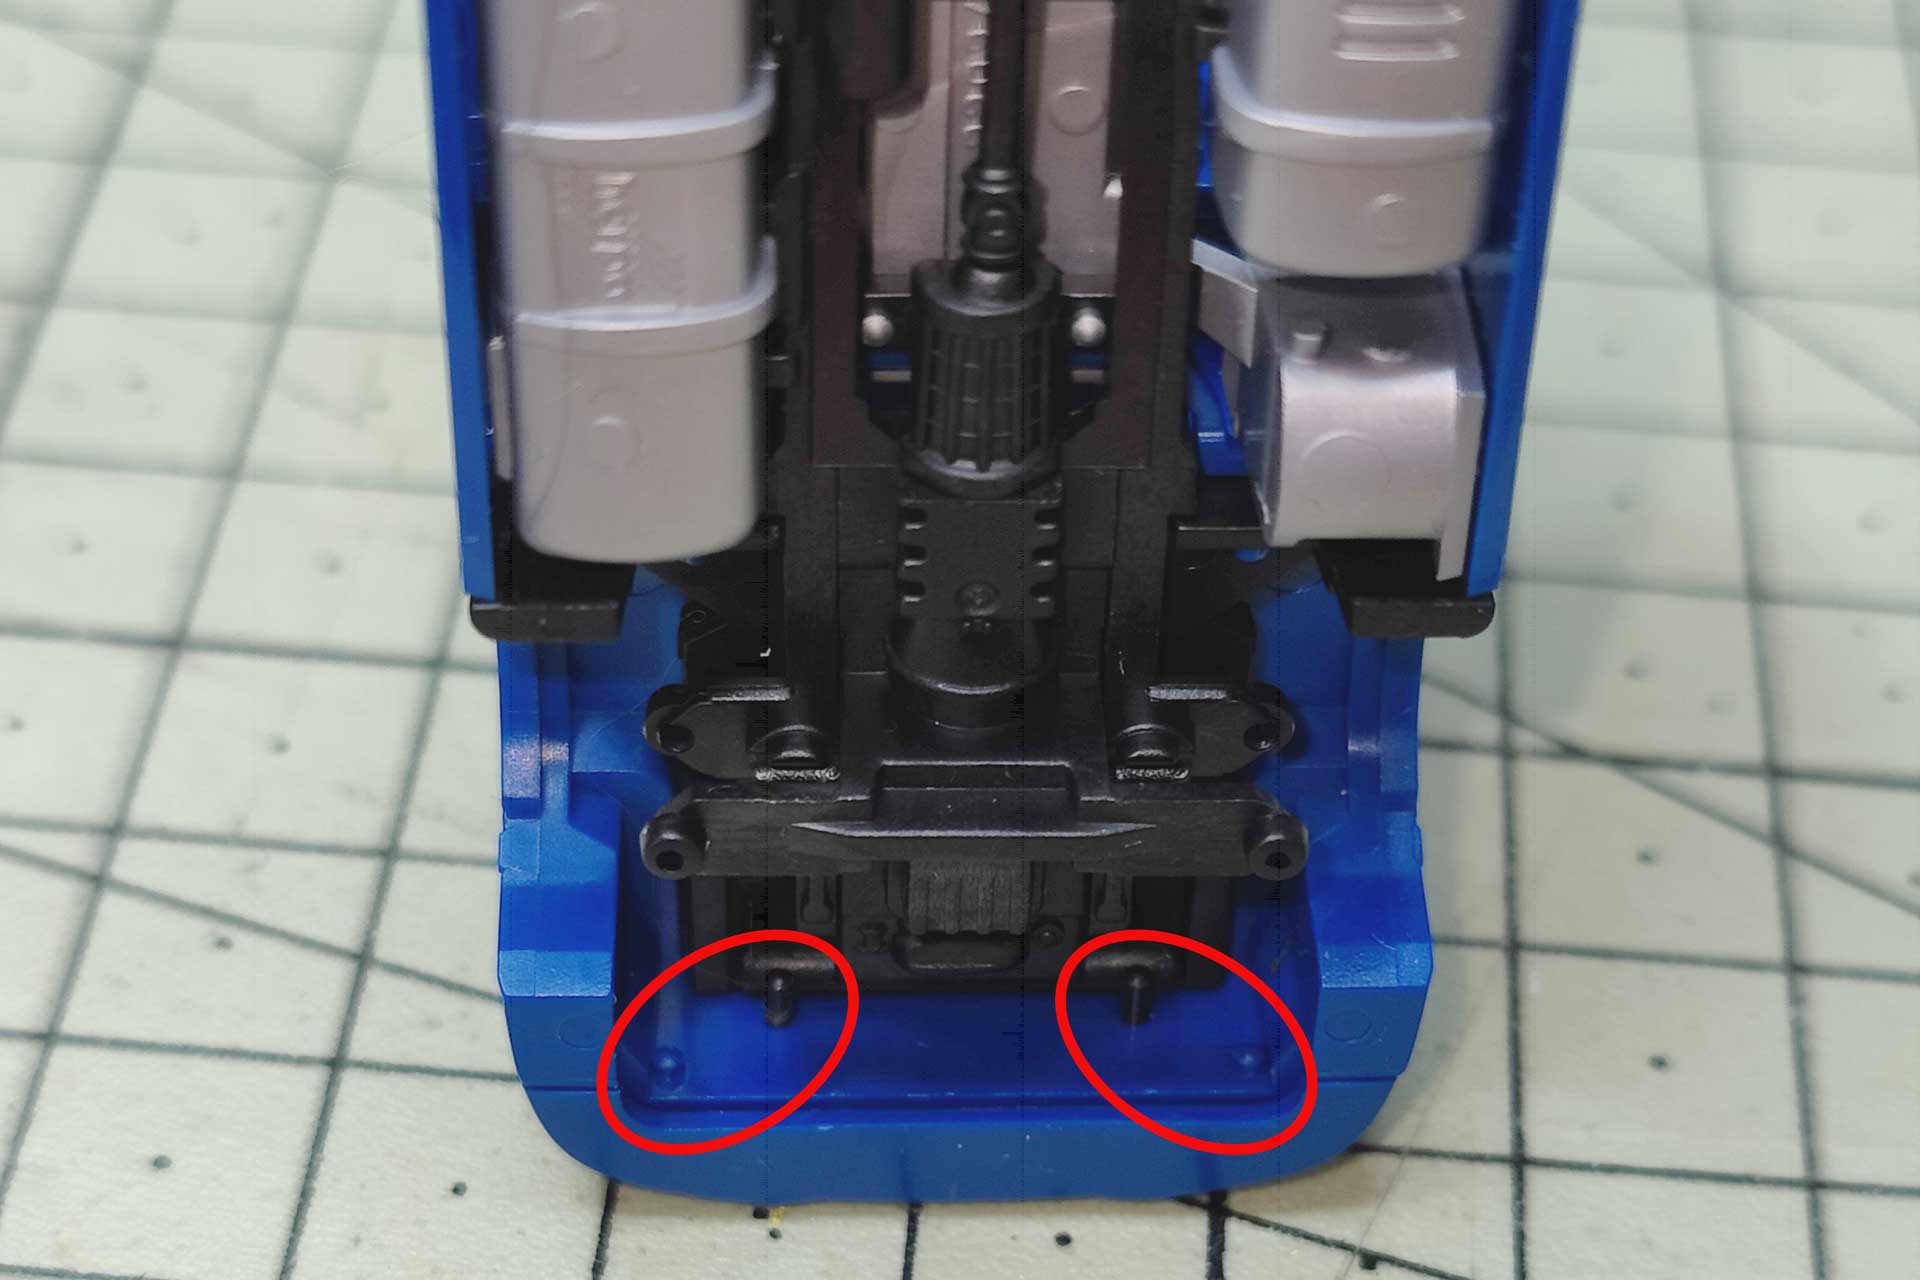
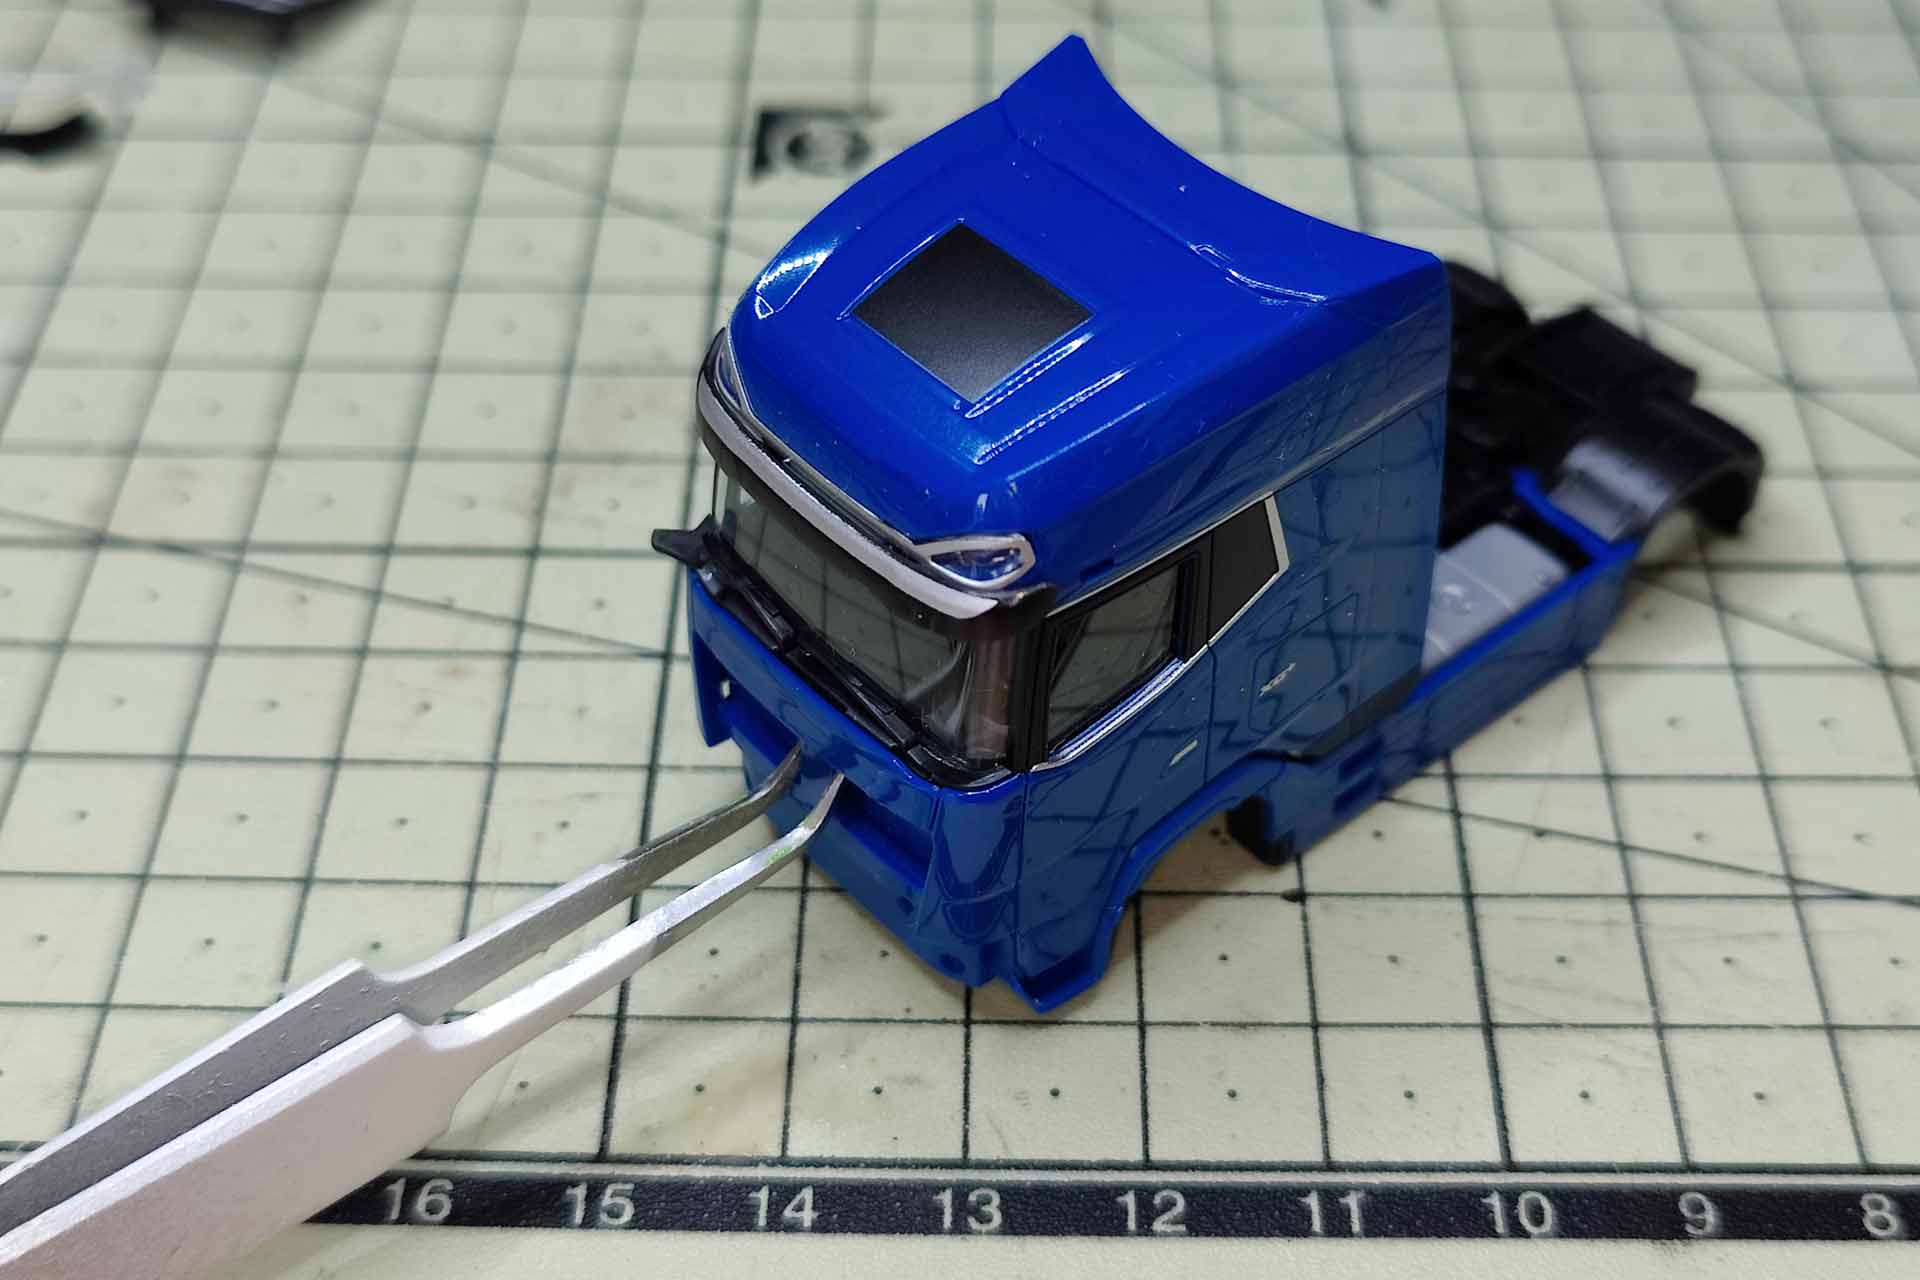
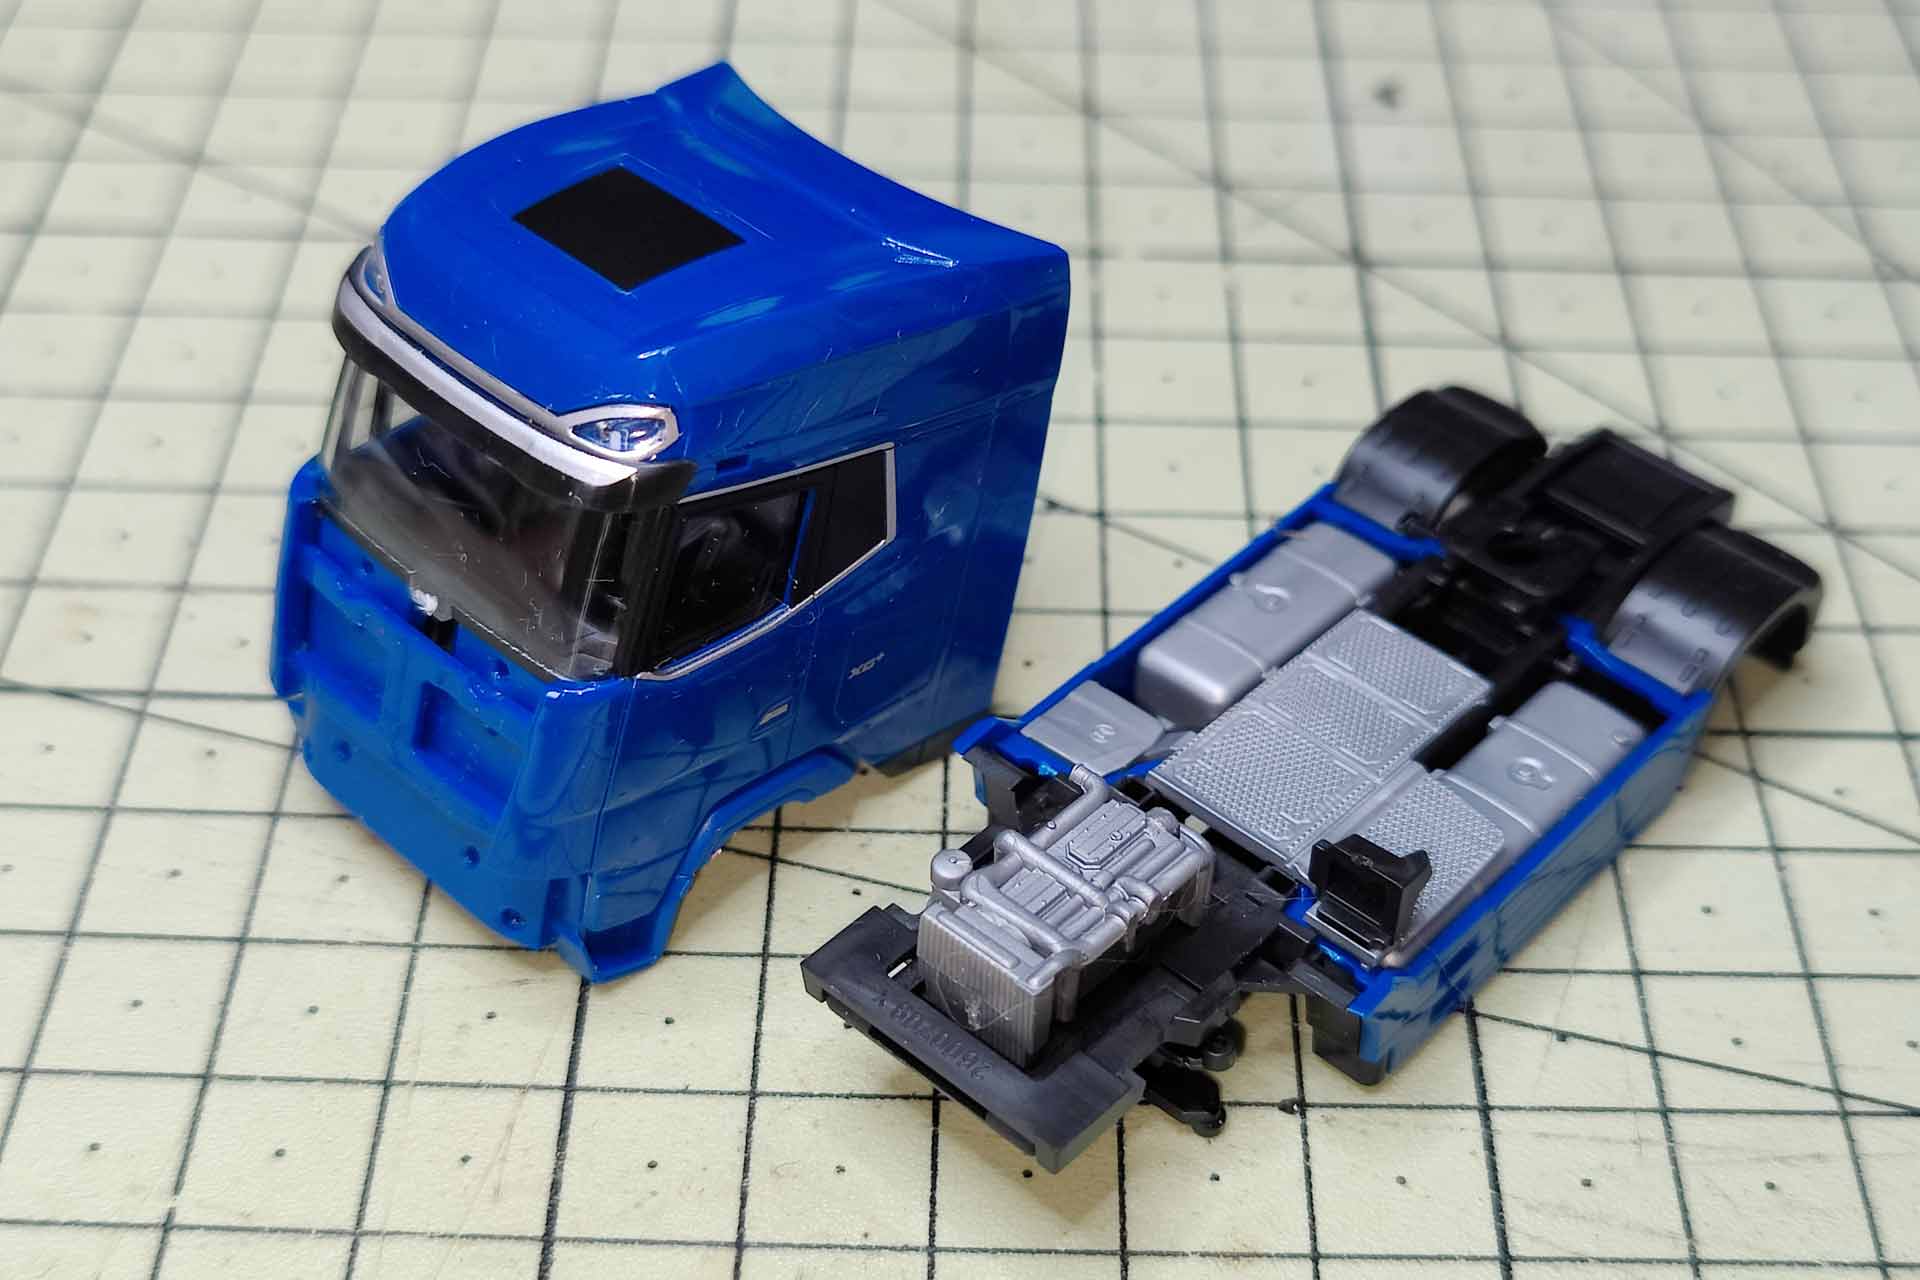
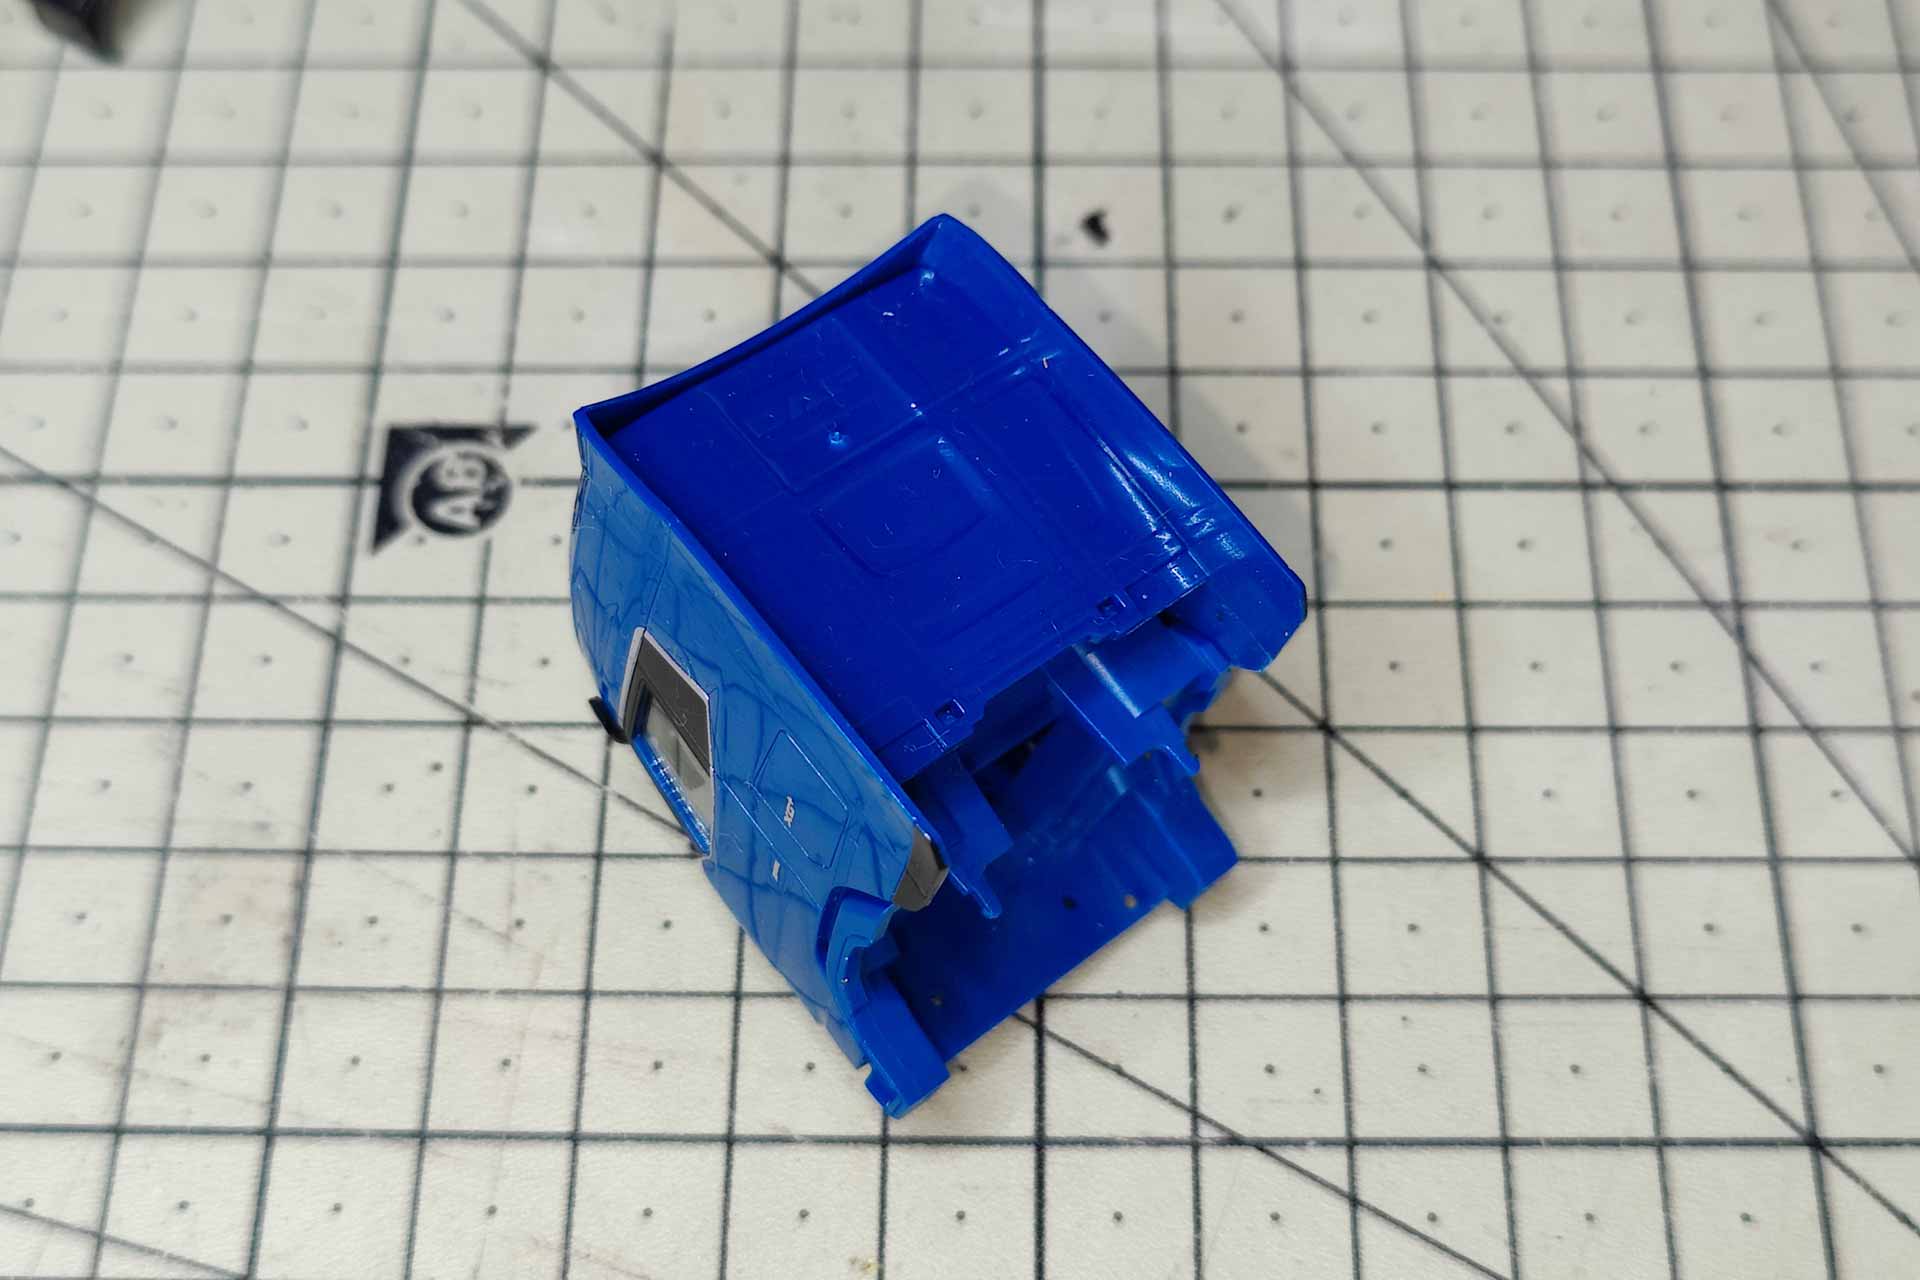
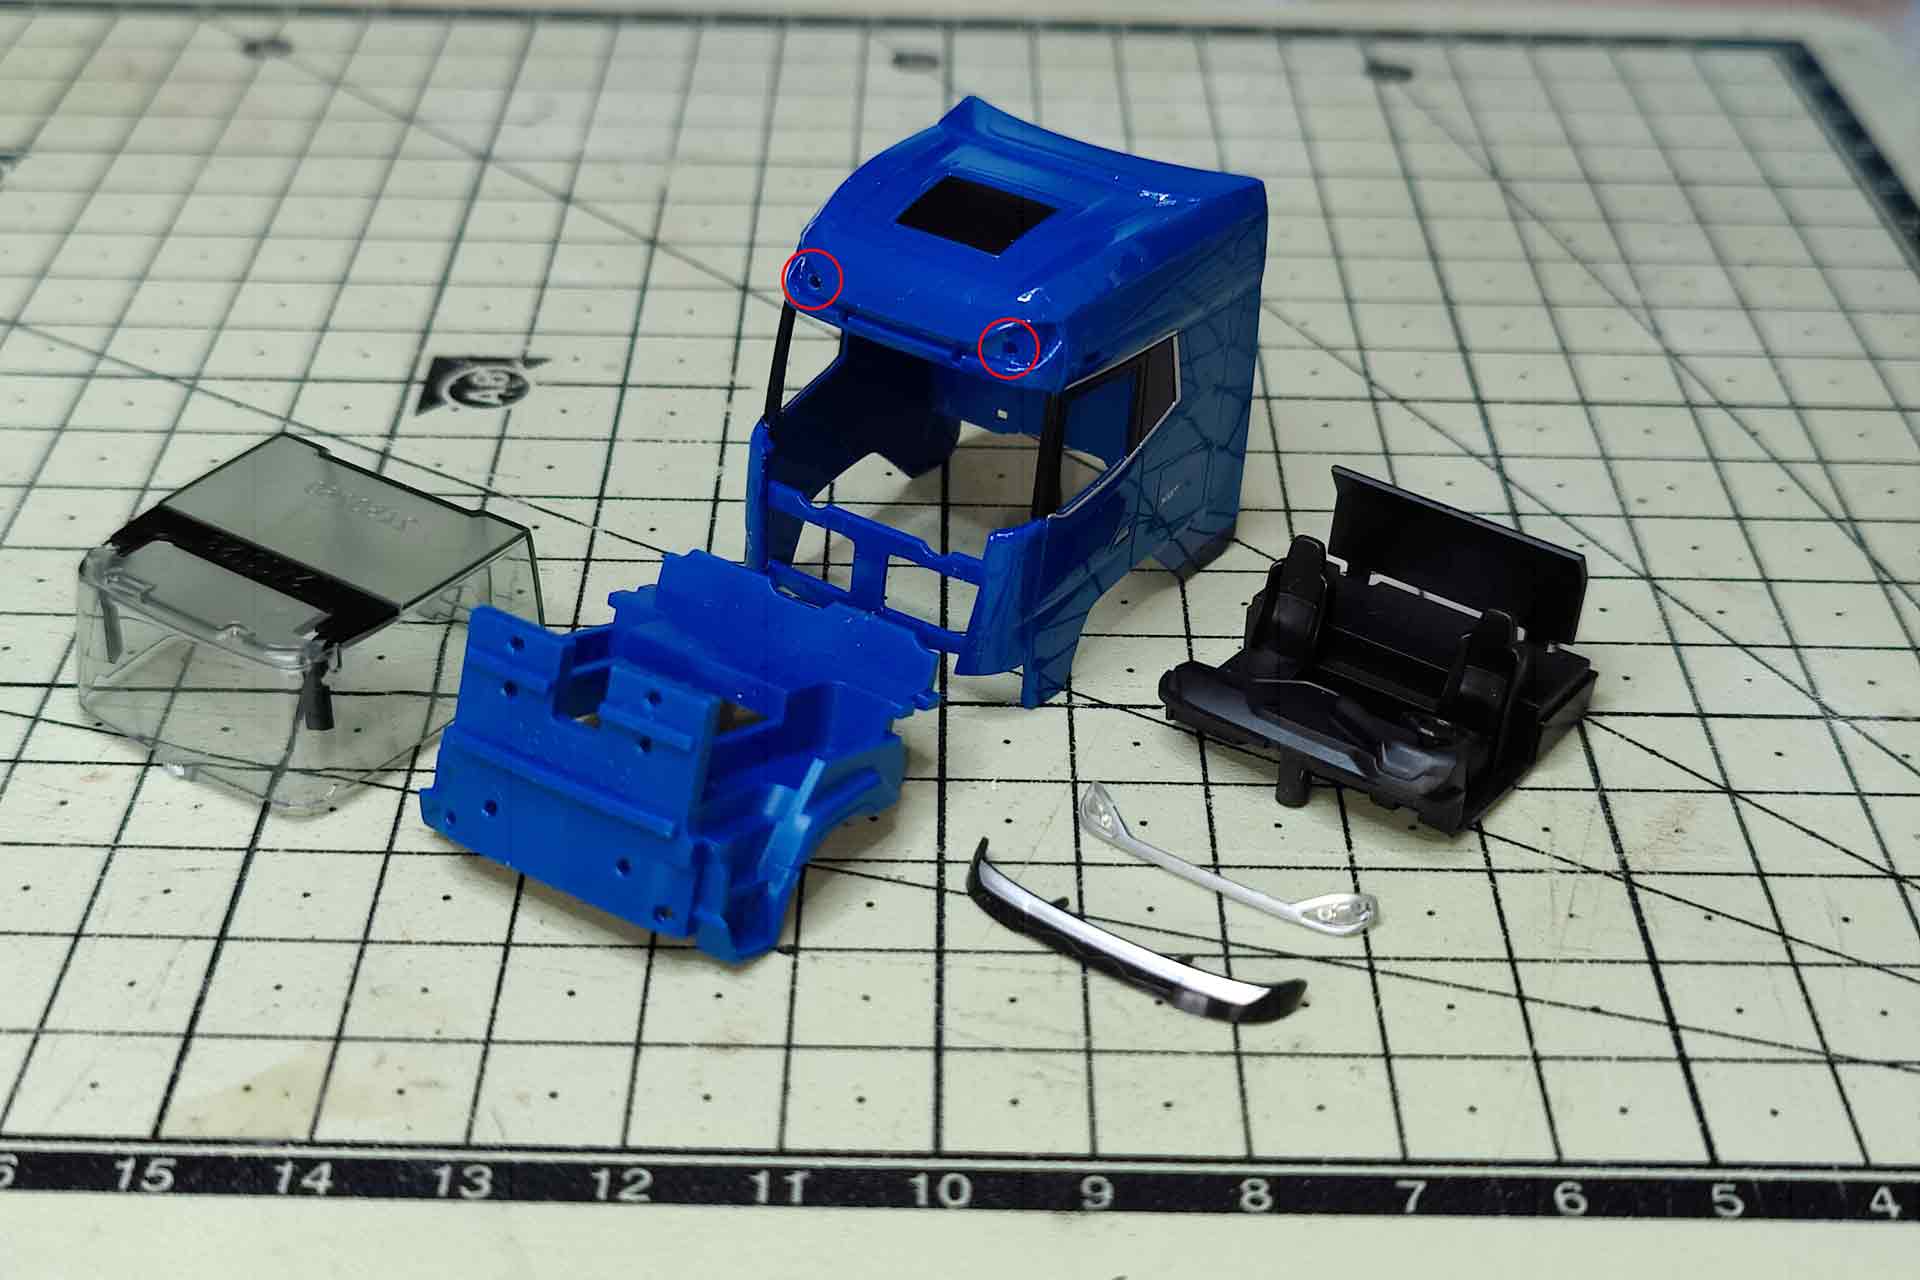
Sometimes the accuracy of fit of the Herpa parts is simply frightening. On the new DAF, for example, the most important part is barely recognizable: The panel below the windshield wipers. It is not part of the cab, as is the case with the Actros or Scania, for example. It is kept in the color of the vehicle, inserted separately into the inner part with two pins and blends almost invisibly into the cab. You can't get any further without removing this panel. Carefully lever it out towards the front and then the large cab can be lifted off the chassis. On the underside, it is firmly attached to the chassis with two short pins.
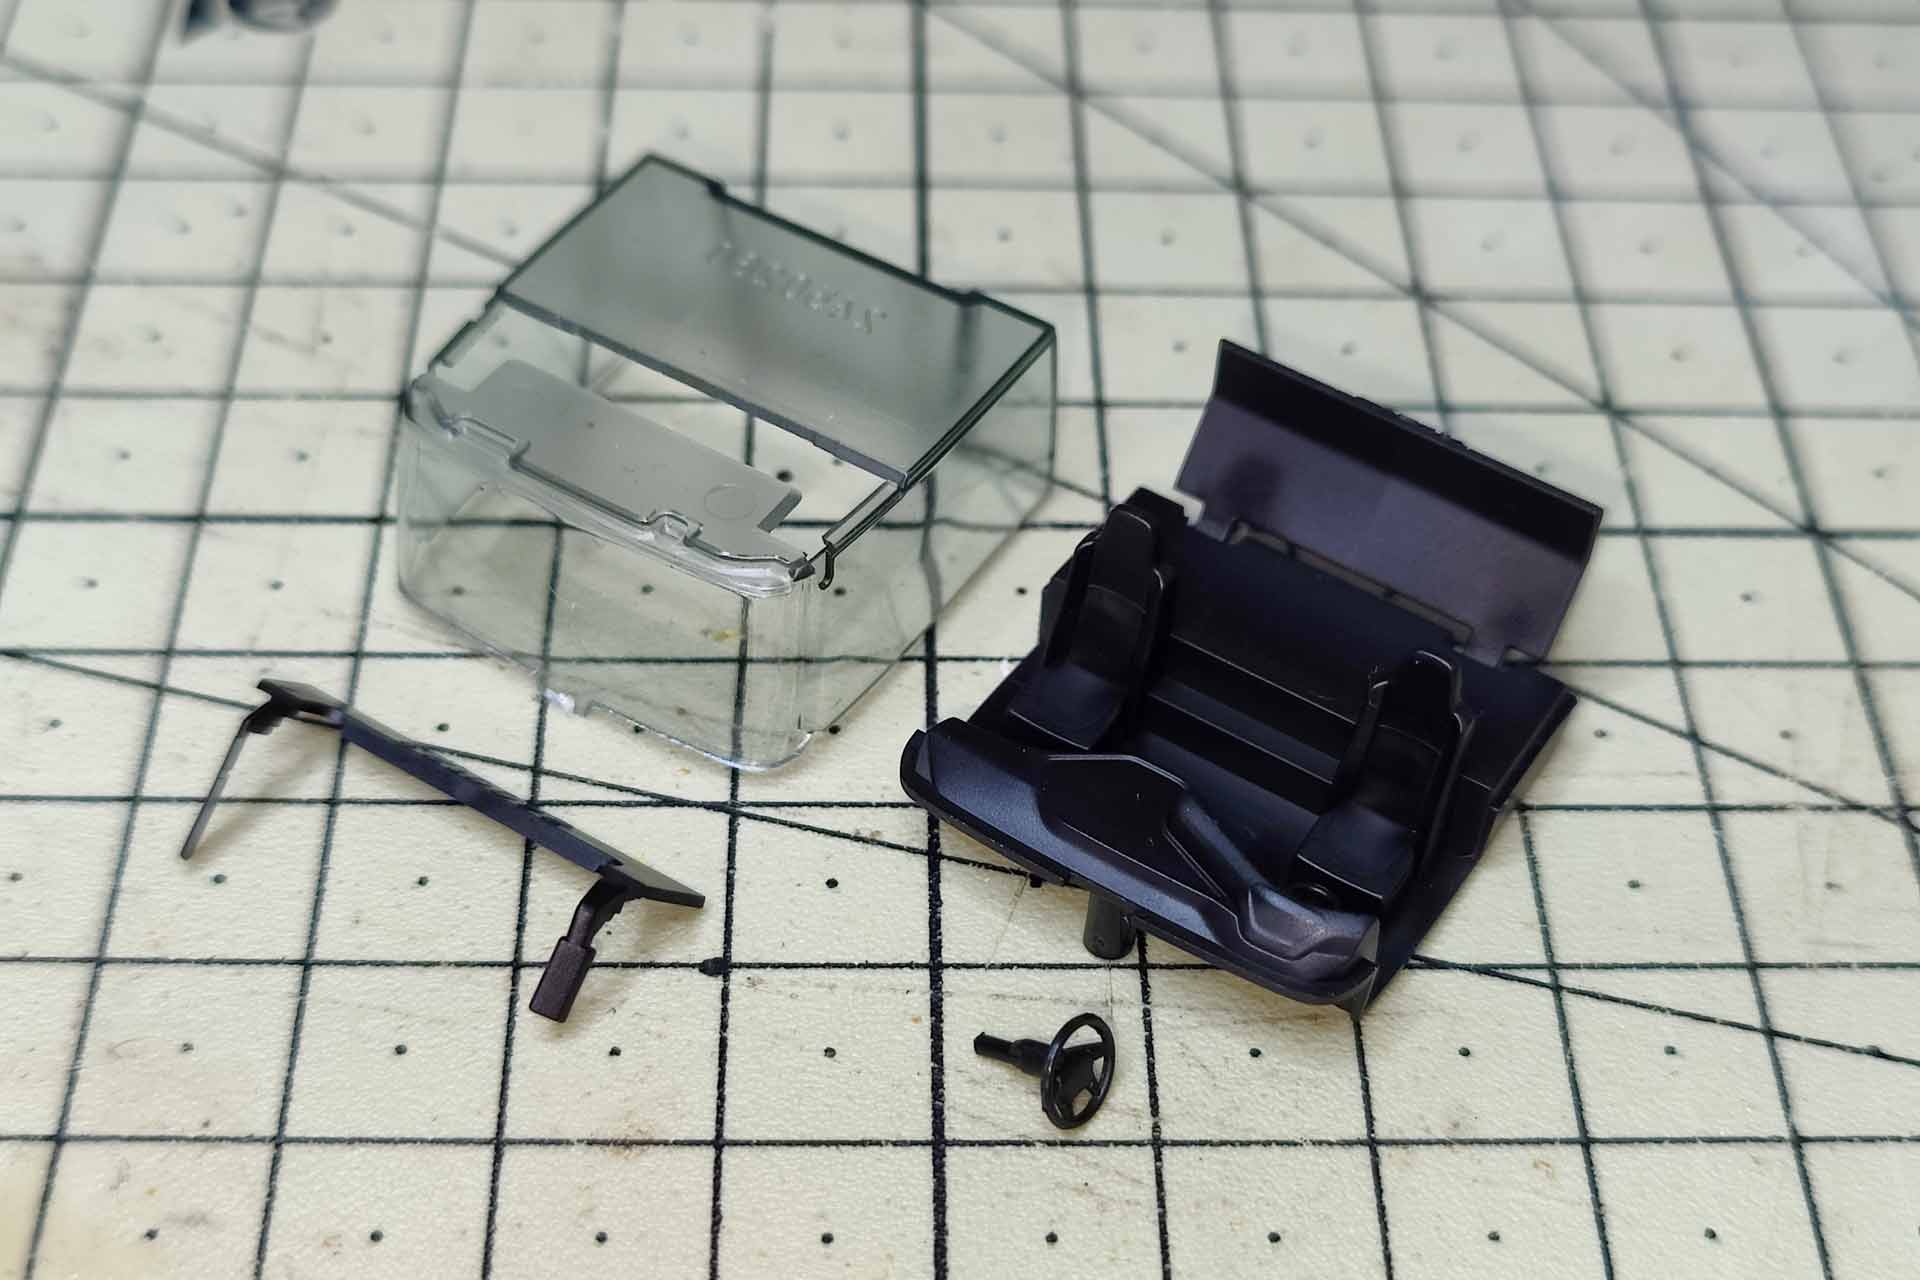
The interior is not secured separately and can be easily removed. As for the interior fittings, if you like, you can remove the steering wheel from the dashboard, plus the glazing and finally the glazing of the headlights including the sun visor. The monitors of the new cameras hang very precisely in the glazing. The black component is tilted and removed.
The experienced Herpa hobbyist will notice the significantly larger amount of space on inspecting the interior, especially the wider bed behind the seats. The advantages of the XG series are obvious even in the H0 scale. How much more comfortable will the real driver feel day-on-day as a result?
Working at ground level
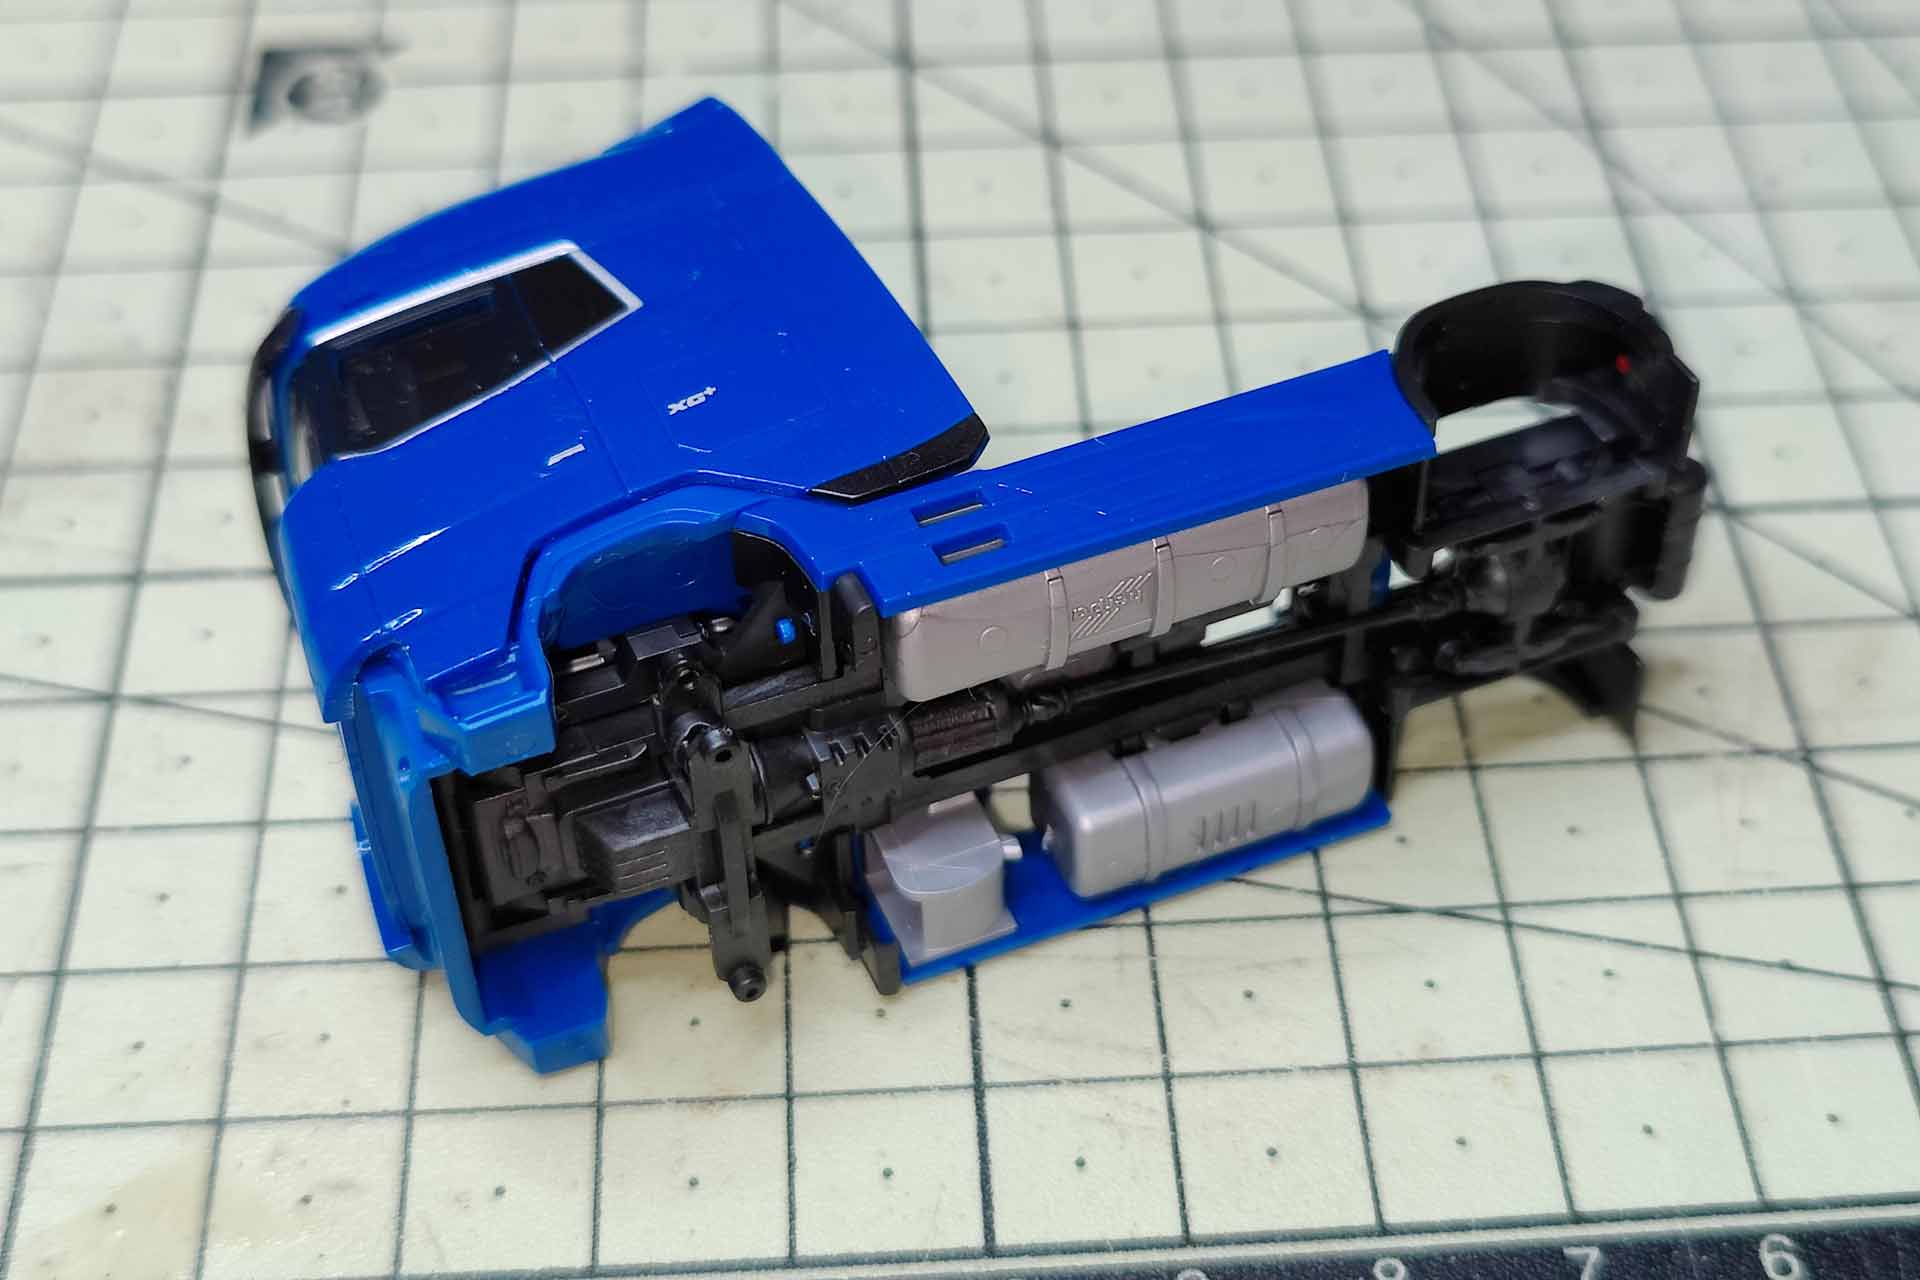
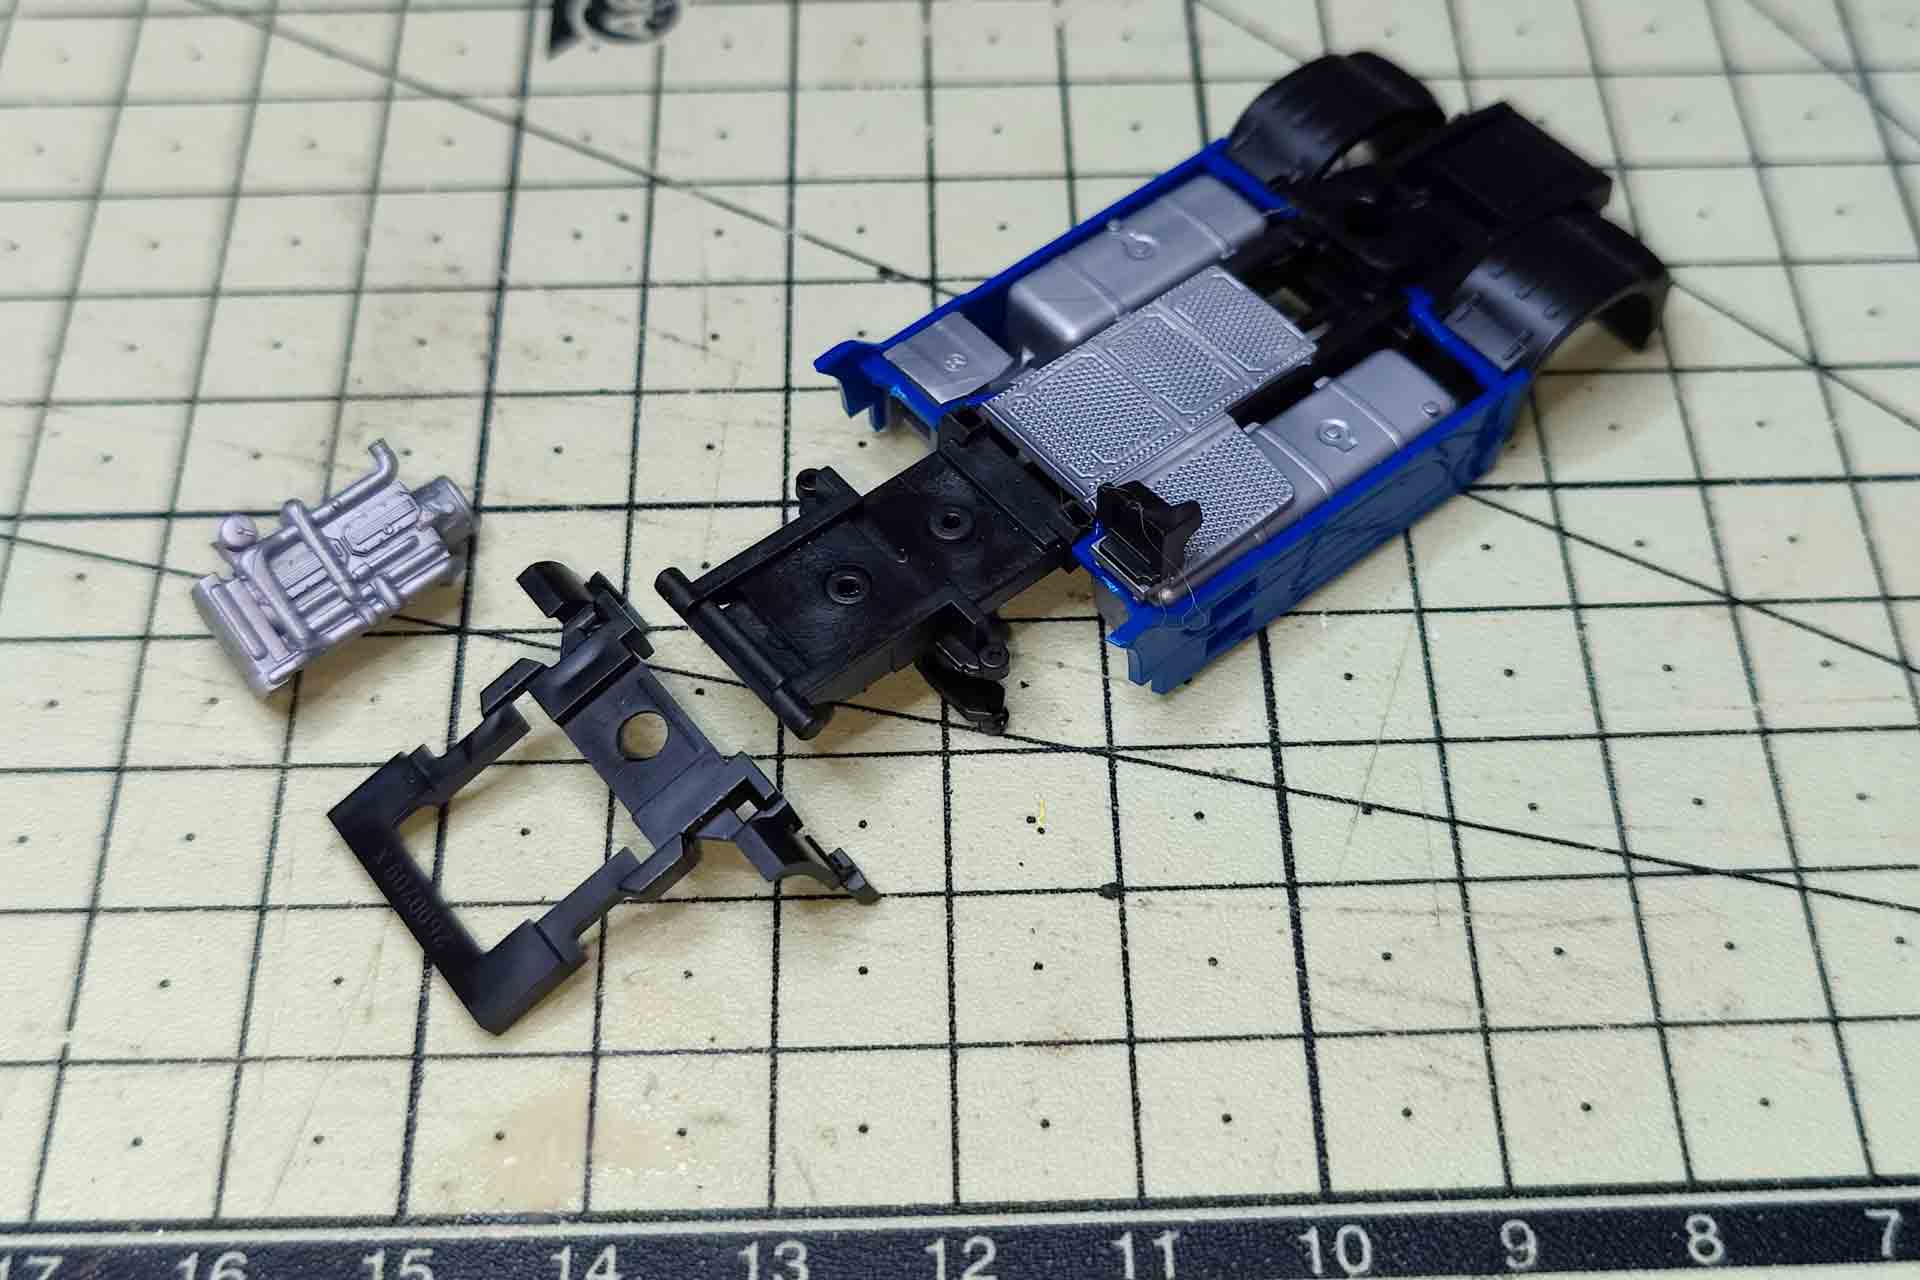
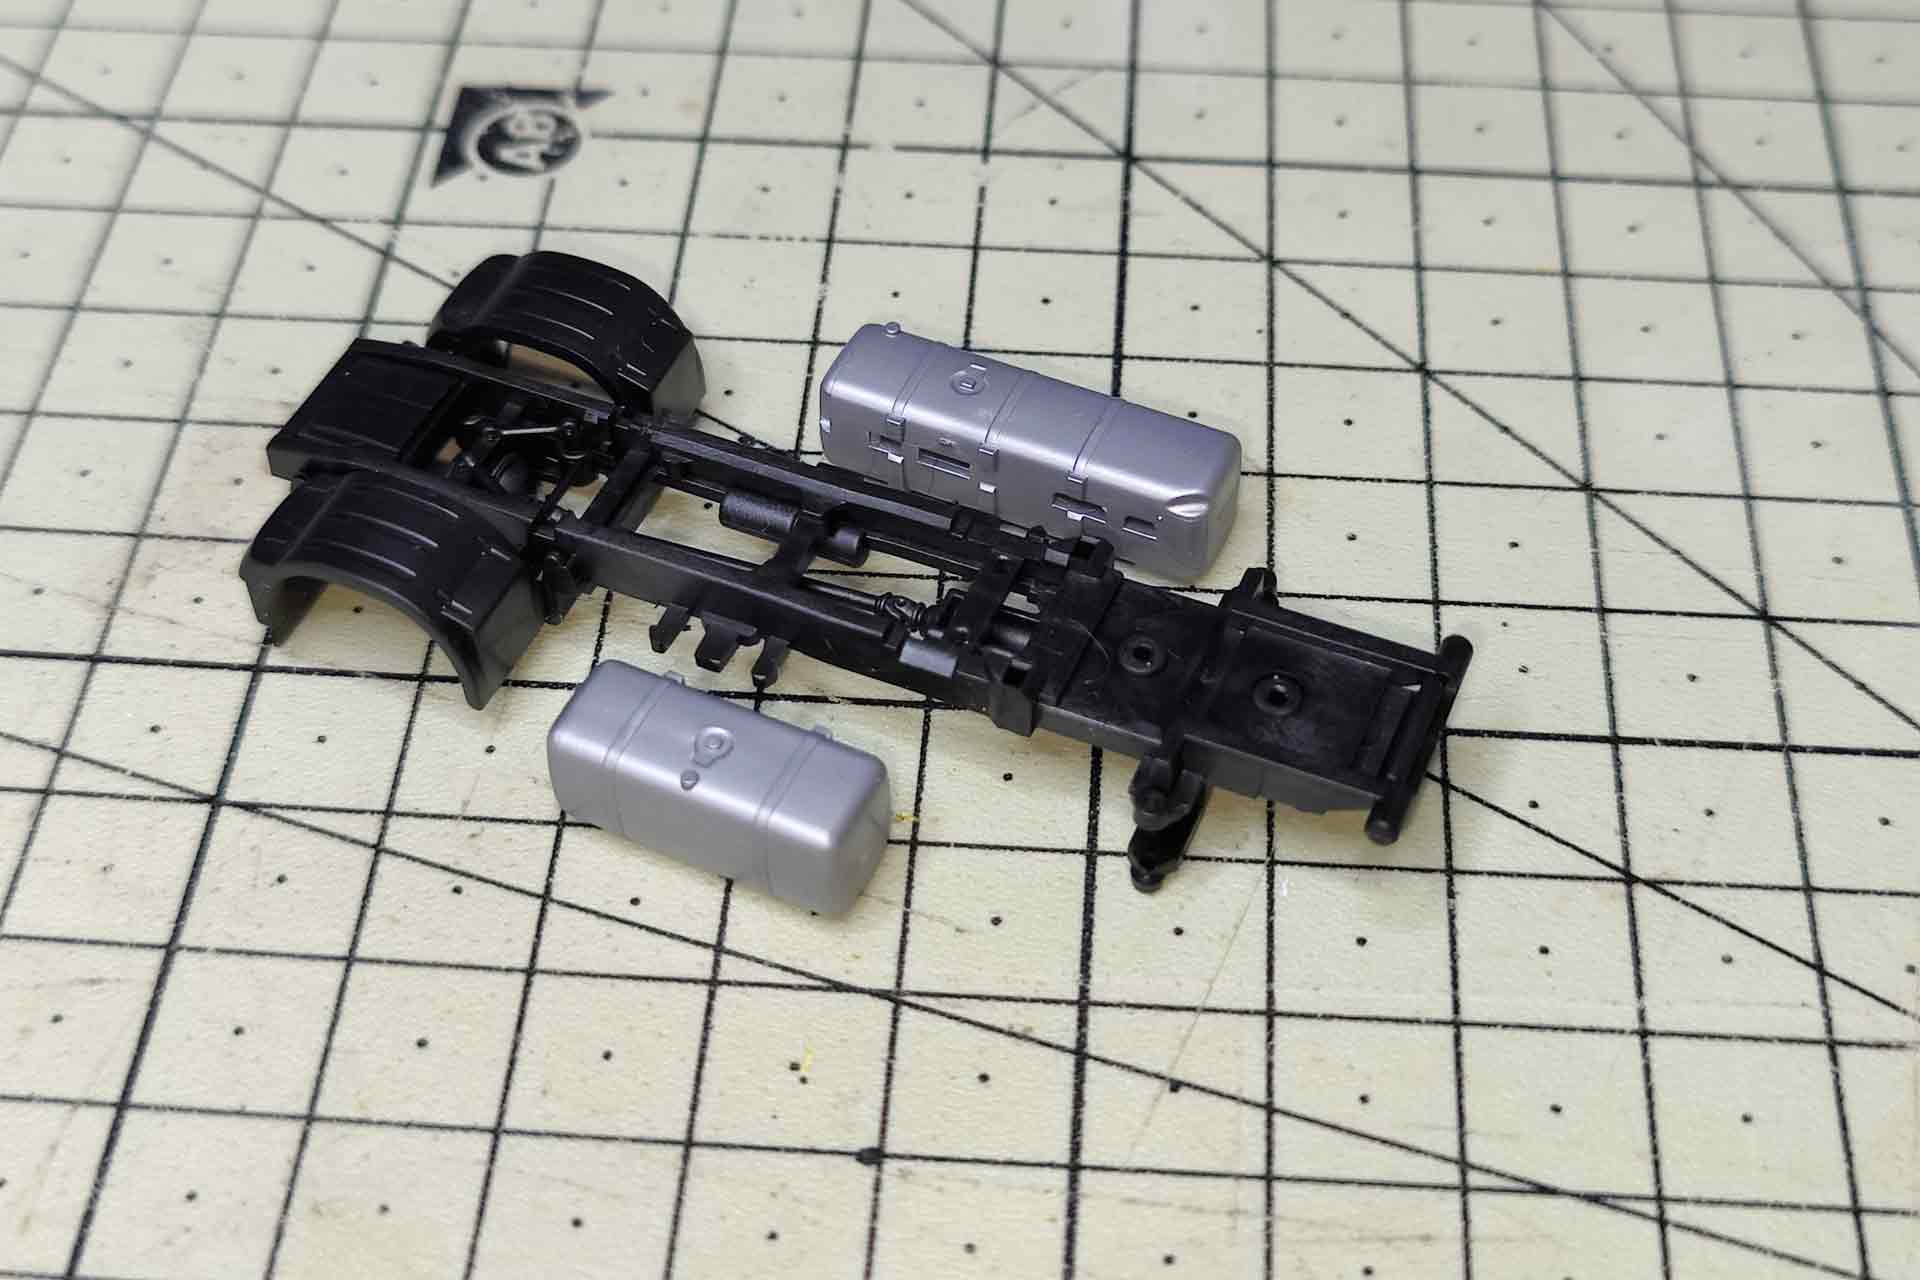
Finally, the chassis is dismantled. The engine block secures the lining of the front wheel housing with two long pins and can be pulled off upwards. The tread plate with Adblue tank and saddle plate are clipped on the side paneling and can be released upwards. The side paneling is now loose on the chassis and the silver attachments can be pulled outwards.
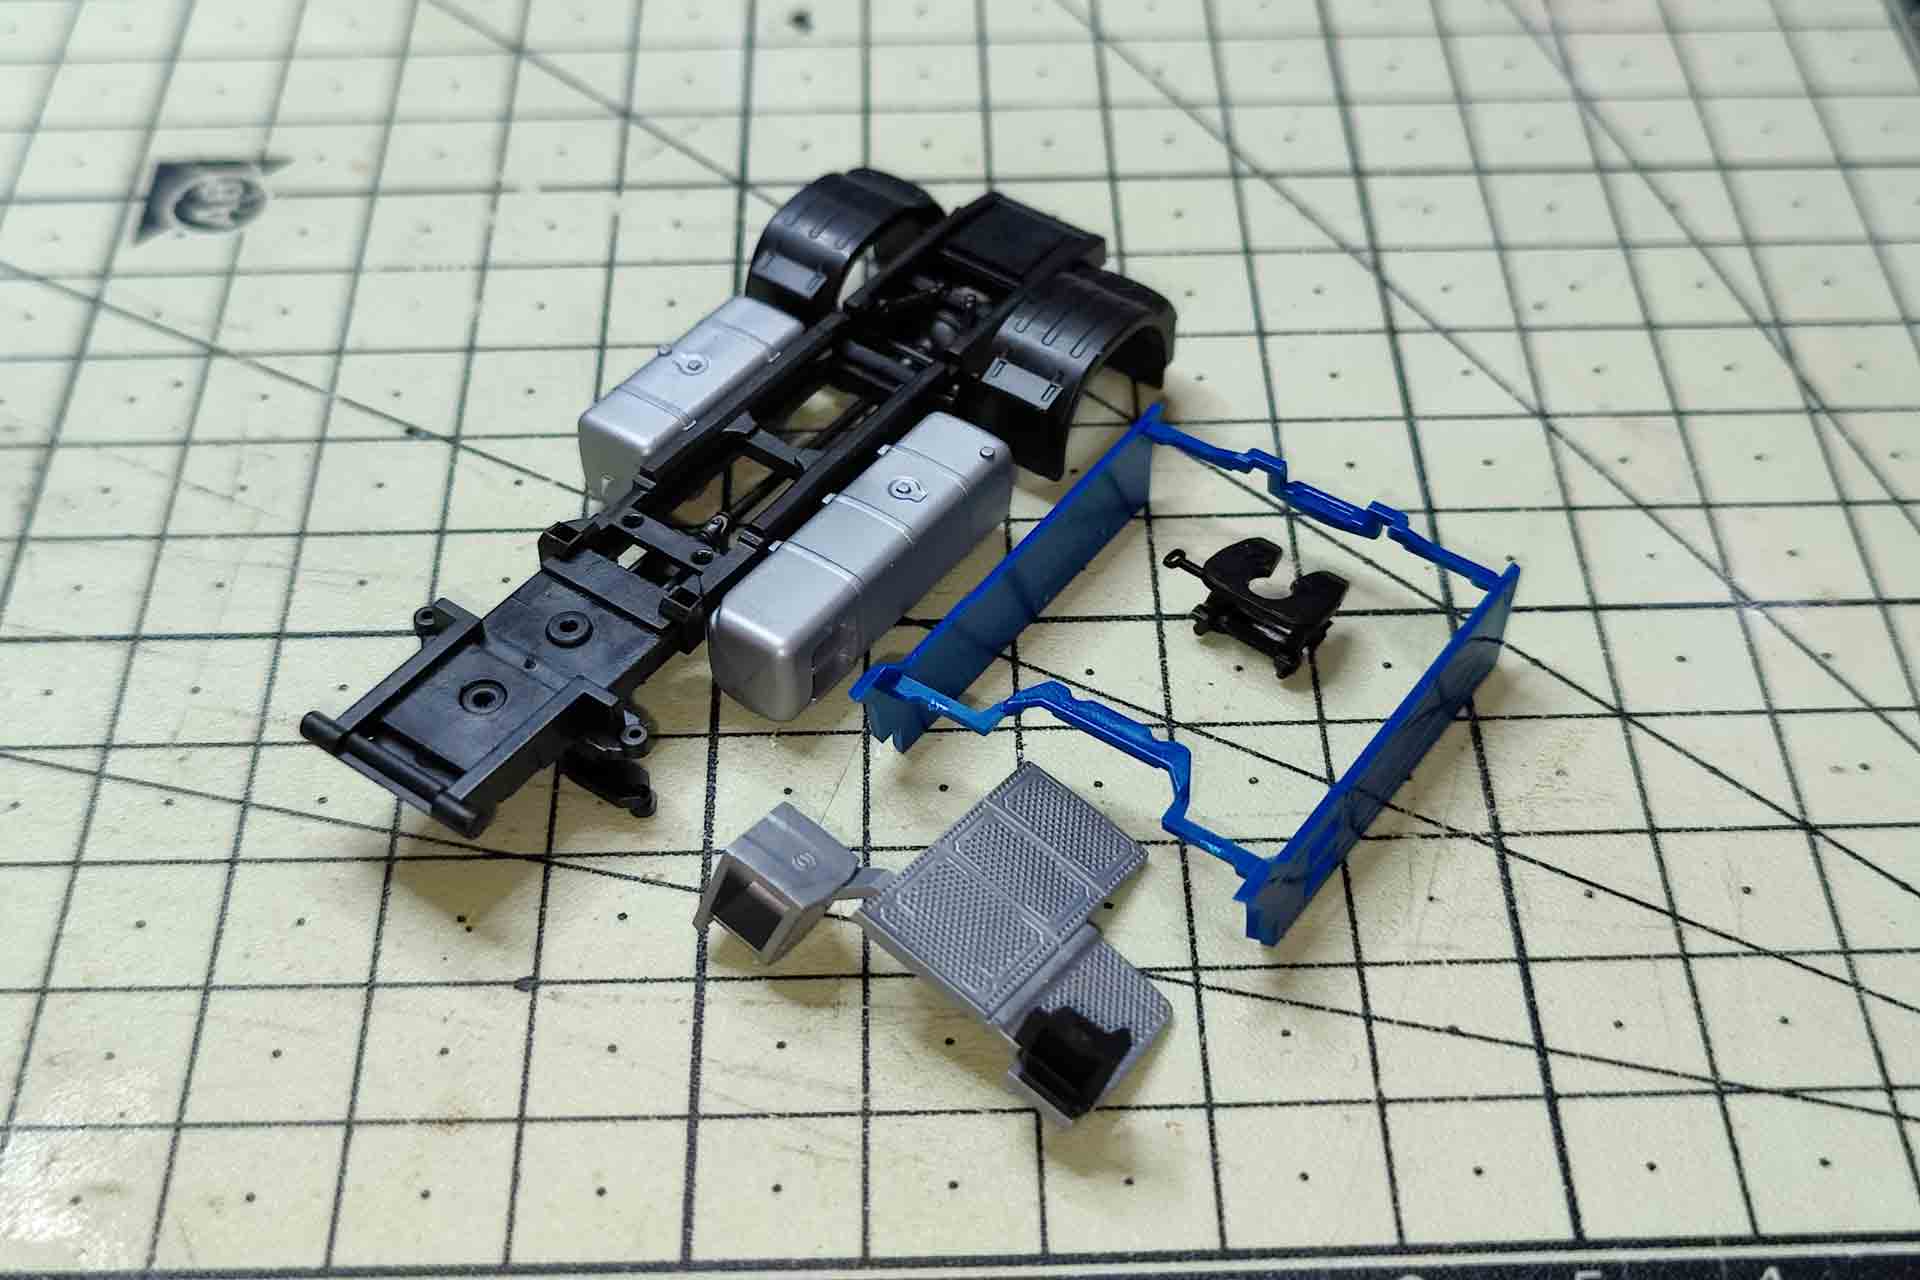
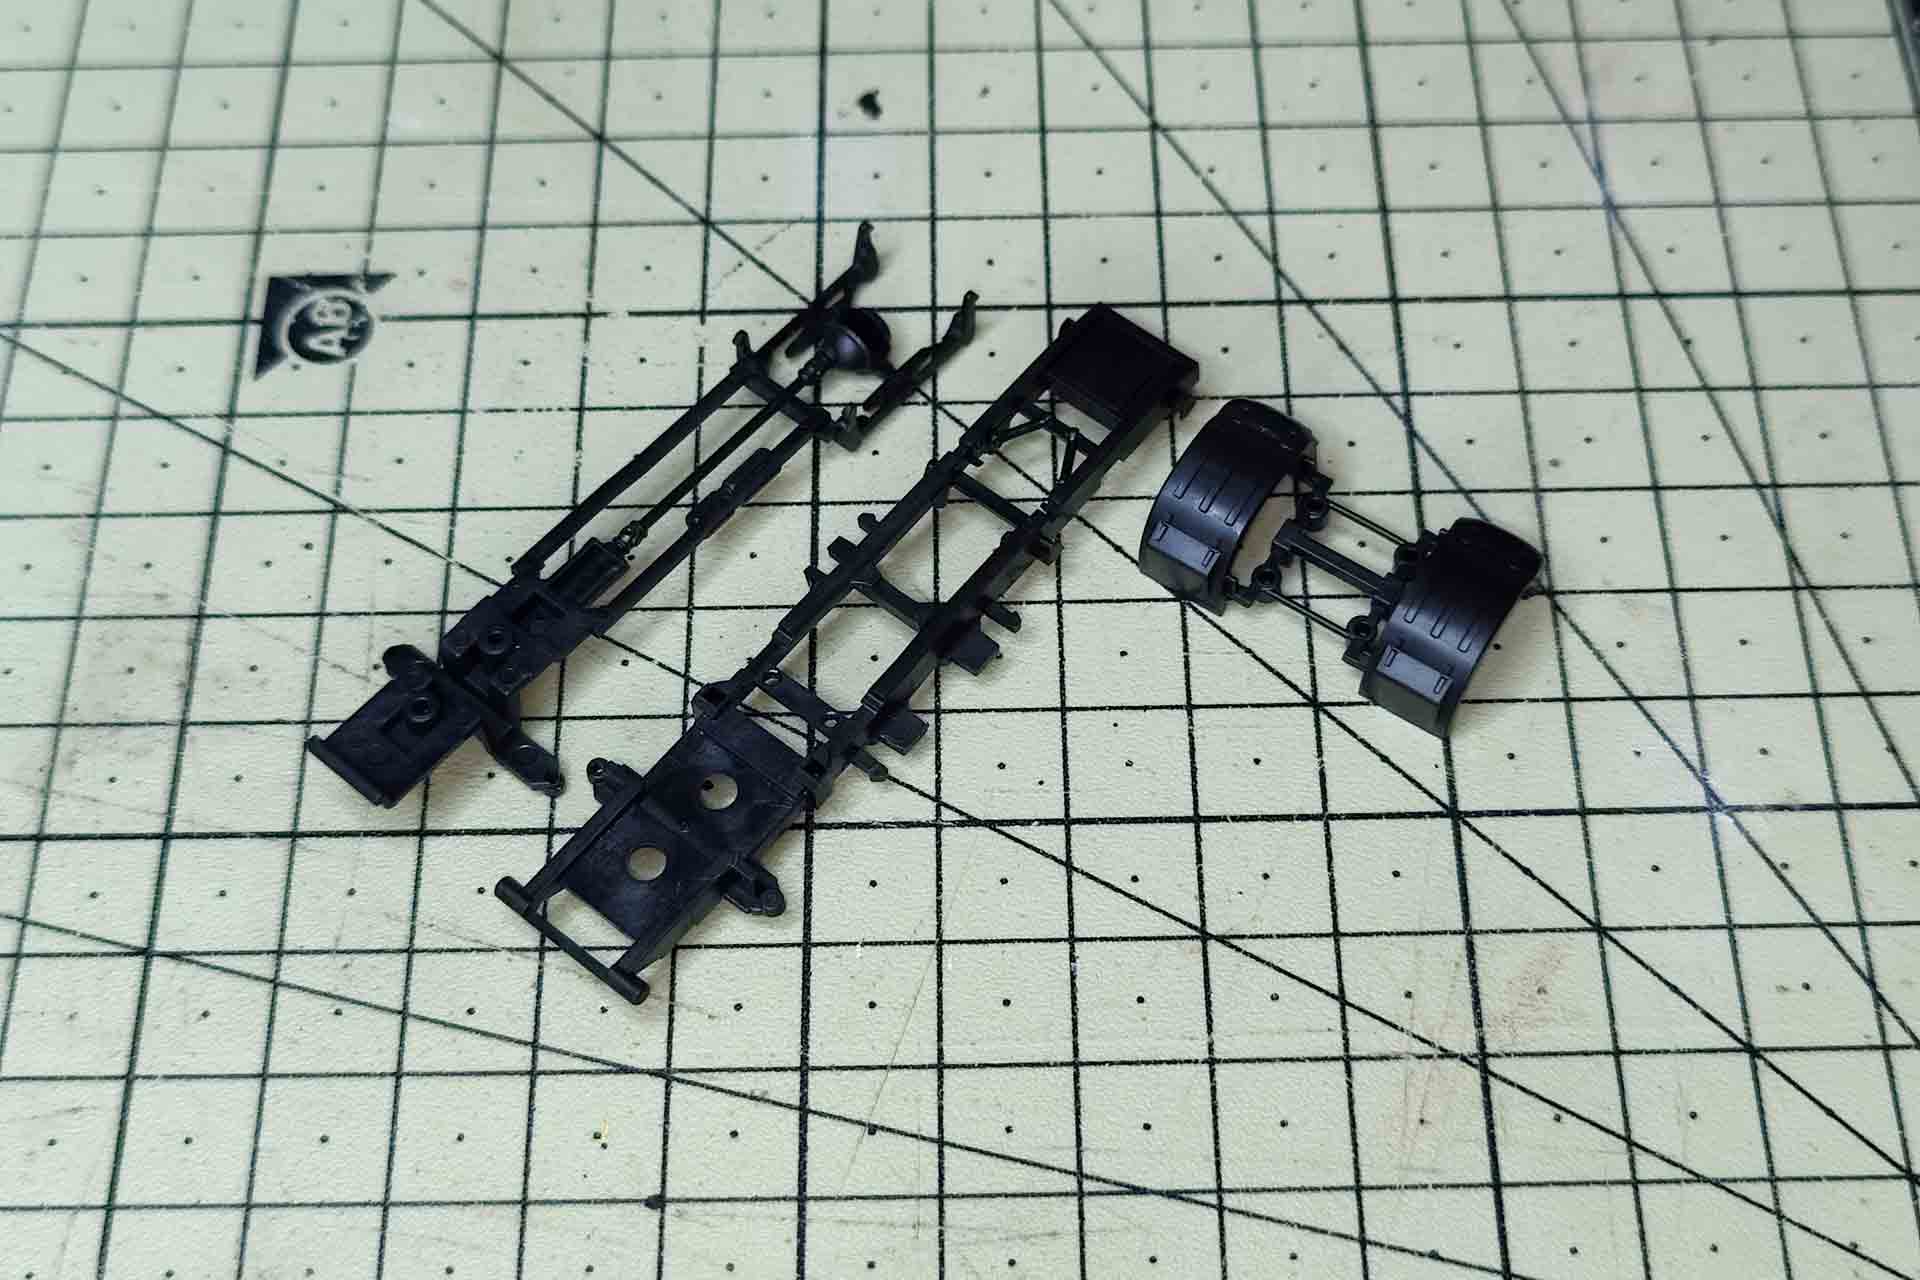
The new DAF also has a two-part vehicle chassis. The lower section is hooked into the upper section at the front and clips to the rear axle area with four claws. Once these are released, the mudguard can be pulled off and the tail lights inside can be pushed out from the inside.
In aid of what exactly?
The new product lies before us in its individual parts - but why? Disassembly is not an end in itself. The spectrum for model tuning ranges from a few brushstrokes to the construction of a self-propelled or even remote-controlled H0 model. In another report, the model will be reassembled, but only after it has been upgraded with some paint and inexpensive accessories. The comparison of the conversion and the basic model will show whether all that effort has been worthwhile, and perhaps motivate readers to similarly customize their model, or even come up with their own ideas.
Modification,text and photos: Frank Hadel
Informations
Thanks to their plug-in technology, which does not require glue, all Herpa models can be dismantled. Often a certain sequence must be followed for damage-free disassembly. Advice for dismantling a model:
- Work surface
- Tray for small parts
- Tweezers of various sizes, straight and curved
- Files
- Disposable gloves, especially advisable when painting the model
- Time and patience