Fresh from the cutter to the table
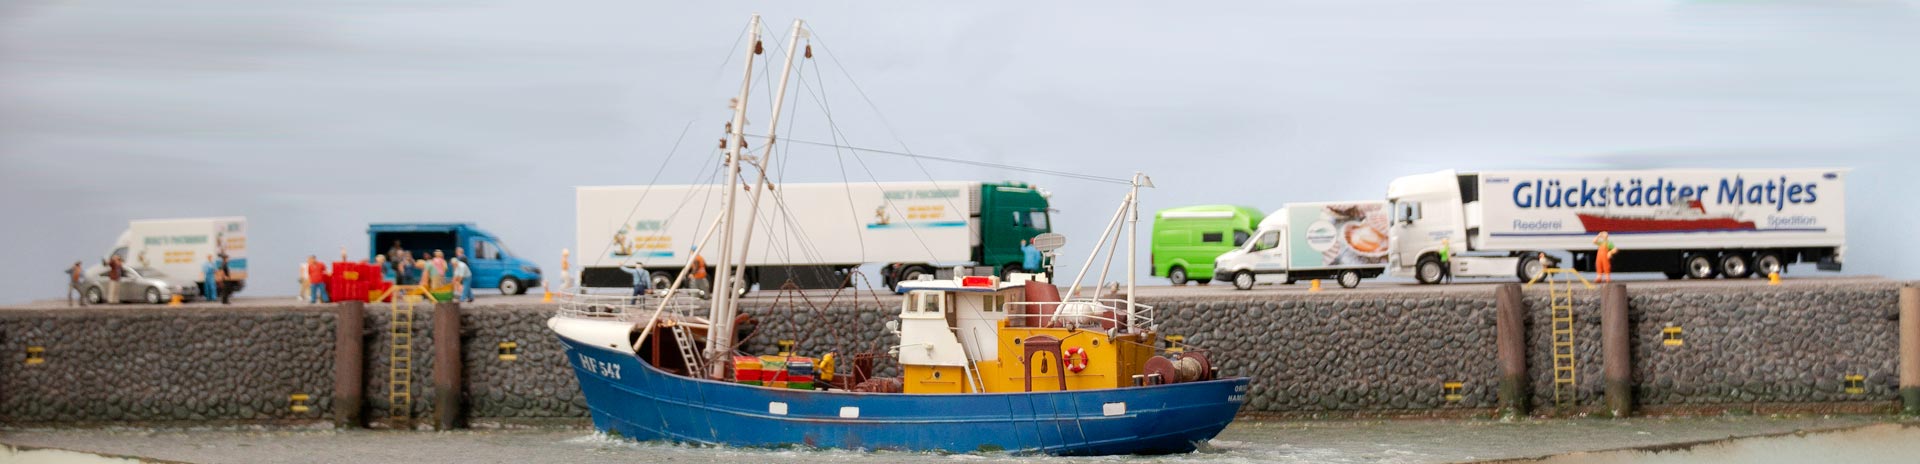
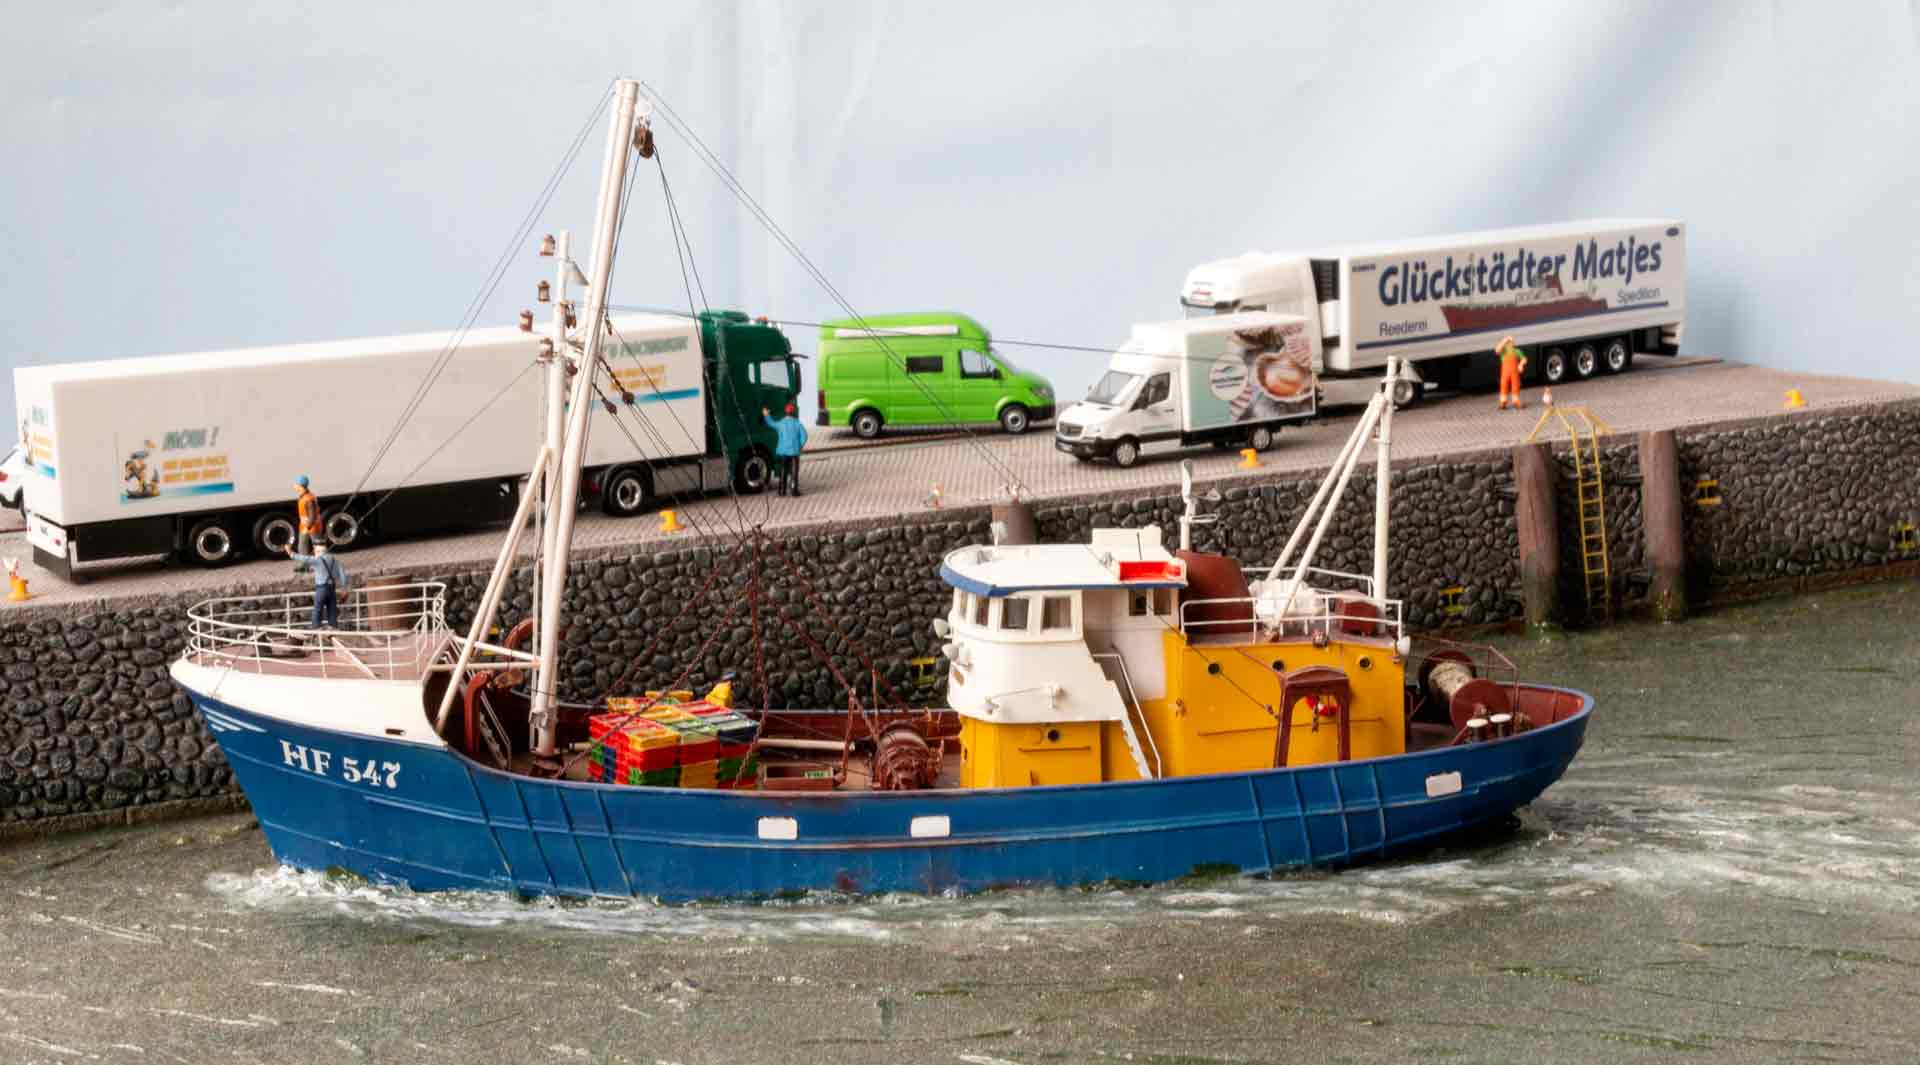
The summer is slowly coming to an end. Inspired by his vacation, Baltic fan Heinz Hofmann has been inspired to recreate a typical harbor scene. Here, the fishing cutters arrive in the early morning hours after their hard work at sea. Visitors and fish lovers in search of fresh catches buy their fish directly in the harbor, already waiting for the incoming ships. In keeping with this theme, Artitec offers a typical North Sea fishing cutter in the 1/87 scale (H0) – the company has been specializing in maritime themes and models for years. The model made of resin and etched parts has been staged accordingly.
Idea and planning
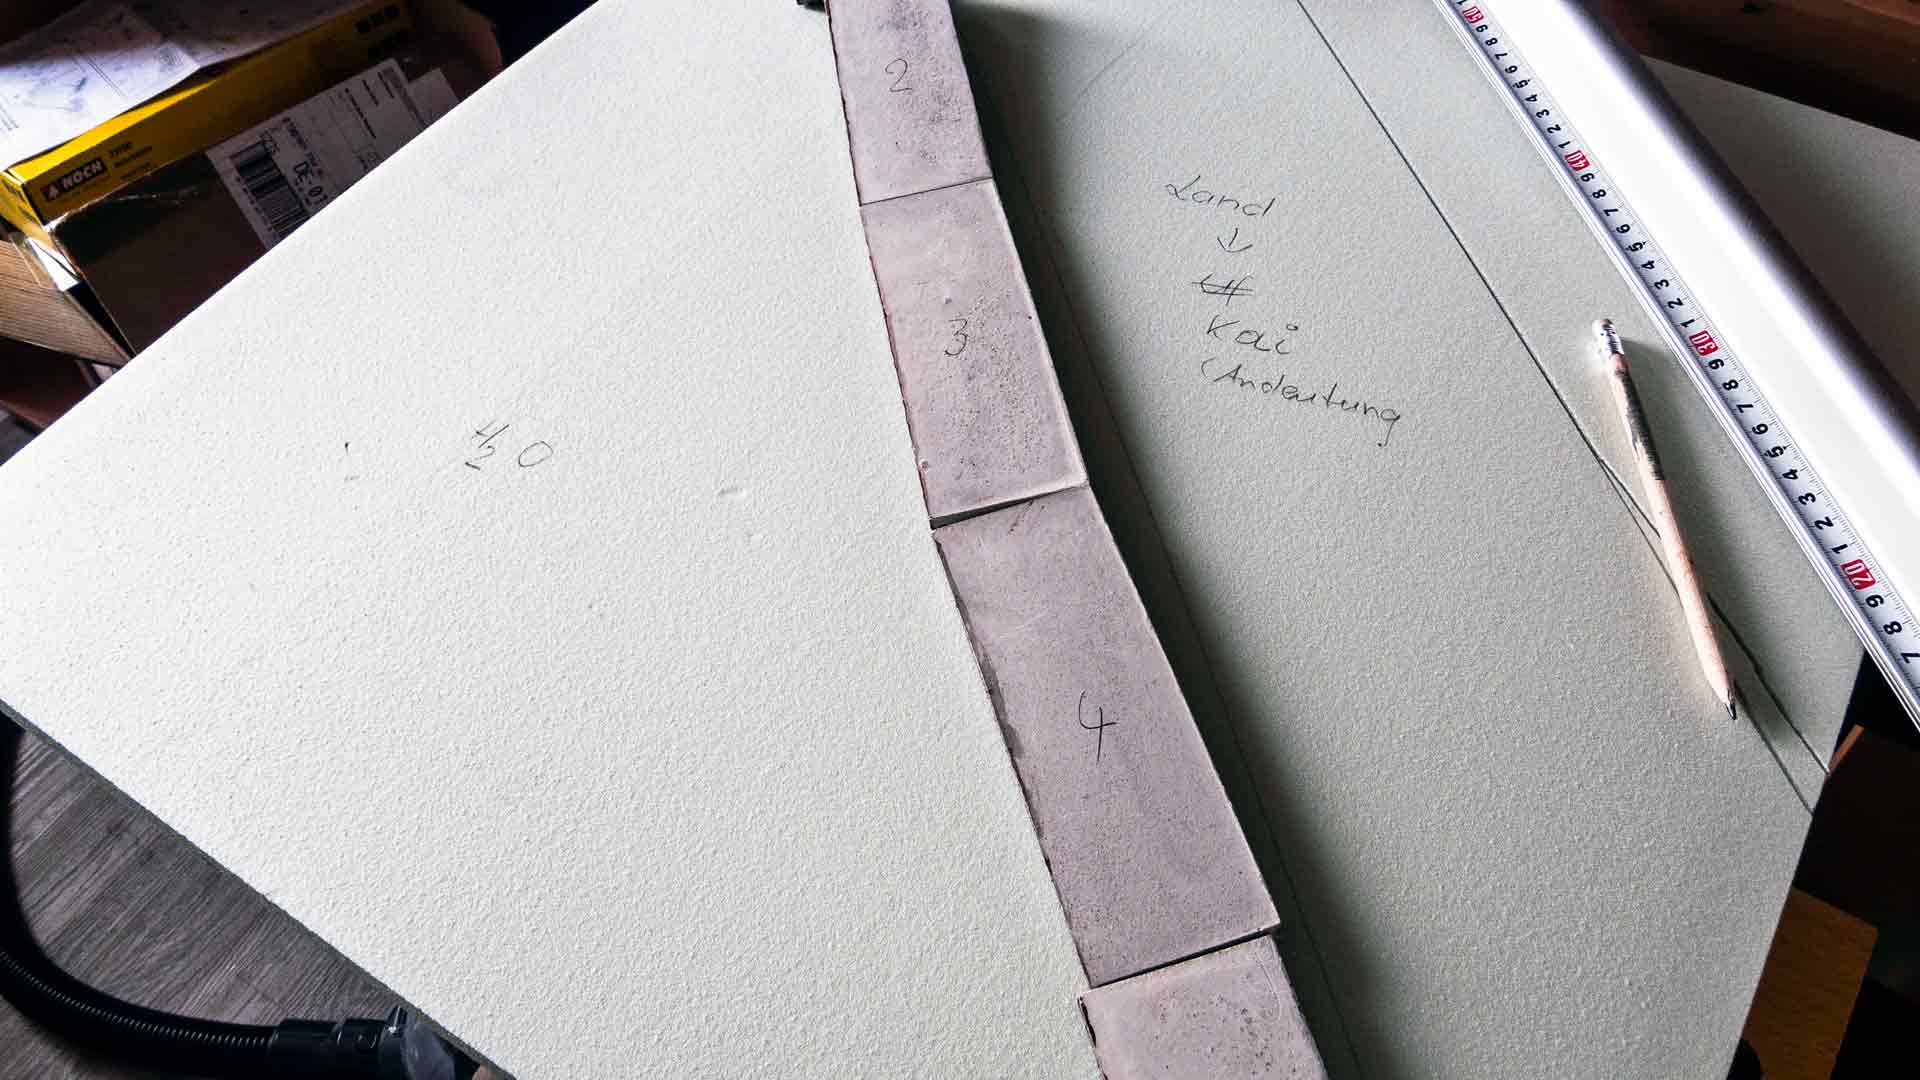
The trawler from Artitec is a type of ship that is still frequently landing in German fishing ports today. In the planned diorama, it is to dock in a tidal harbor. The showpiece is then to be integrated into a larger diorama, resulting in the strange triangular base with a leg length of 78 cm. Also, the basalt cyclopean walls of Vampisol are indispensably earmarked.
Building the cutter
The first glance into the box shows relatively few resin parts, but a large etched board. The resin parts are of excellent quality and require rework only in a few spots, if at all. Before assembling the parts, all the holes noted on the plan must be drilled. In most cases, the holes are 0.4 mm in diameter; deviating holes are specified. The fine etched parts will be placed in these later. The foredeck is not placed until the underlying section has been refined in color.
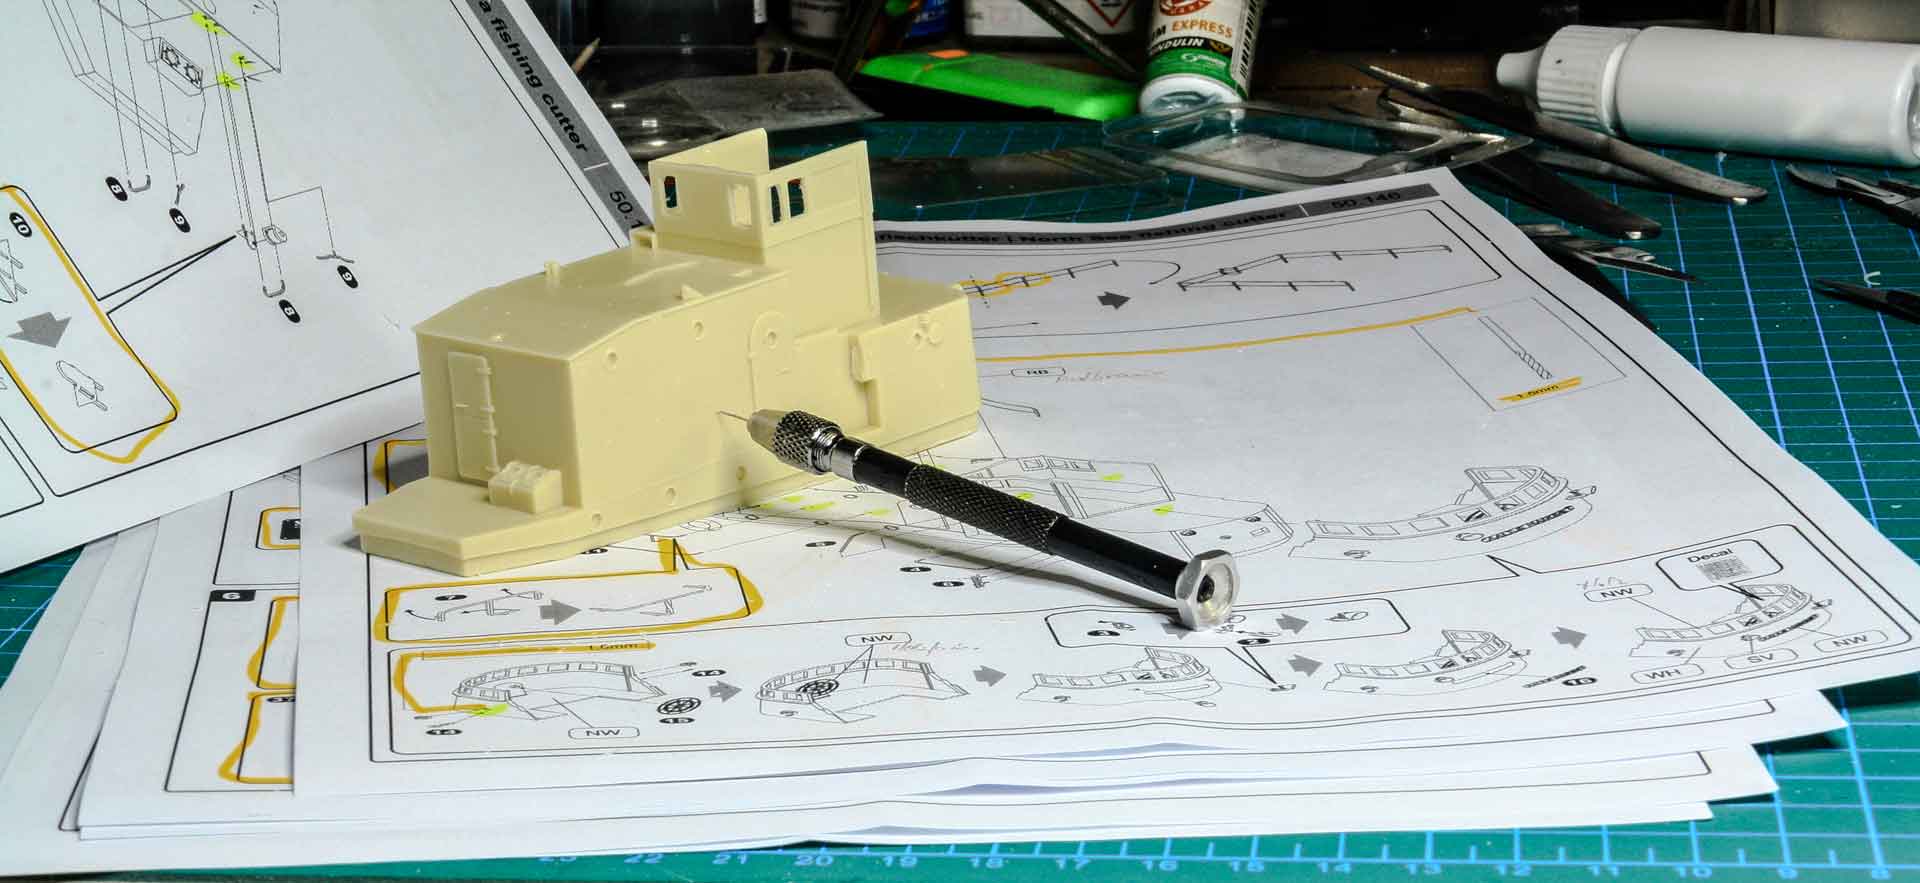
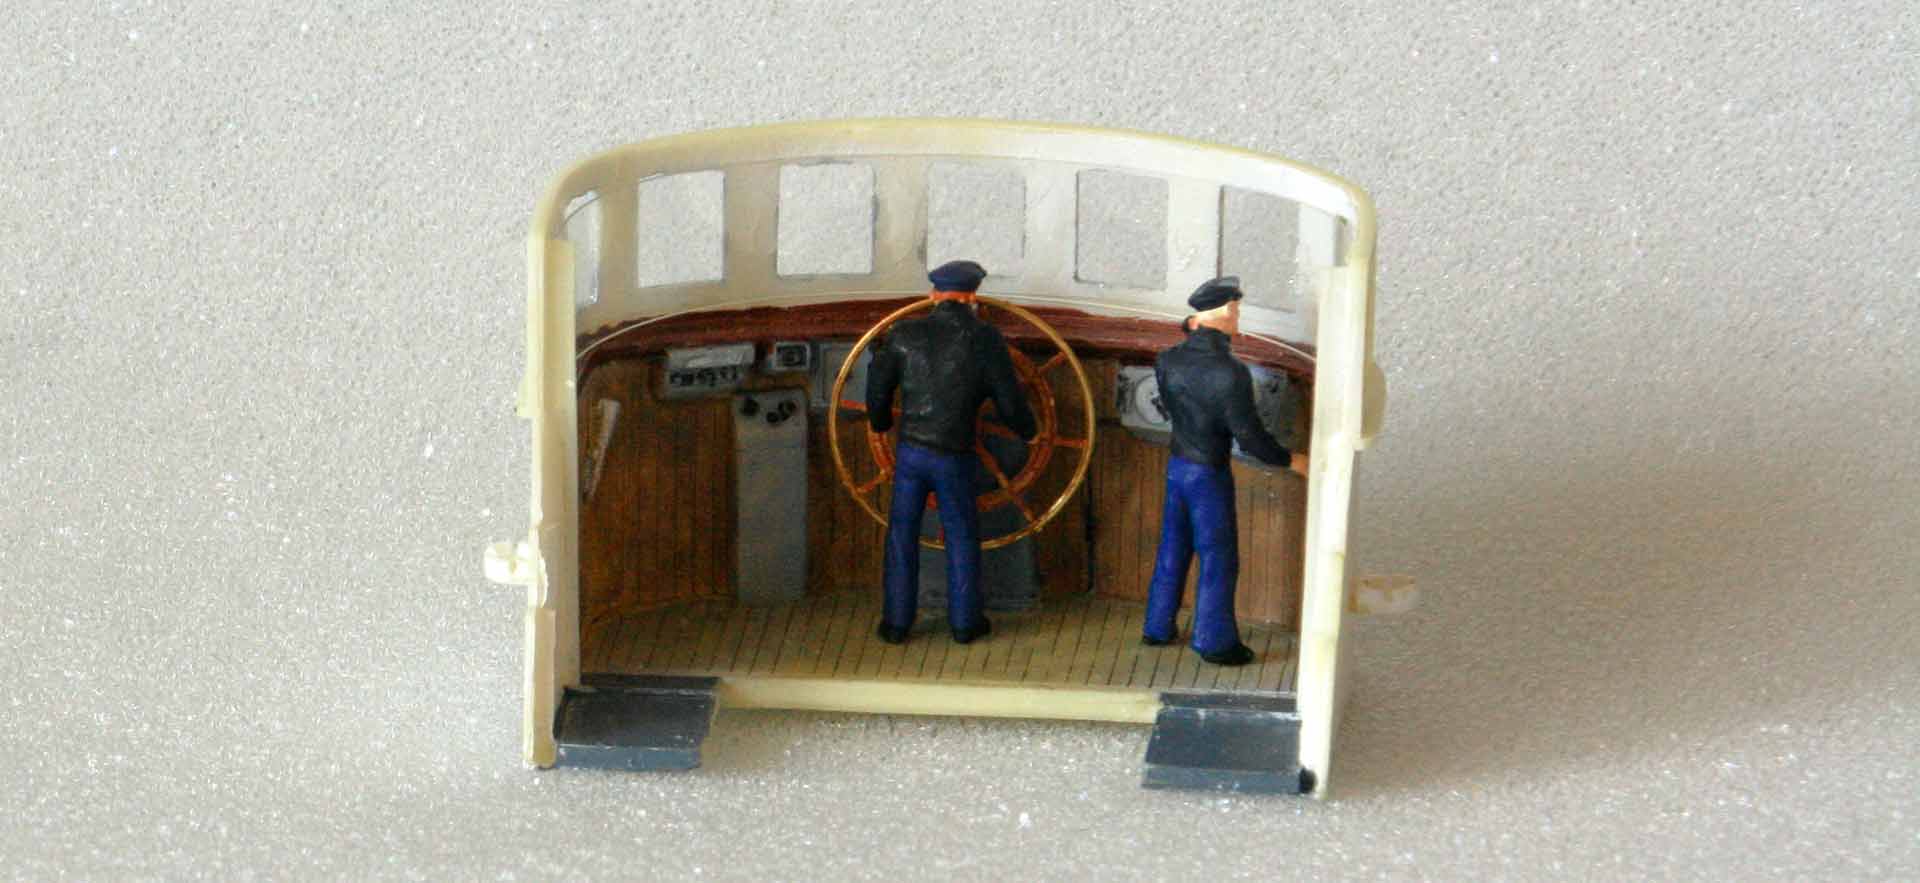
The wheelhouse with its detailed interior deserves a lavish finish, even if in the end, looking inside is only possible from certain angles. In addition to the color scheme of the floor, ceiling, side panels, and the instrument boxes, brass parts and decals included in the kit also find their place there. This was followed by the assembly and gluing of the hull, the deckhouse, and the bridge. Low-odor superglue is used for this purpose. This has the further advantage that the parts can be aligned for some time (about 15 seconds).
Coloring of the cutter
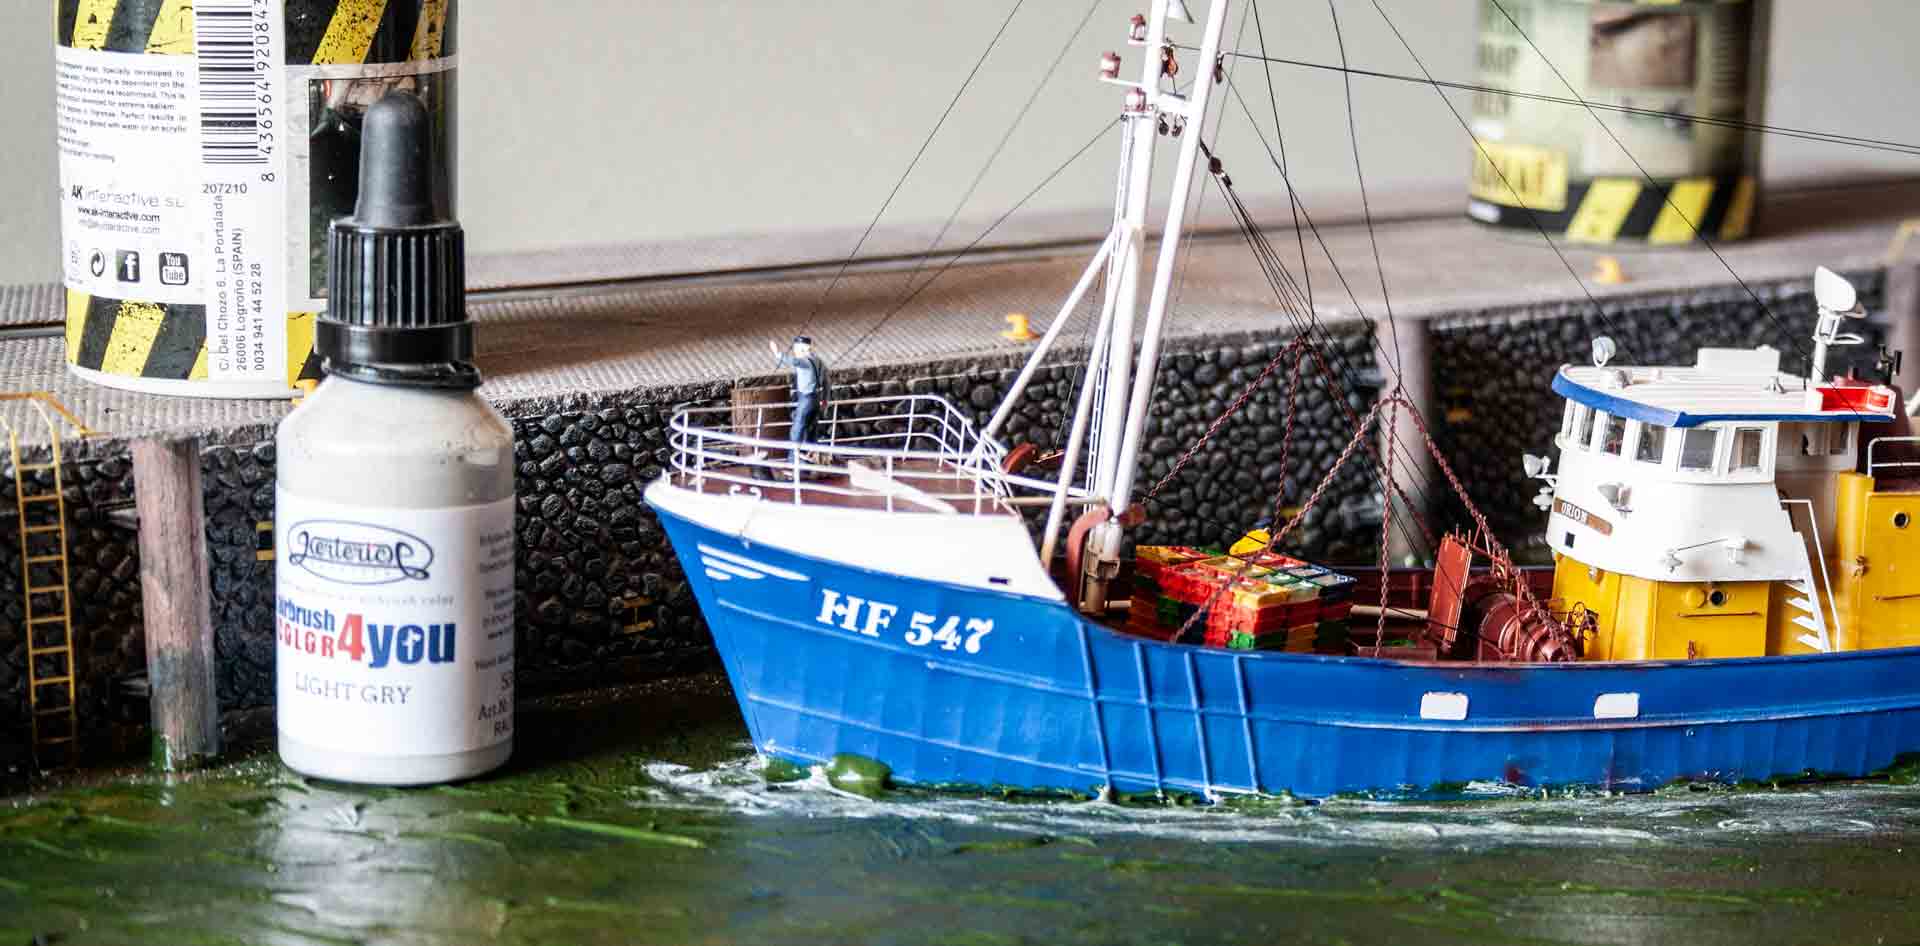
Before fitting the cutter into the diorama, the brass and resin parts have to be colored. In this case, we deviate from the color specifications and use an original from Cuxhaven as an orientation. Make sure that these parts are thoroughly degreased beforehand. Isopropanol 99.9% is suitable for this. You can also clean the parts with water-based silicone cleaner beforehand. The etched parts that are to be bent for the construction are not colored until after the final shaping. It is recommended to use a bending aid when bending the numerous filigree etched parts. This way, they will be an eye-catcher in the end. Colors from the AirbrushColor4you and Modeltones series from Herterich Products are used for the color design. These are applied using an “Infinity” airbrush and, in the case of filigree parts, with a fine, high-quality brush. For the application with a brush, the medium “Thick’n BrushPaint” (Herterich) is added in a minimal amount to the original airbrush colors. This produces a model brush paint that covers well.
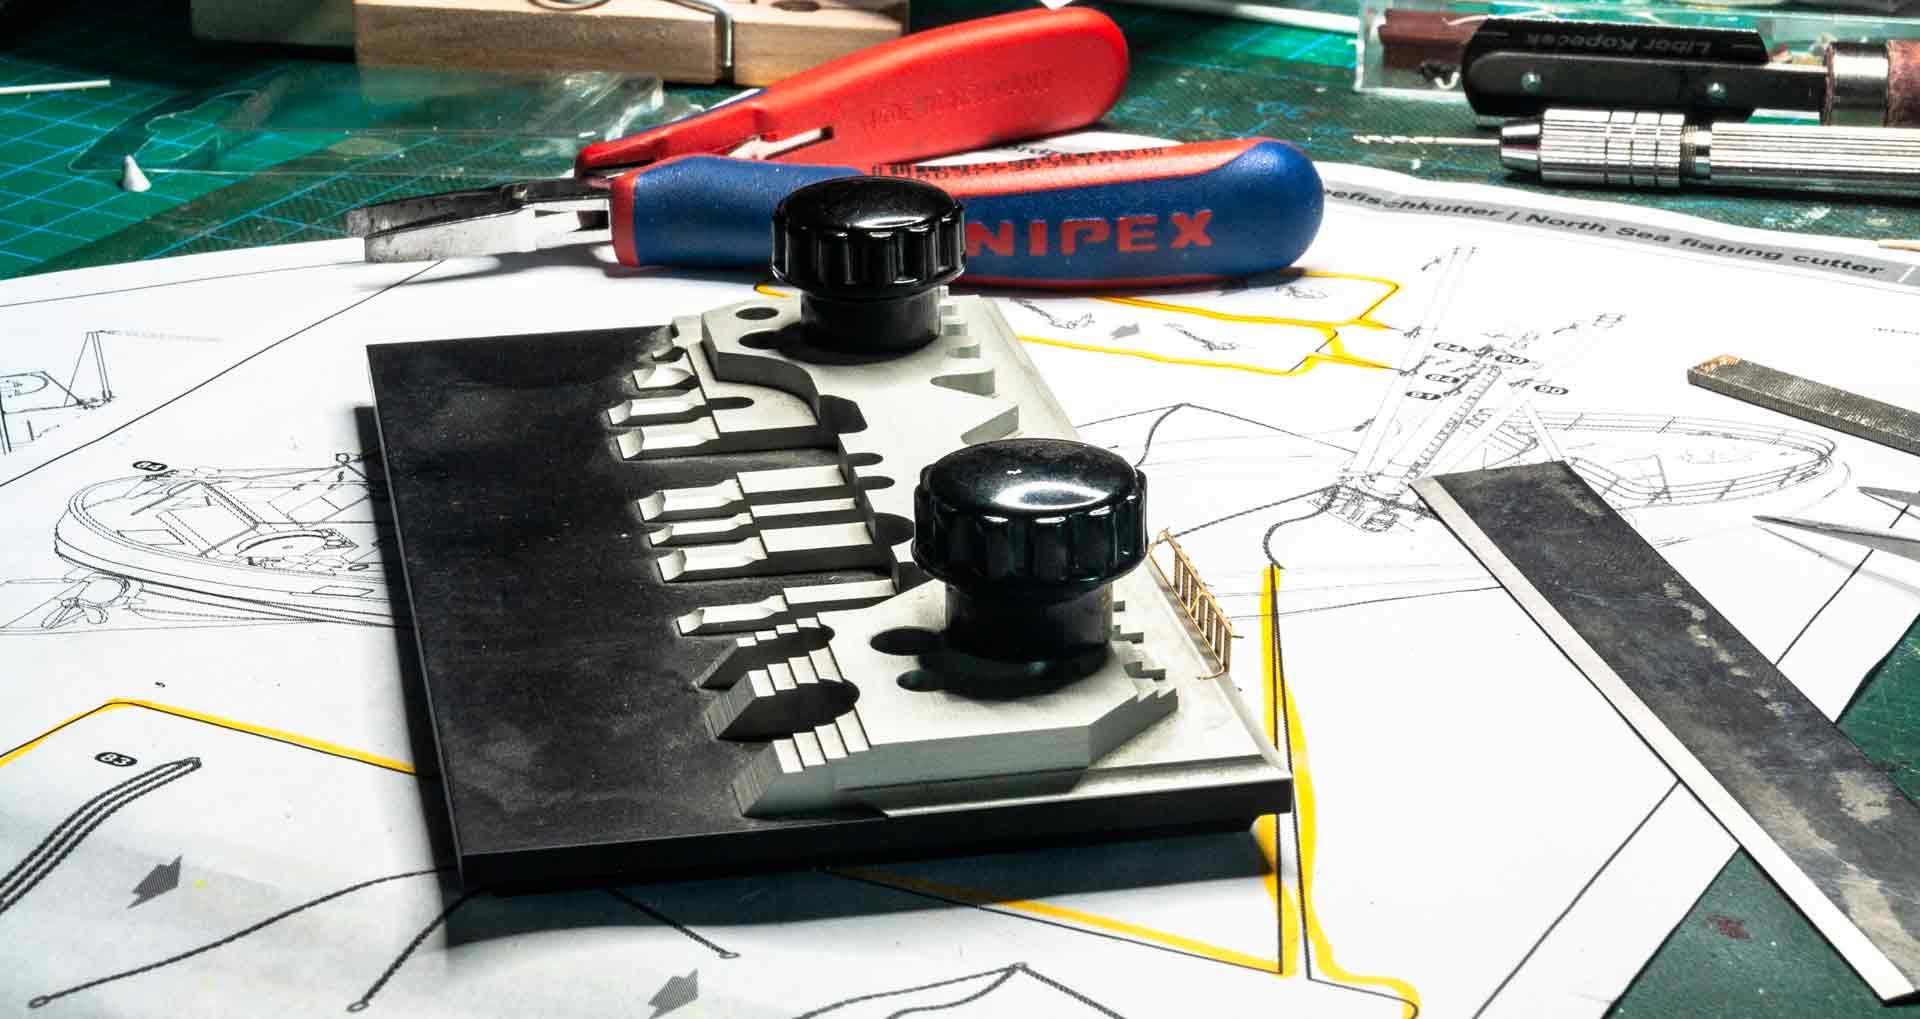
Bending aid for bending the filigree etched parts, here a staircase to the wheelhouse.
Fine-tuning the masts
For the construction of the masts, Artitec supplies polystyrene rods and tubes of various thicknesses, which, when assembled exactly according to the instructions, result in masts that are true to the original. Special care is required when assembling the pulleys and blocks. These are folded and assembled according to the instructions. Take care to ensure that everything is assembled without gaps – especially regarding the pulleys. Otherwise, the thread for reproducing the ropes for the gear will slip through the pulley later, which does not really look true to the original. A great deal of sensitivity and care is also required when making the bracing, as otherwise, some of the filigree parts can easily be torn off, and the overall impression of the model suffers if the bracing ropes sag.
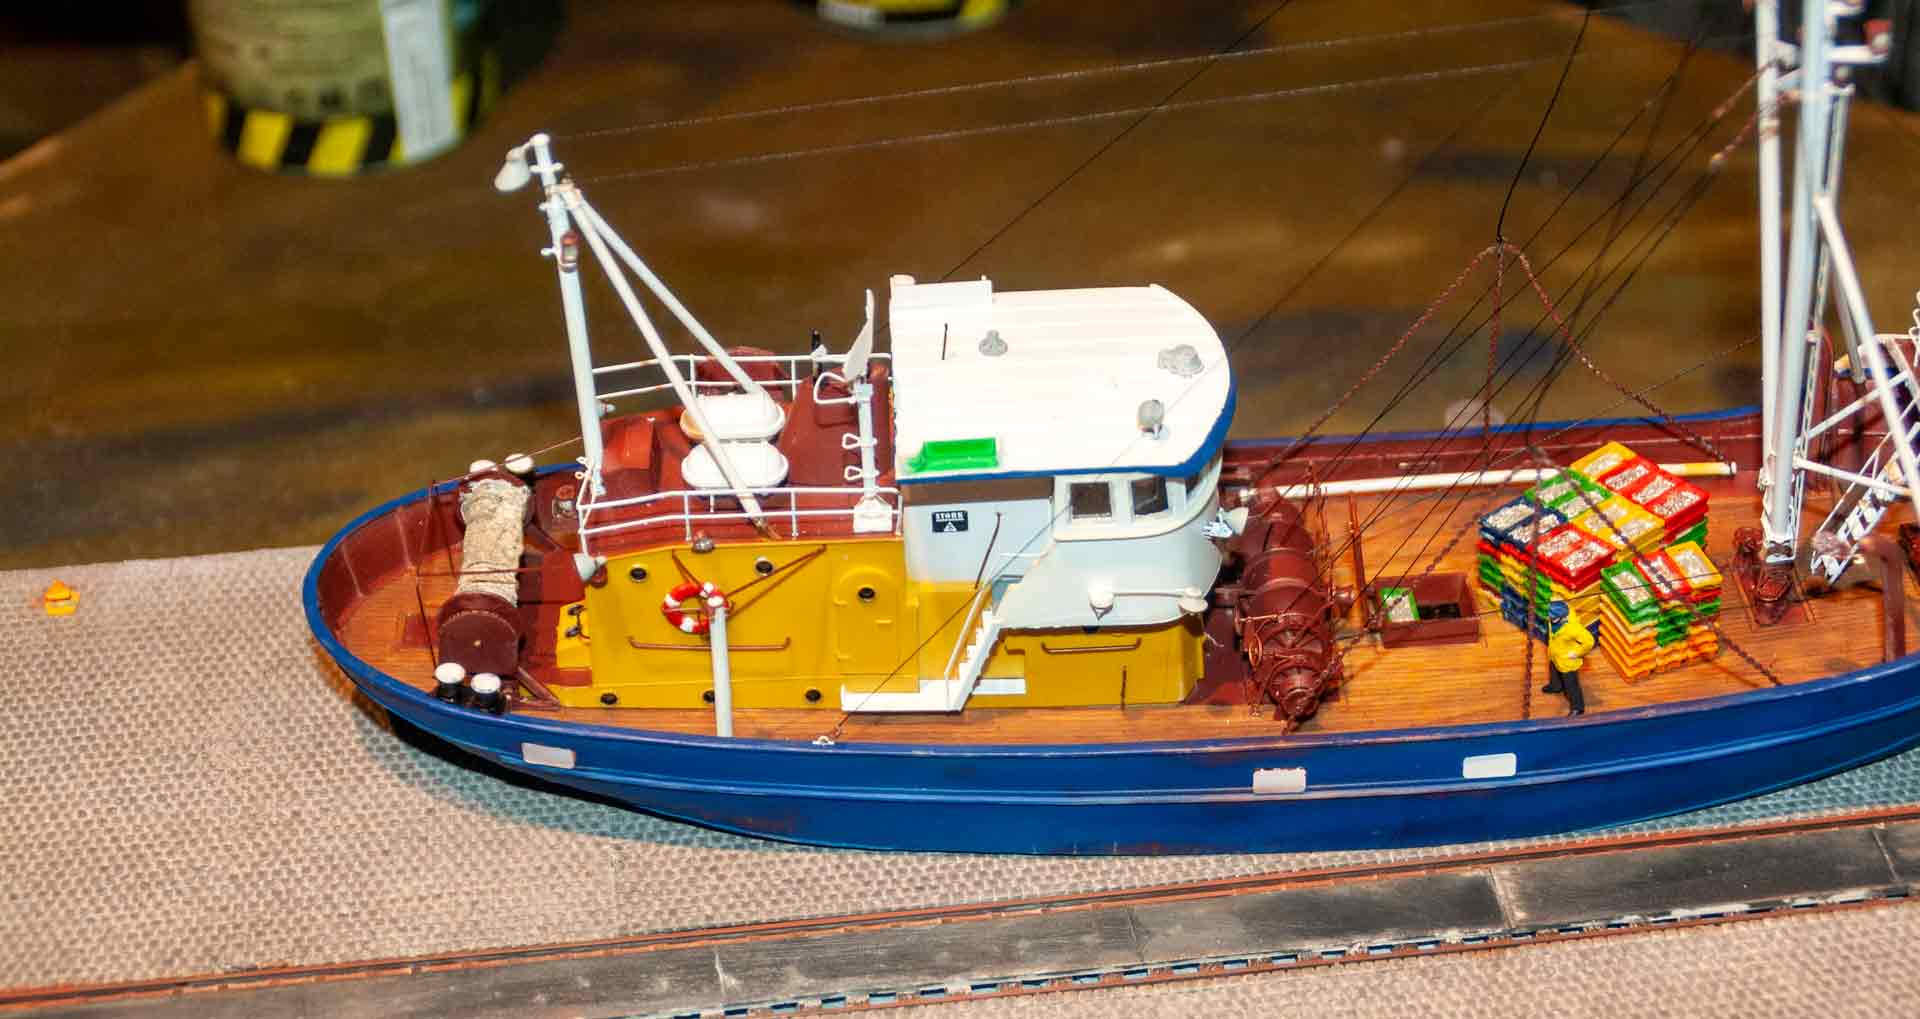
The loaded fish boxes on the deck of the ship ready for unloading are from Artitec and are colored with AirbrushColor4you / Modeltones paints from Herterich Products according to the German fisheries. The ship’s crew is from the Preiser range and makes the overall appearance of the cutter complete.
Building the quay wall
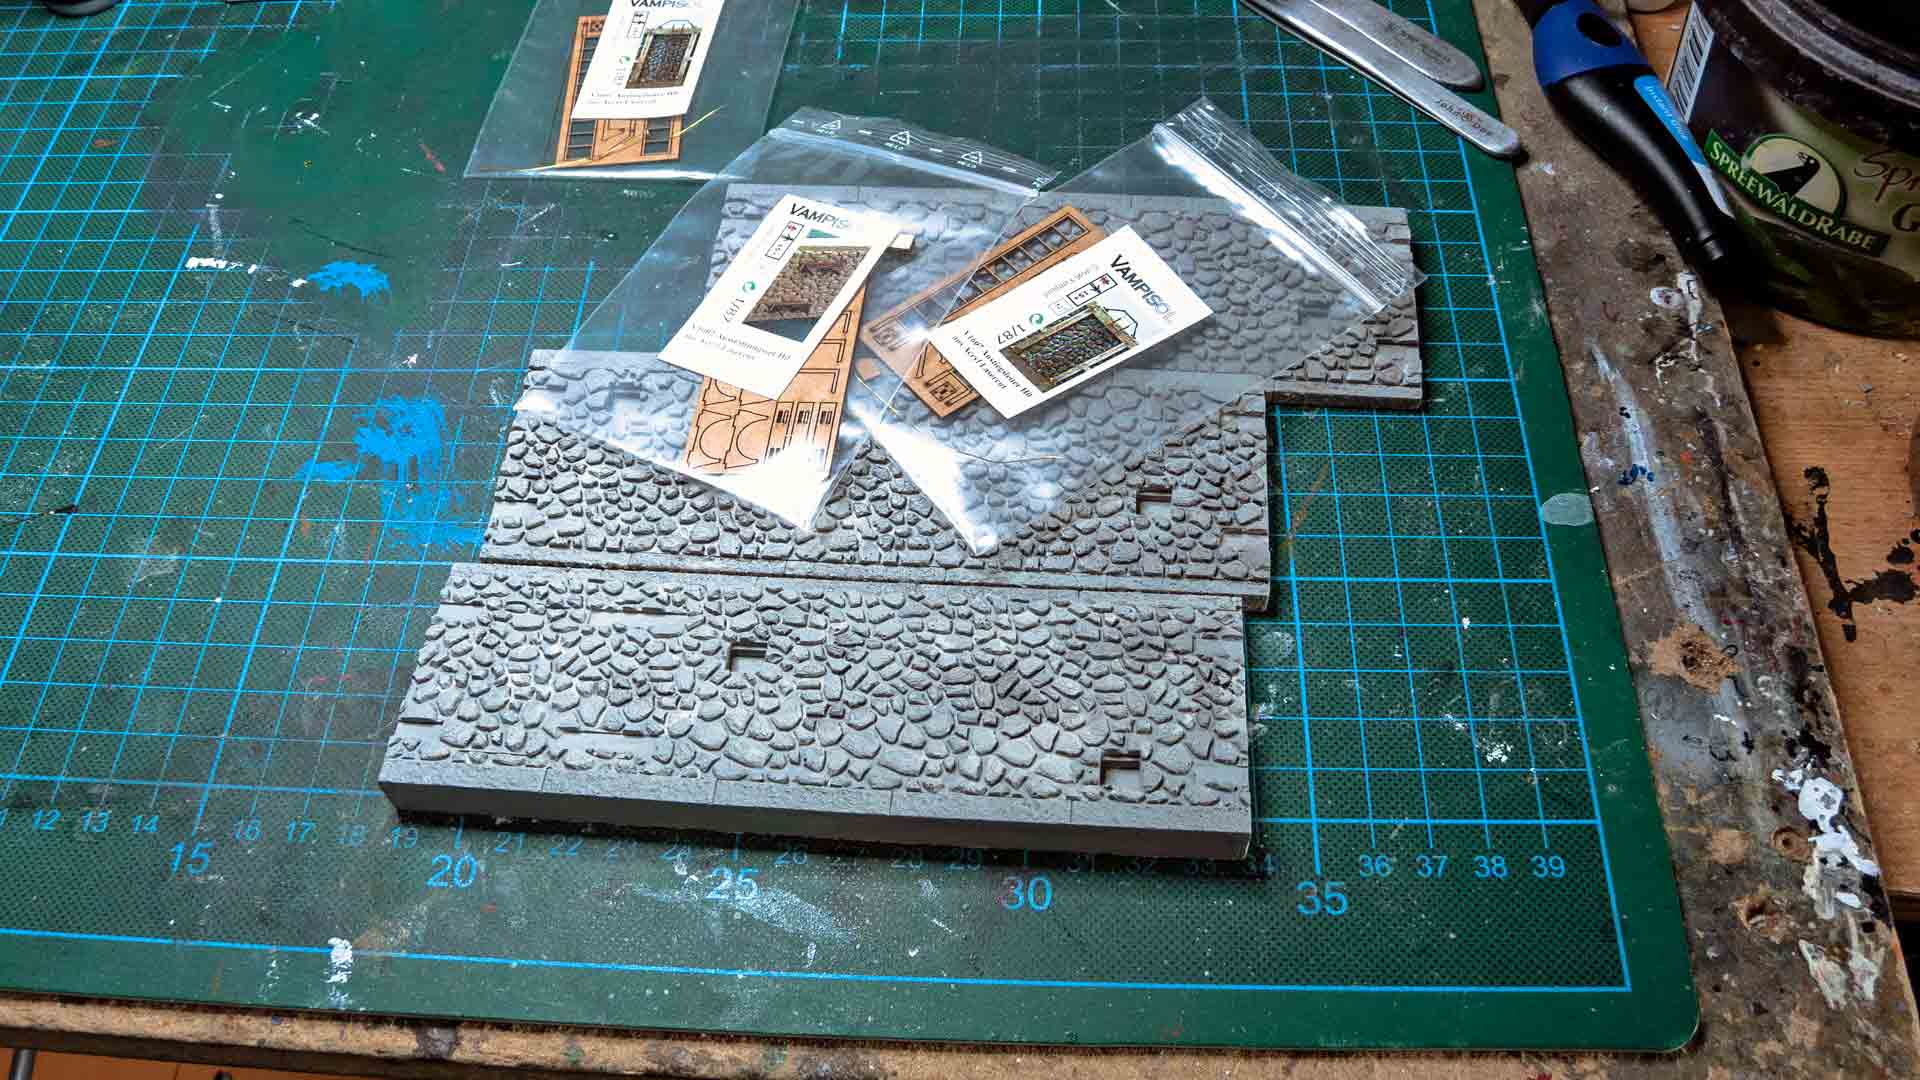
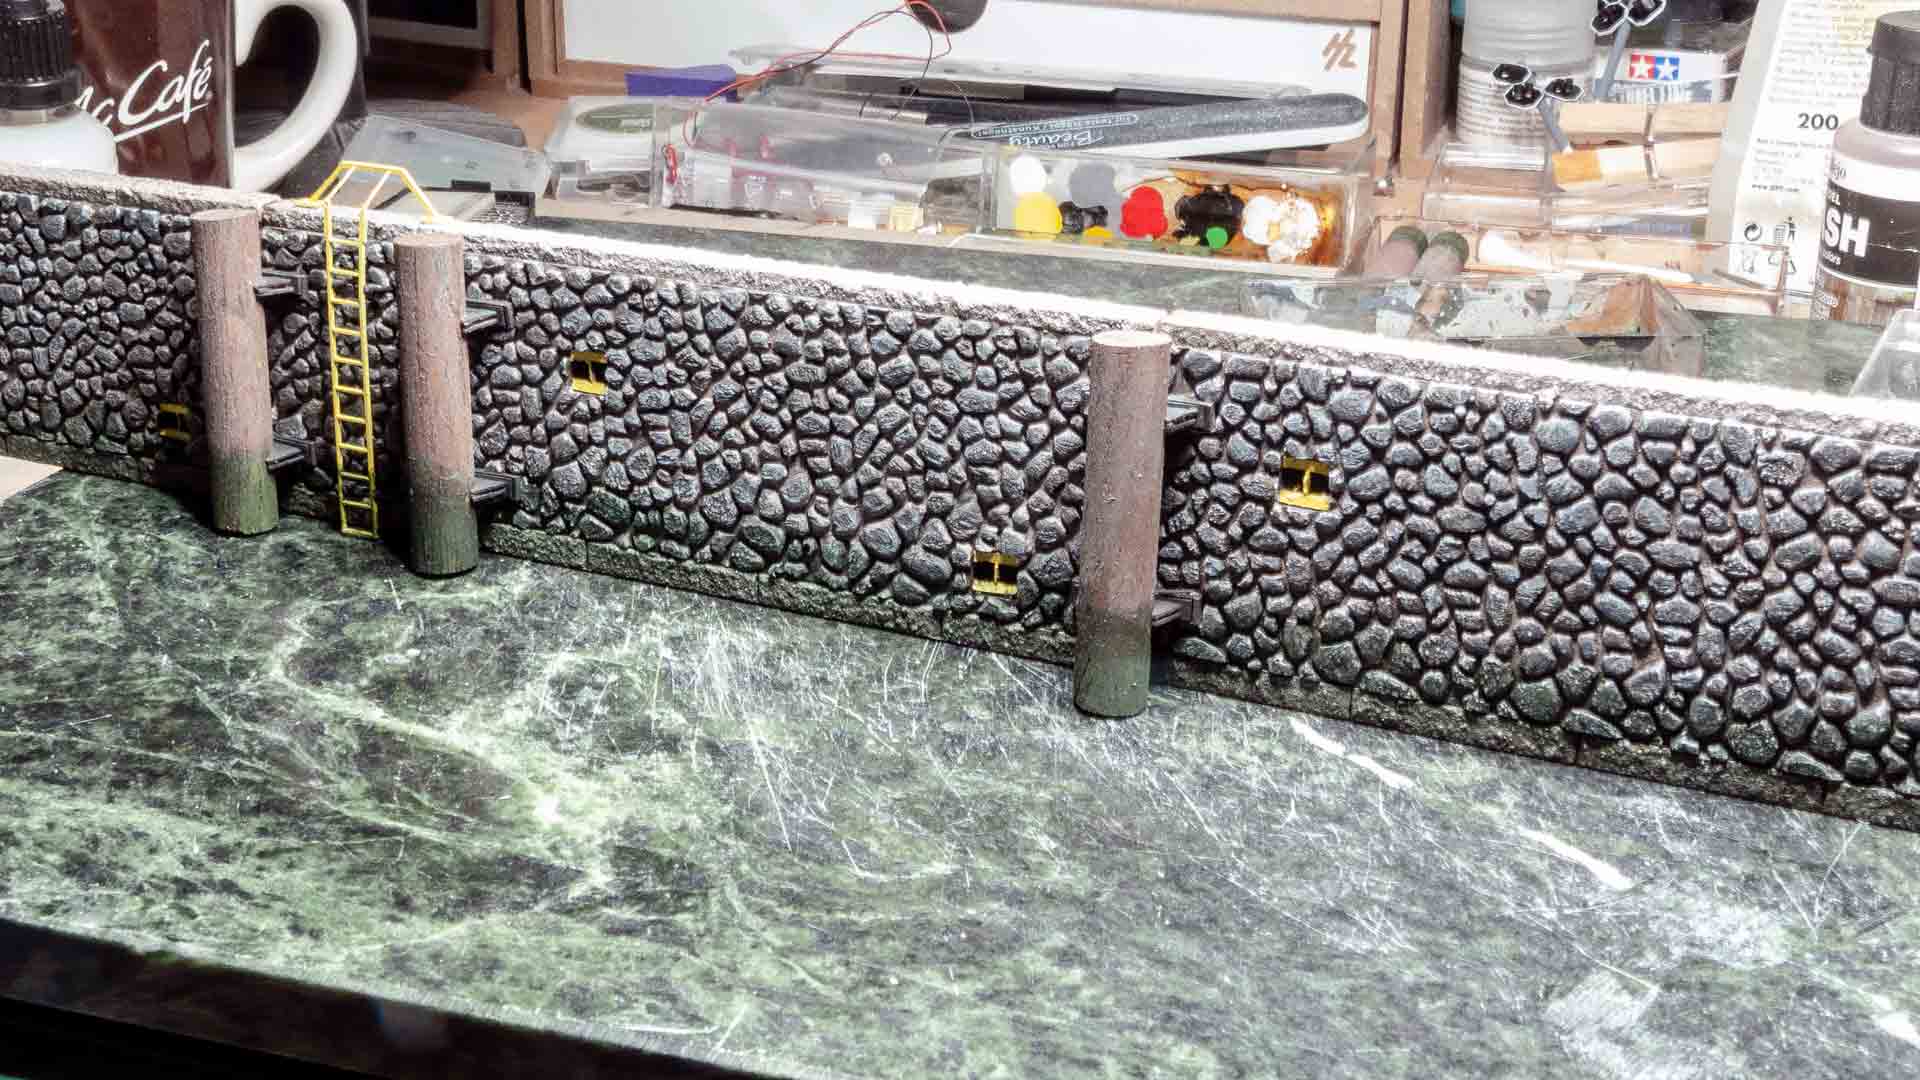
Since a tidal harbor is suggested in the showpiece, we are using the “Hamburg model” quay wall from Vampisol. This quay wall is a replica of a cyclopean wall made of basalt rock and has a landward slope of approx. 5%, true to the original. The individual wall sections are of very good quality and can be used without major reworking. They are primed with a highly diluted acrylic-water mixture in silver-gray. Once the paint has dried, the individual basalt parts are colored. They are painted individually with a fine brush in “Granite Grey” so that no paint gets into the wall joints. Now, the basalt stones are treated with “Trafficwhite” until they look like the original.

The basalt stones are highlighted in color.
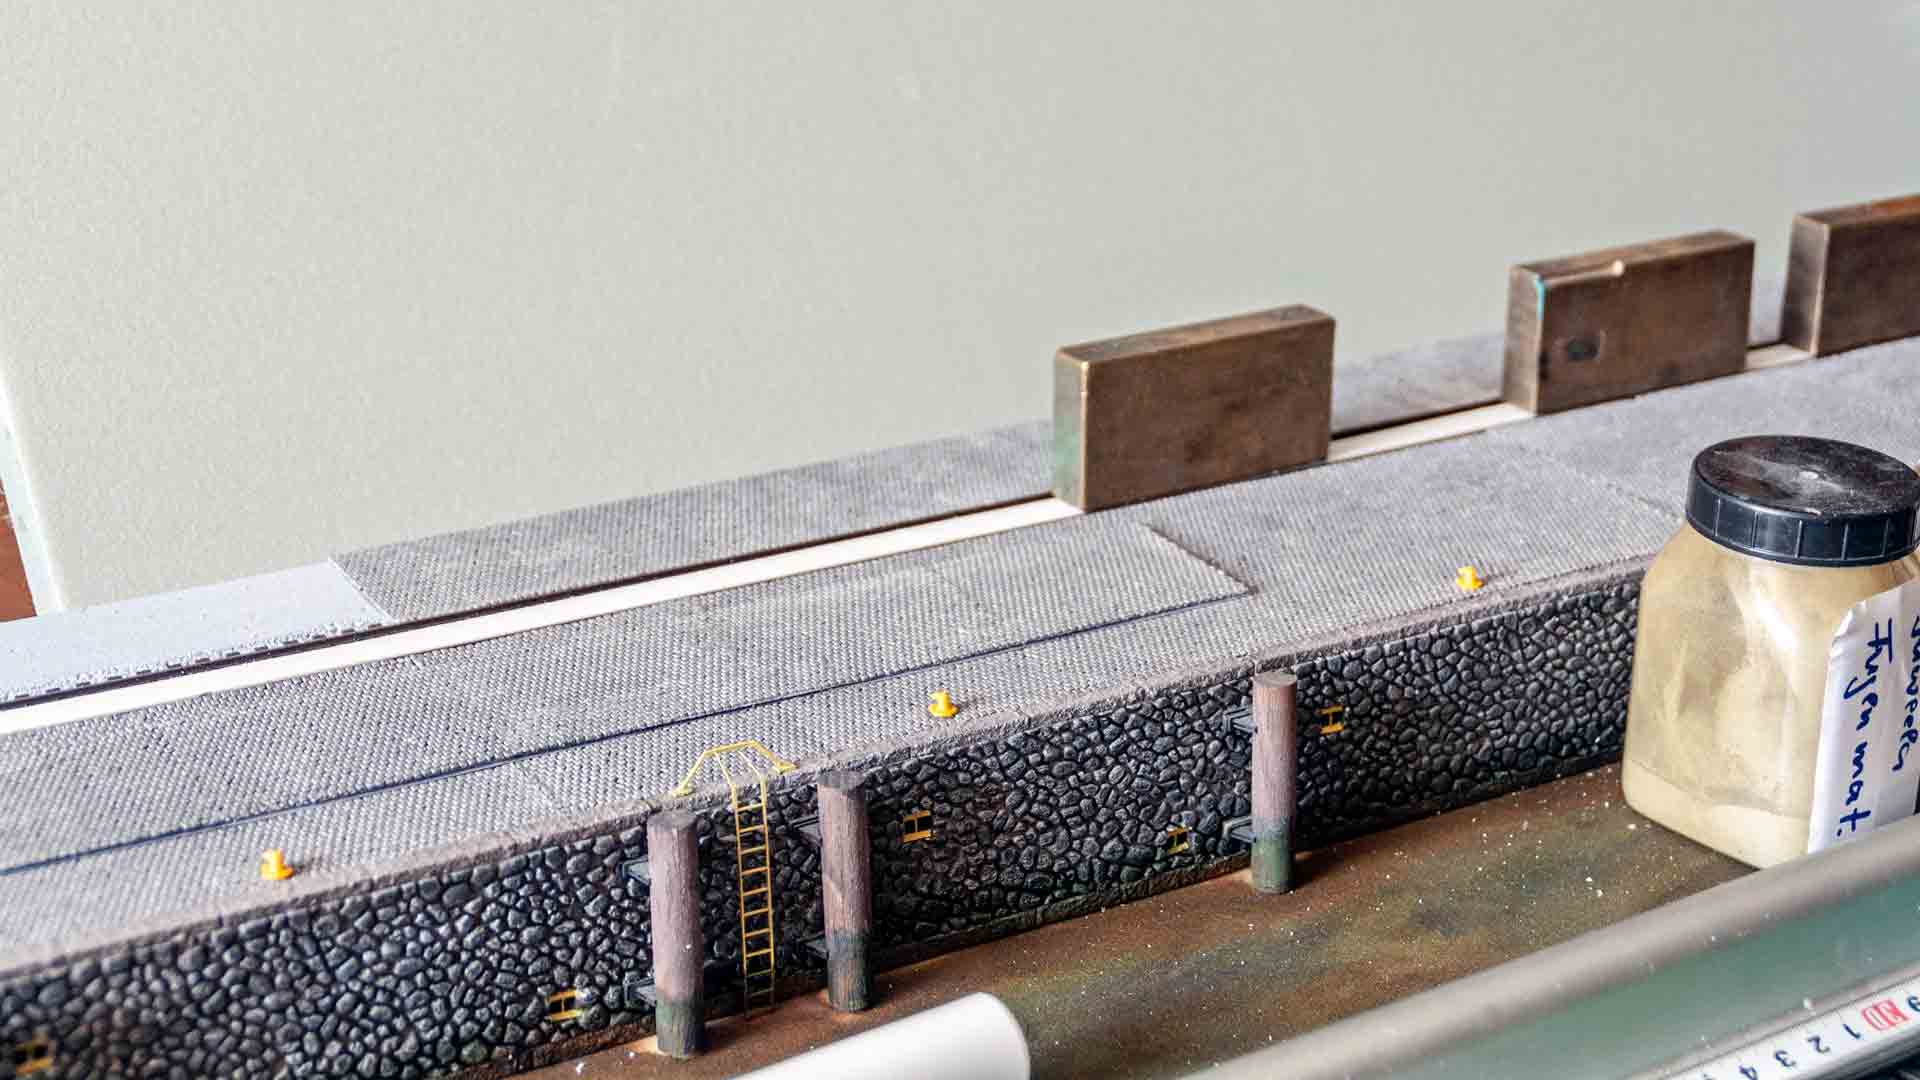
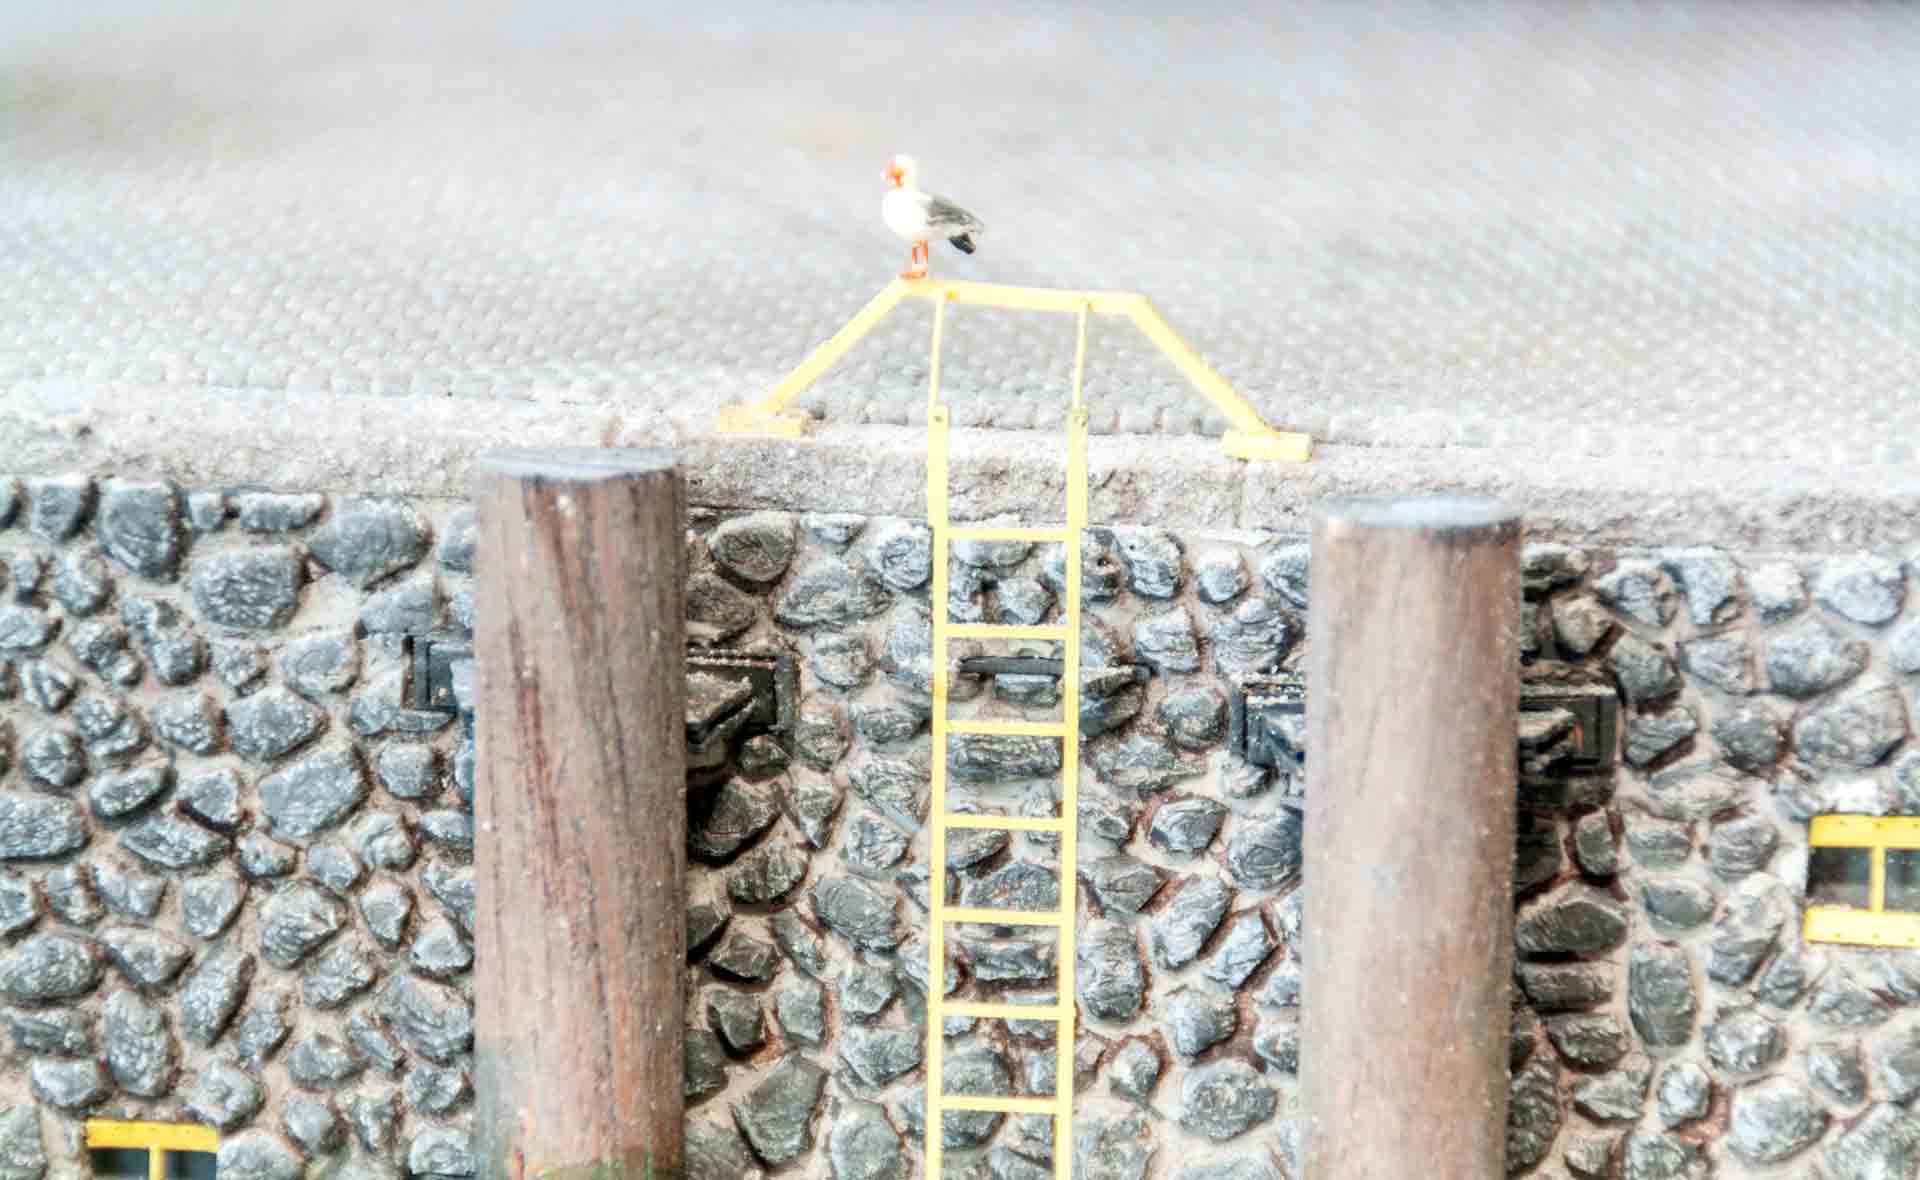
During the drying time of the paint, the construction of the ladders and mooring lines, which are located in the masonry, takes place. After assembly, the paint is applied in a yellow color, which is applied by airbrush. The holders for the dolphins are made from the laser-cut components supplied, and then colored in anthracite. The dolphins themselves are made from round wood, which is cut to the right length so that they are flush with the top edge of the quay wall. After that, they are colored with glaze or highly diluted acrylic paint. The “Stretcher” available for the AirbrushColor4you colors is suitable as a thinner for this.
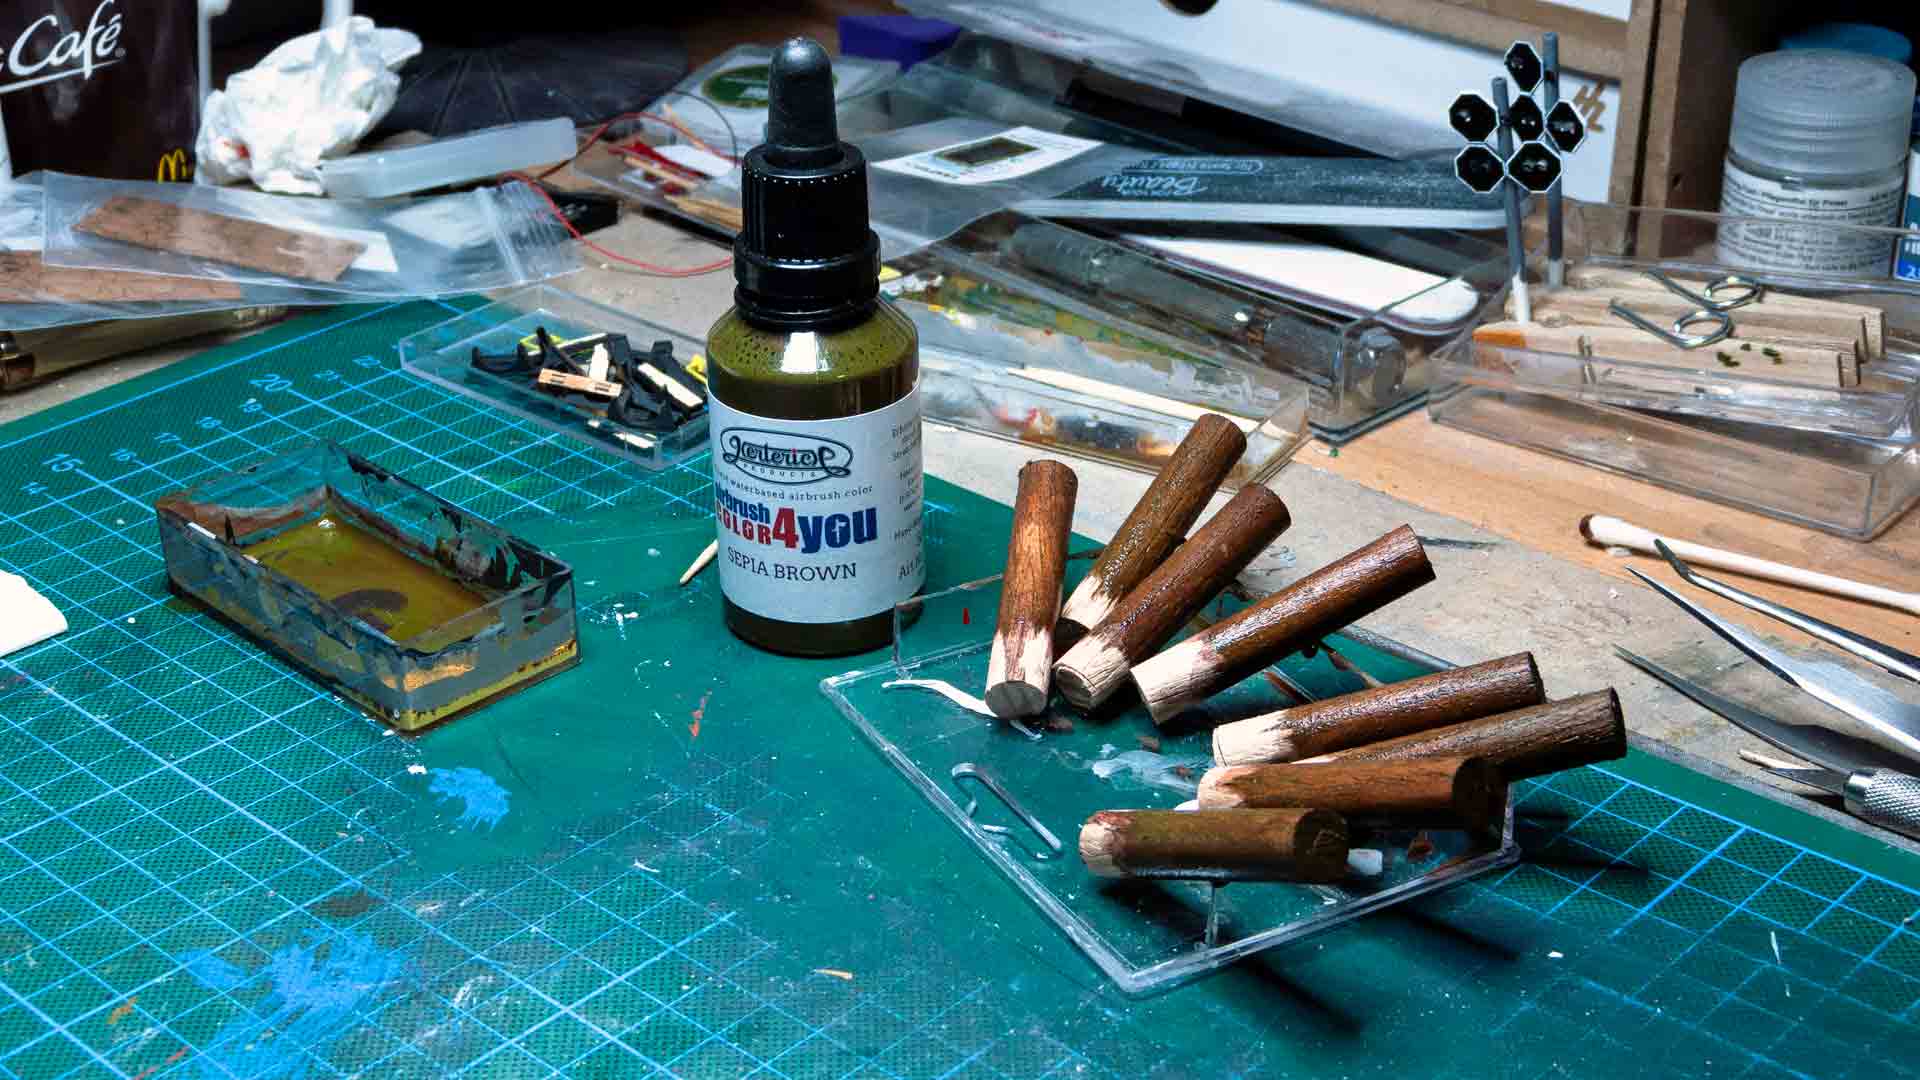
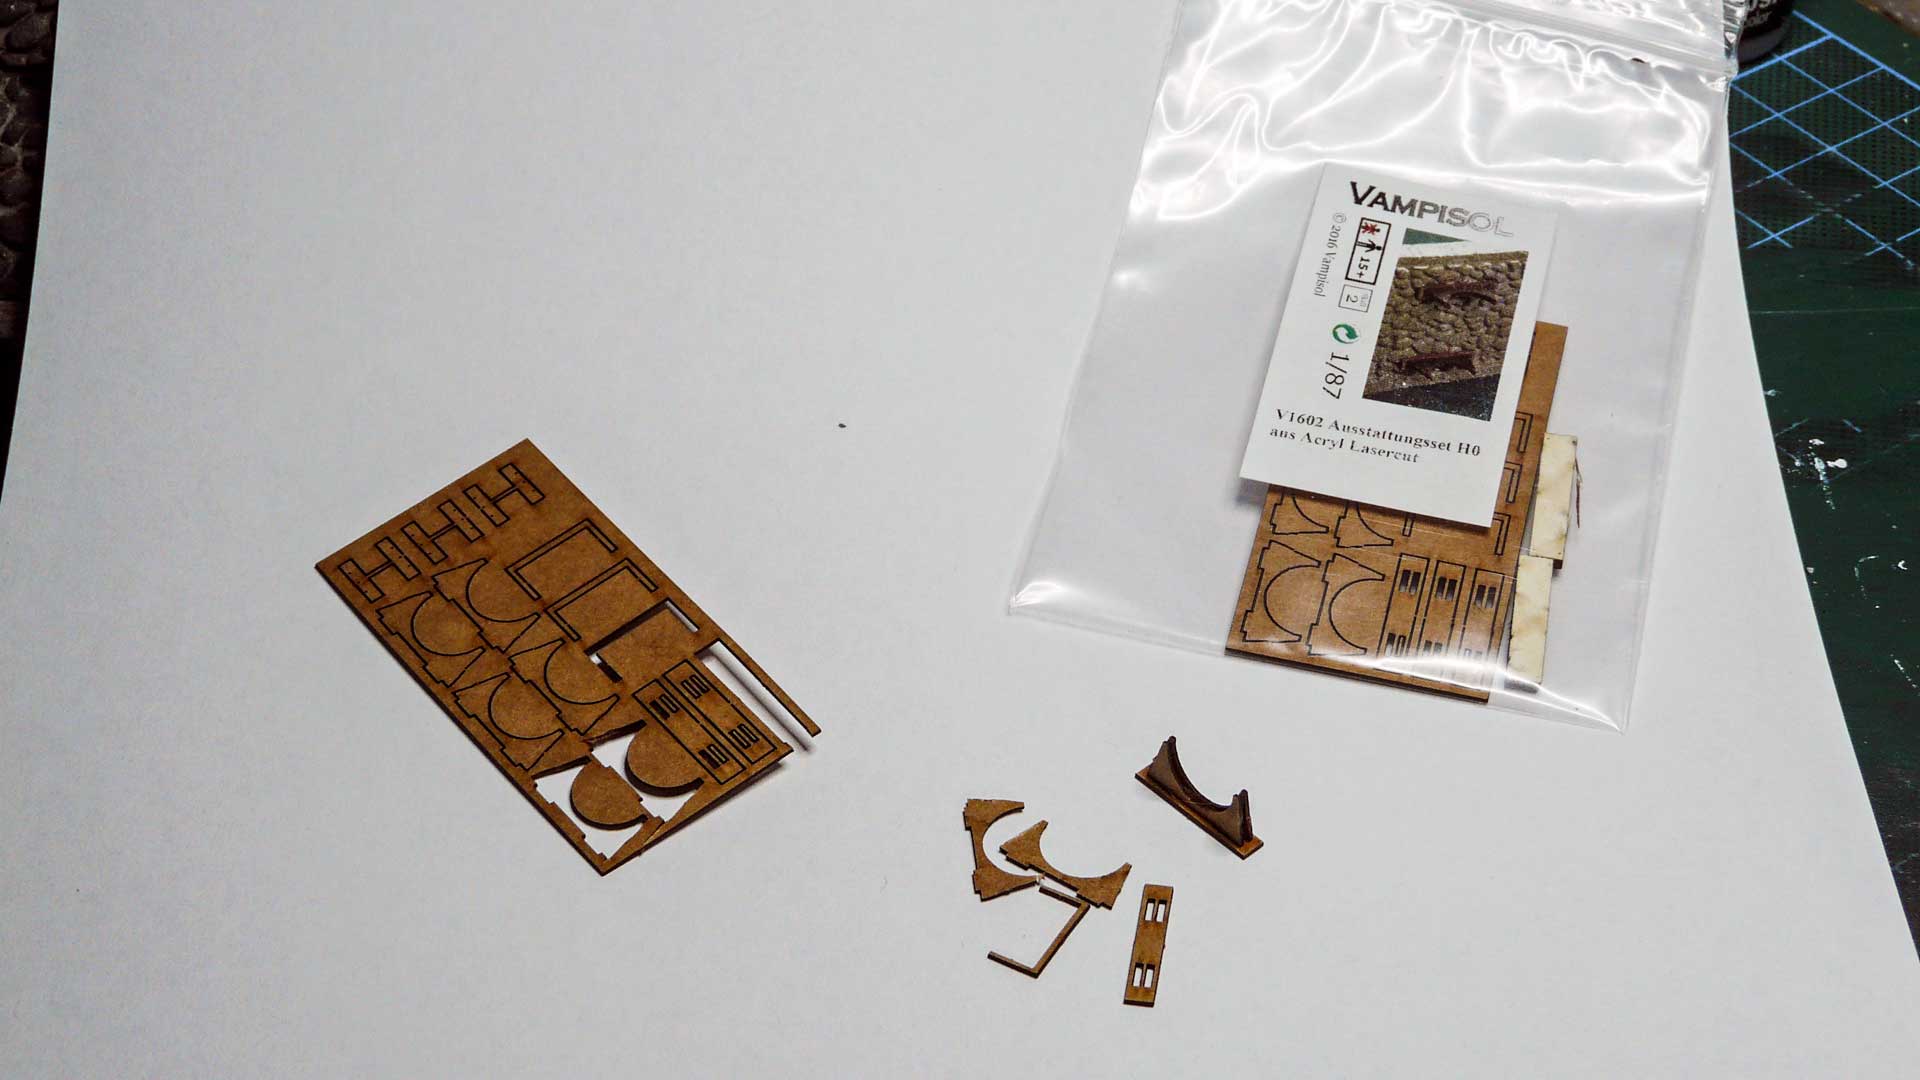
The laser-cut scaffolding parts for the dolphin mounts. The dolphins are made from a 10-mm round wood and have received the first coat of paint.
Completion of the quay
Now, the individual elements of the quay are assembled and glued together with wood glue. With the Hamburg model, you don’t have to worry about the glue joints that occur when the individual elements are joined together – these will be covered later by the dolphins. The assembly is done on a really smooth base, such as a polished stone slab. Once the adhesive bond has hardened, the prepared brackets for the dolphins are glued into the recesses intended for them. These provide additional rigidity to the bonded joints. Once the fixtures are in place, the quay wall is carefully erected, and the dolphins are glued into the fixtures. Thanks to the upright wall, all the dolphins can be placed level on the stone slab, so that there will be no gap between the base plate and the dolphins later. The wall can then be carefully lifted in one piece to the intended location and fixed in place.
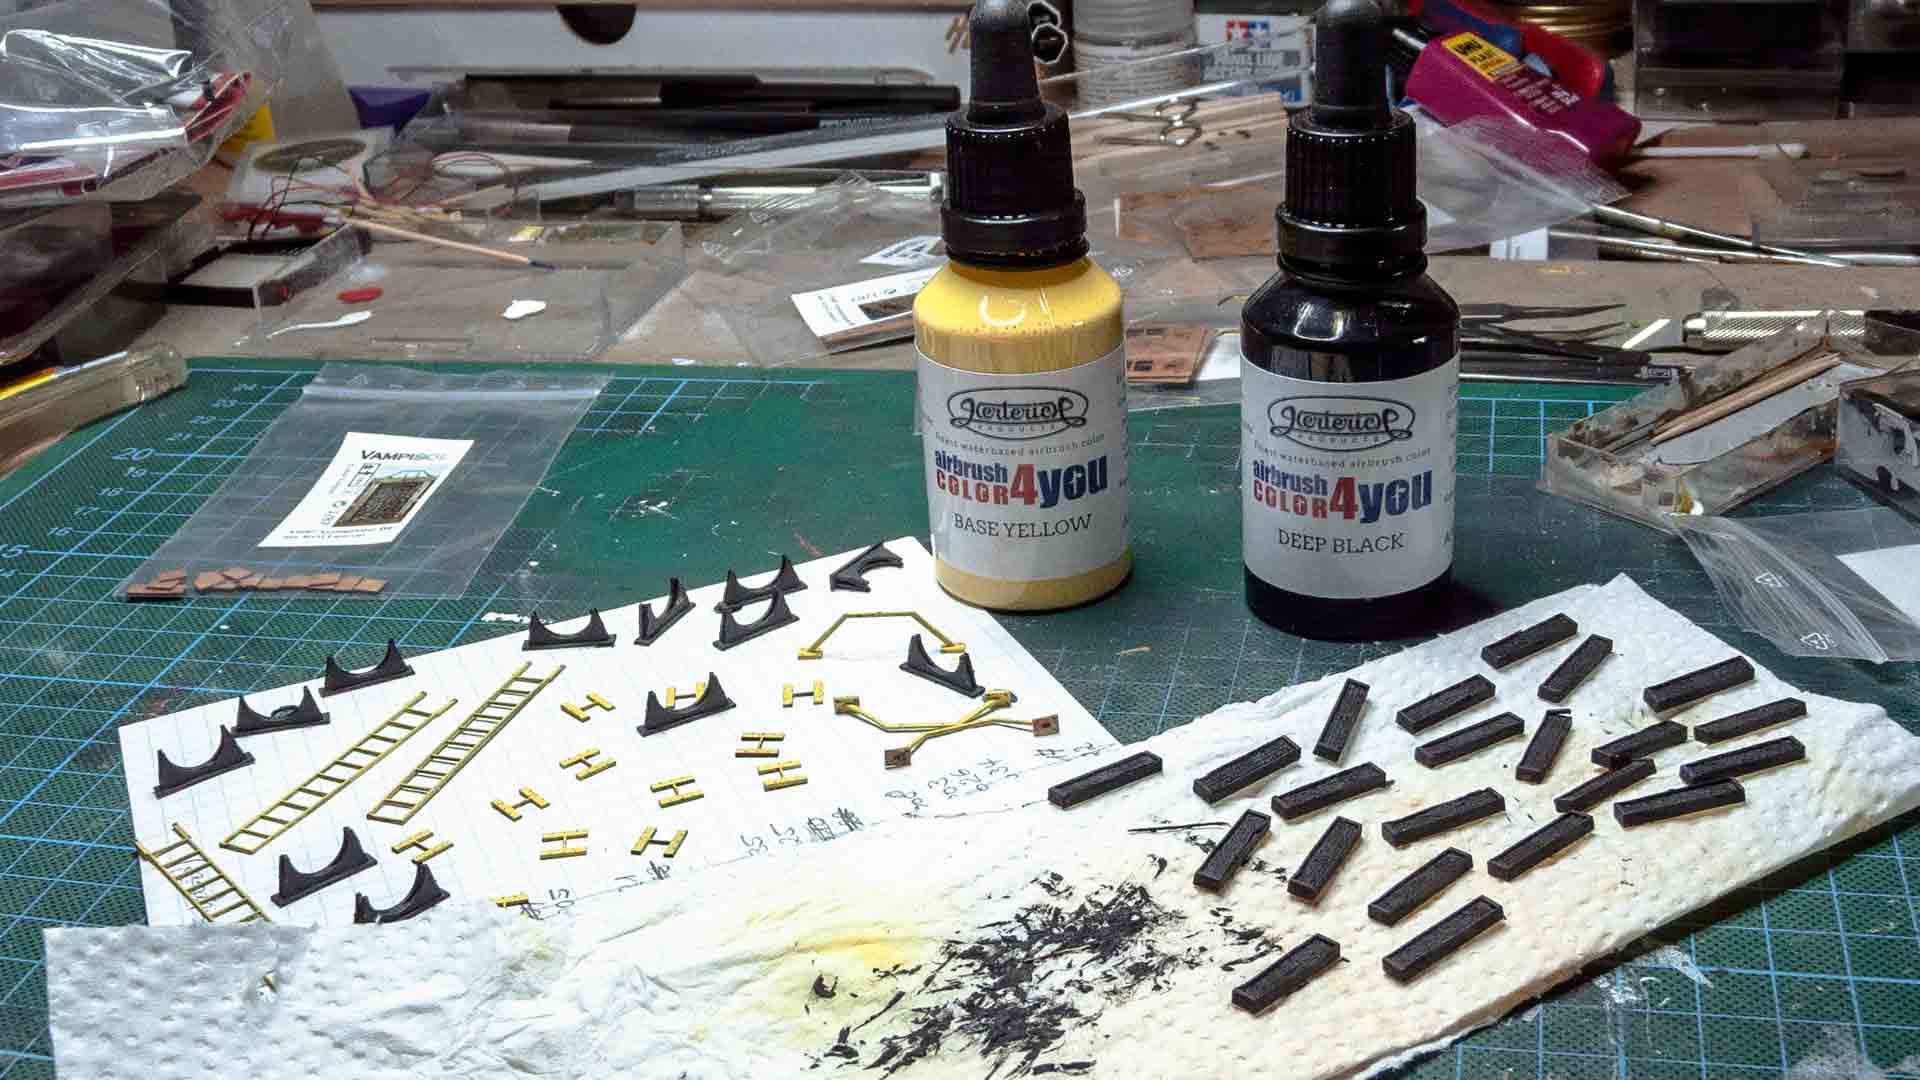
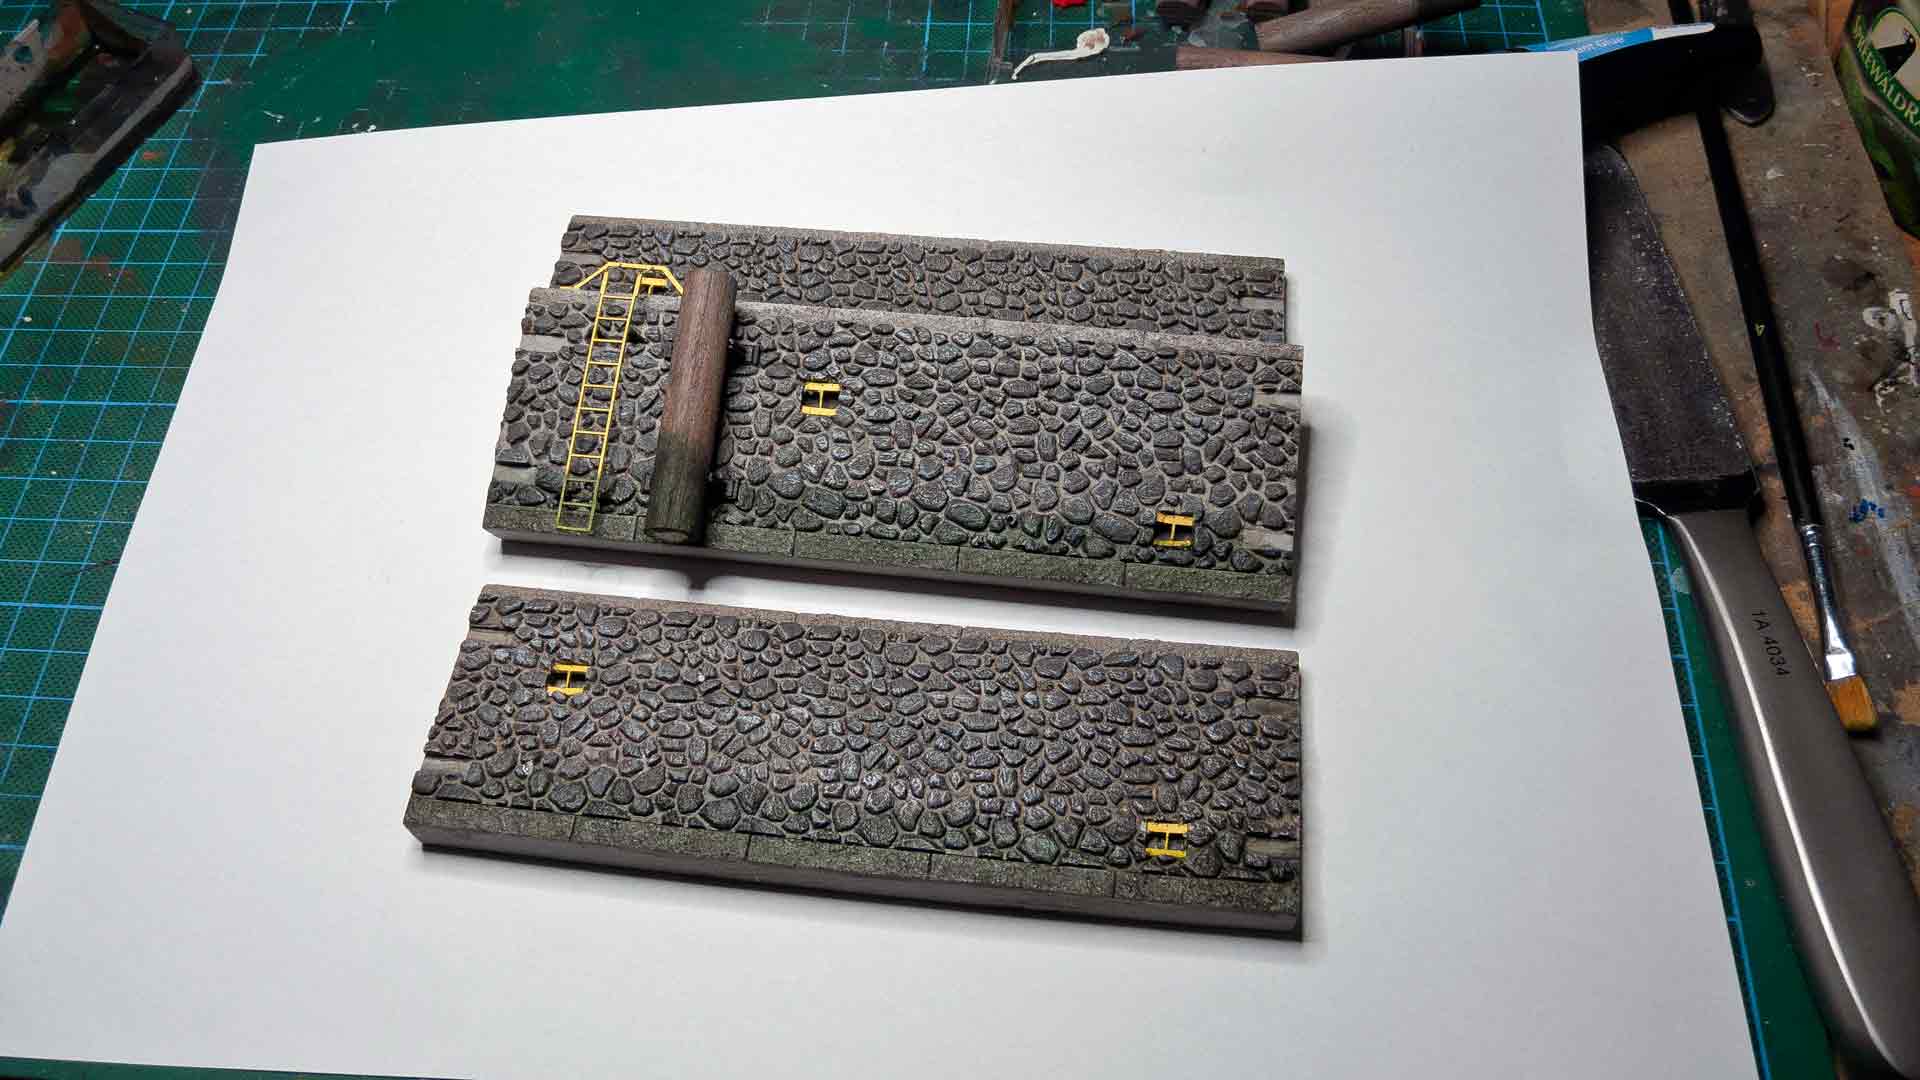
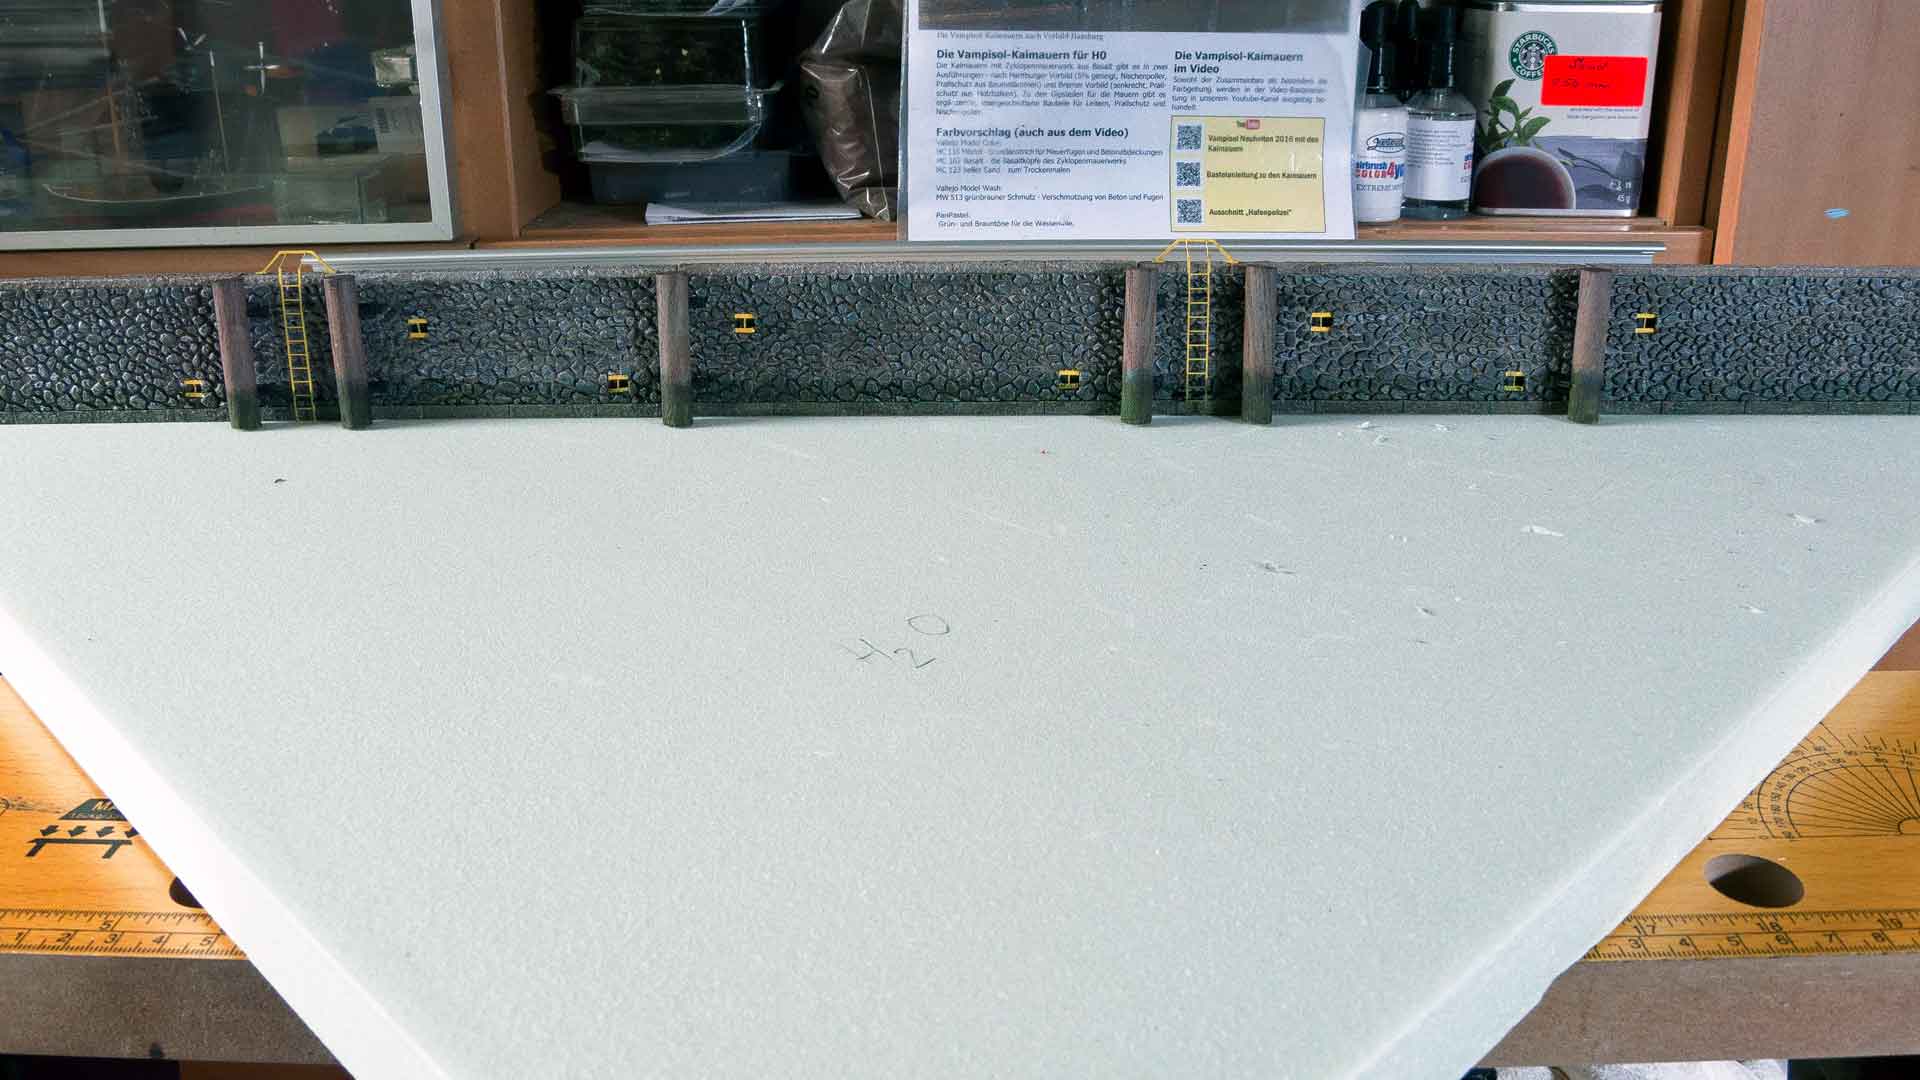
First trial positioning of the parts for the quay wall to check them for later installation. Ladders, mooring lines, and dolphin mounts were colored with an airbrush (Infinity). The completed quay wall has now been placed and fixed on the base plate of the diorama.
Finally, the wall and the dolphins are painted in various diluted green tones of the acrylic paints used later for the water and in the area near the water to create a hint of moss on the wall and the dolphins. Taking a look at photos of the original is helpful for this purpose.
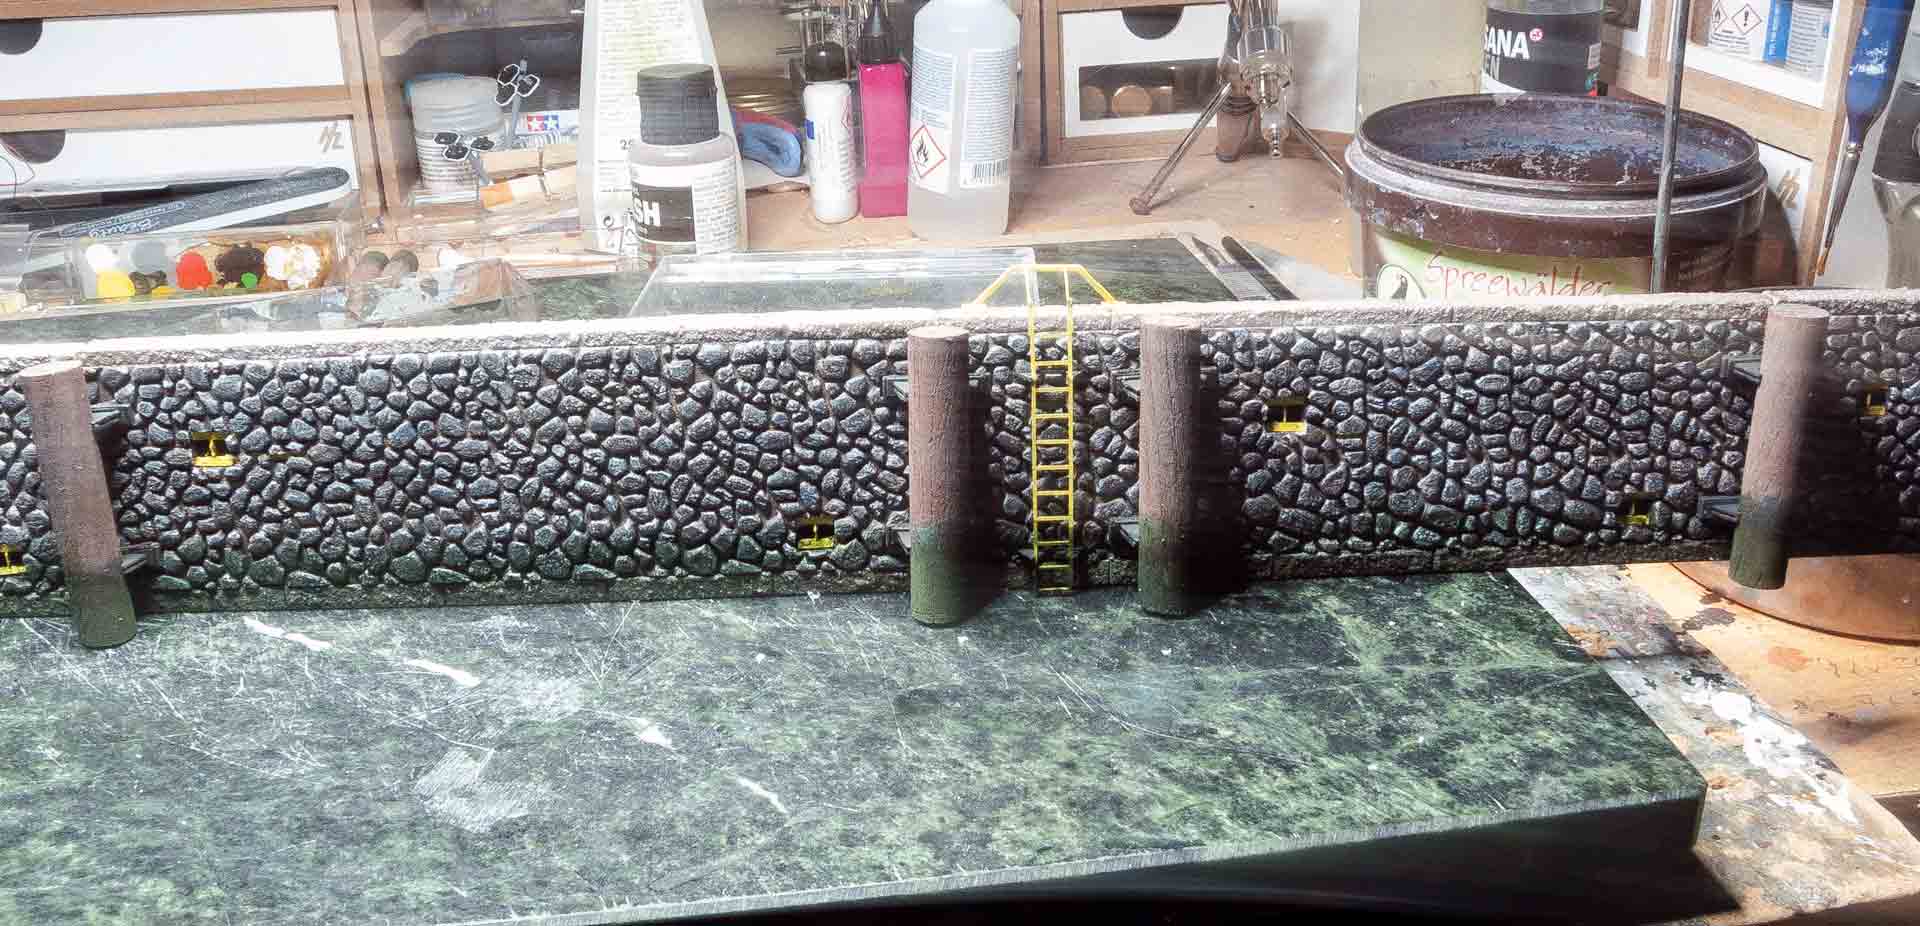
The individual elements are glued together on the sanded stone slab. This guarantees correct alignment. The quay wall has received its mossing by means of paint.
Cargo quay with railway track
As a basis for the operating area of the quay, 2.4-cm thick Styrodur pieces are cut to size and glued to each other and to the base plate using solvent-free all-purpose adhesive. Until the glue is dry, everything is weighted down well. Then, the course of the track is drawn on the Styrodur and – according to the sleeper and rail height – a suitable recess is worked out of the Styrodur using a narrow fine rasp. Then, the track – flex track from Tillig Elite – is aligned and fixed in place selectively with superglue. Finally, everything is additionally fixed with ballast glue.
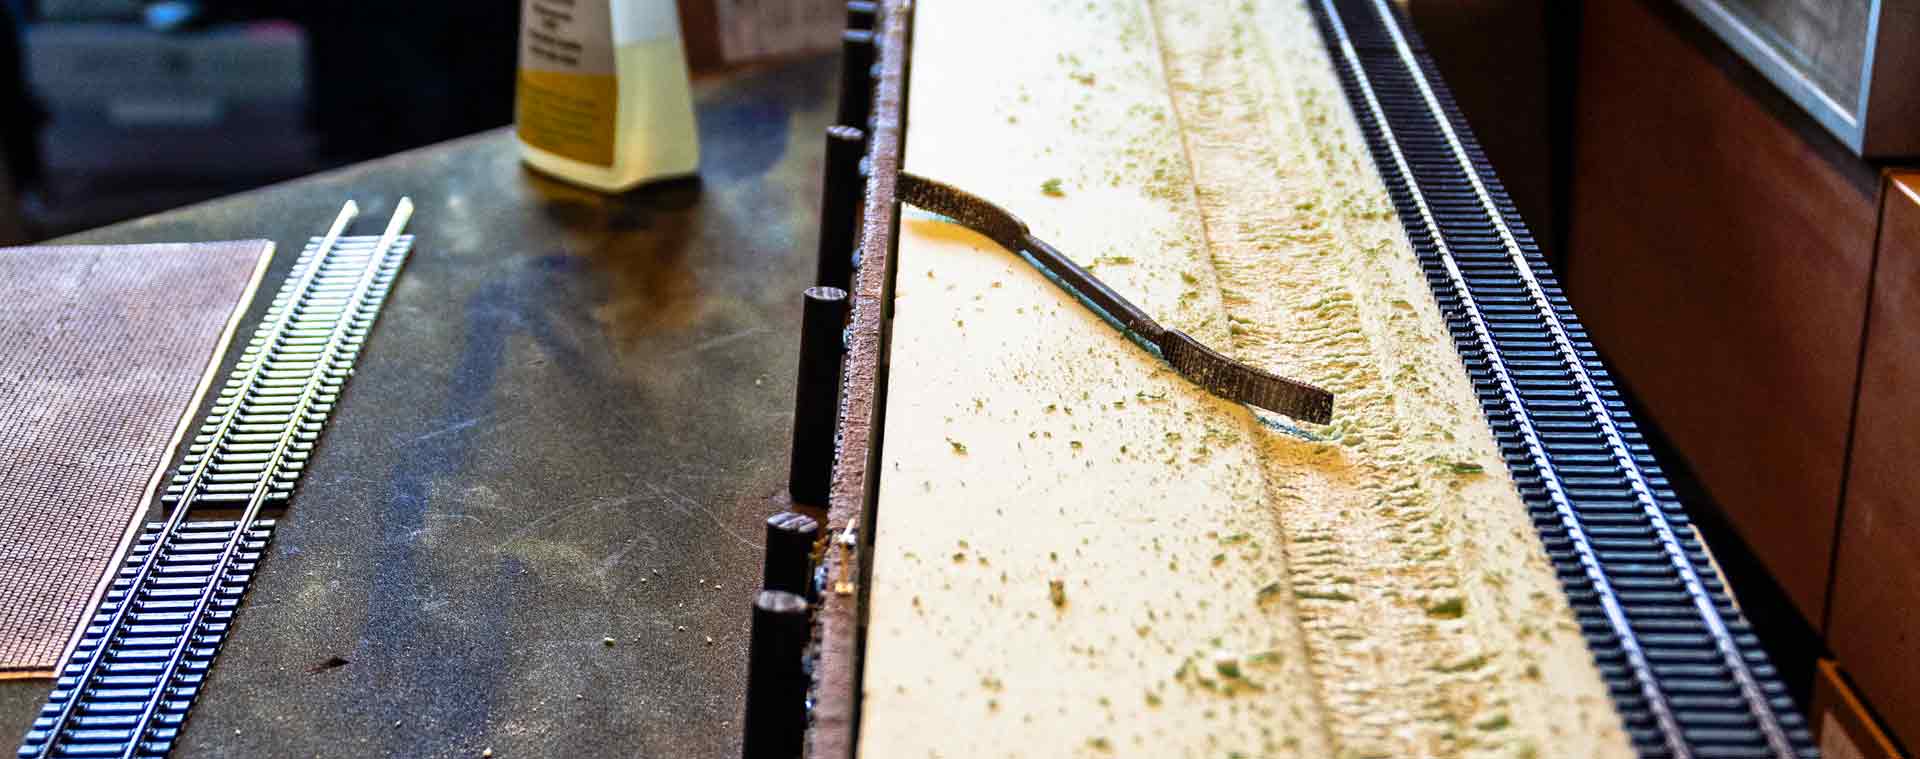
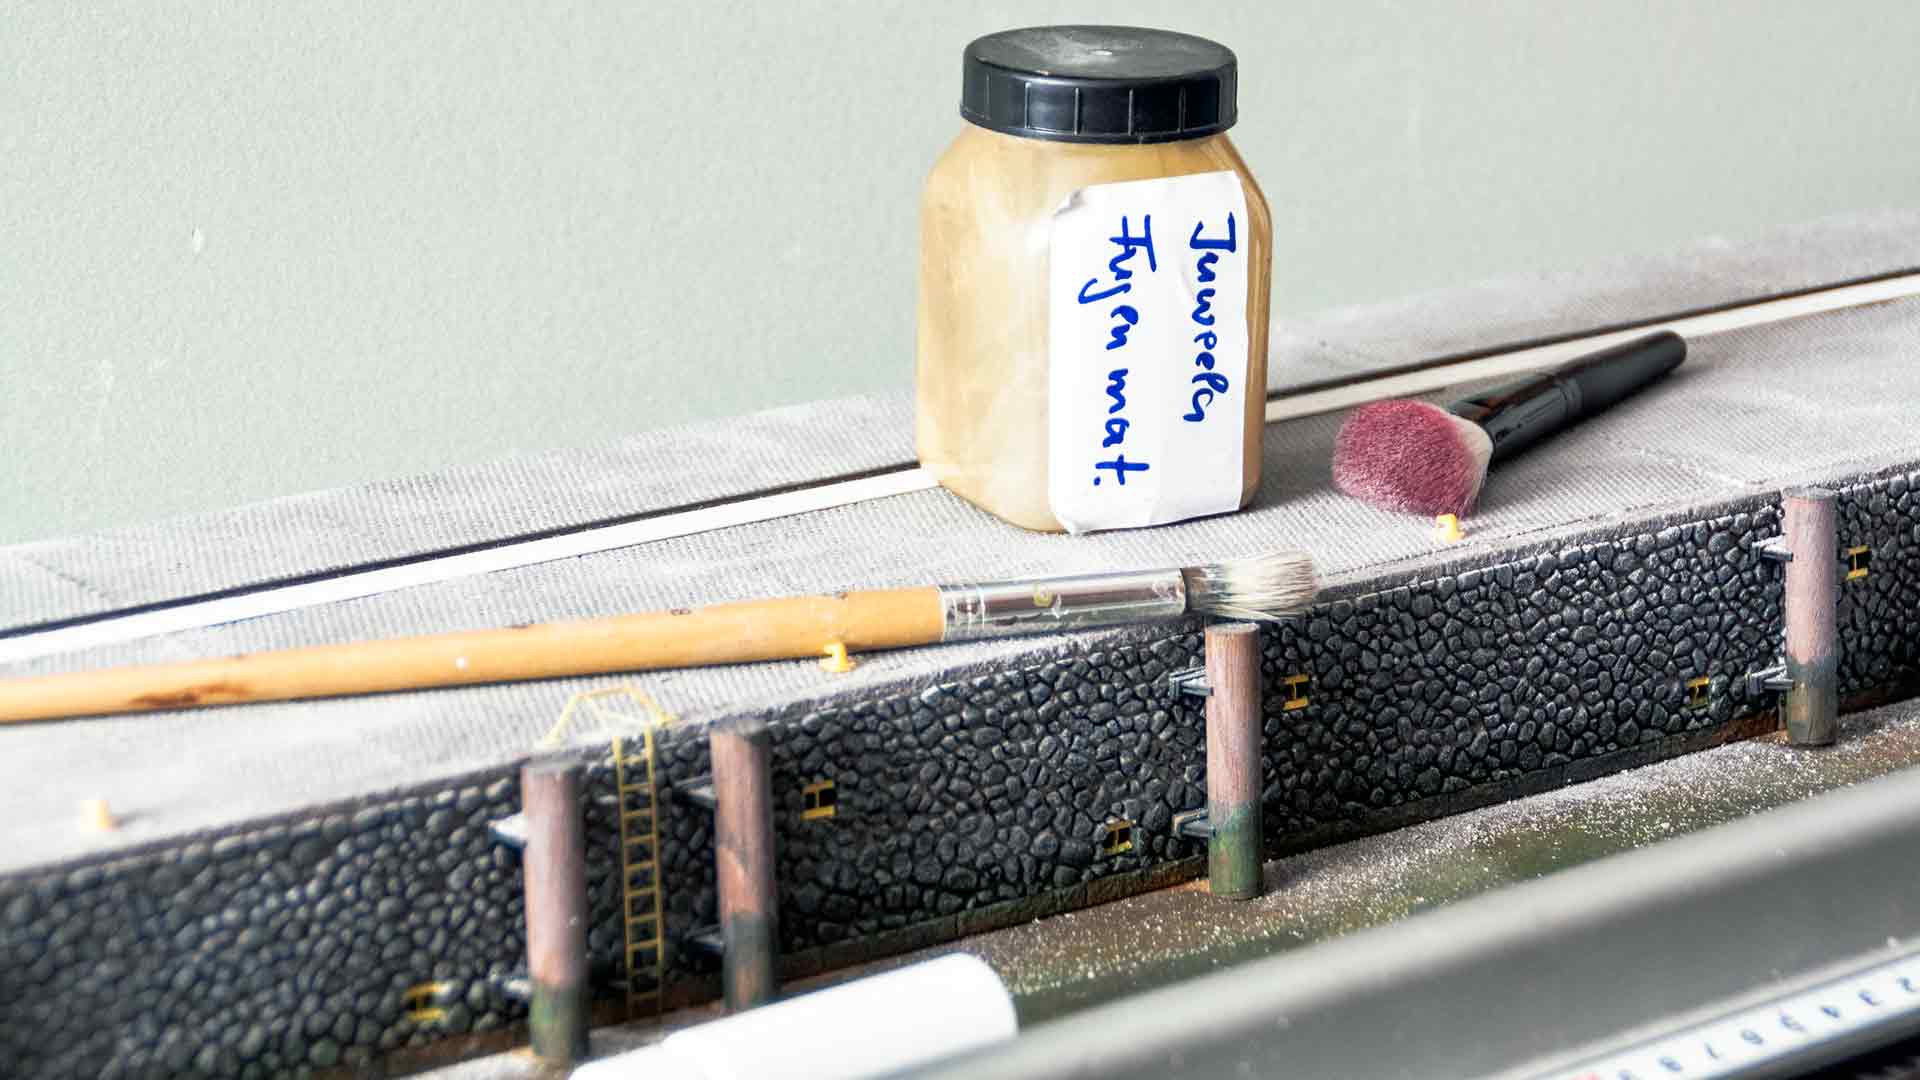
The design of the traffic areas for road vehicles is done with the Flexyway “old town” pavement from Juweela, which is cut to fit the track and quay wall edge without any gaps. The concrete slabs between the tracks are replicated using polystyrene strips of the appropriate thickness. To do this, indicated parting lines are filed in at specified intervals using a triangular file. These panels are then given a coat of dark concrete paint. Now, the strips can be glued to the sleepers between the small irons using solvent-based all-purpose adhesive. Until the adhesive hardens, everything is weighted down accordingly. The joints between the paving stones are now “grouted” with Juweela’s grouting powder, which is then wetted with a fine water spray so that a permanent joint filling results after drying. Finally, the rails are given a “rust coating” using the Infinity airbrush.
Creating the water
The later water surface first receives a shaded coat of paint in various shades of green, blue, and brown, which is deliberately applied in a somewhat streaky manner. Now is also the time to glue the completed trawler onto the intended surface. In the next step, AK Water Gel “Swamp Green” is dabbed onto the entire water surface with a flat brush; make sure that an even wave formation is achieved. After curing, the side waves created by the ship’s motion and the bow waves are modeled along the hull using AK Water Gel Effects (AK8007). After the paste has dried, the entire water surface is modeled using AK Water Gel Transparent following the same procedure. The two different texture pastes create a plastic depth effect of the water surface. In the last step, the “Water Waves” paste from Woodland is used to further strengthen the waves in the bow area and on the sides of the hull. This paste is also used to reproduce the stern wave, making sure that the change in direction is also reproduced correctly. Finally, “Trafficwhite” was used to reproduce small spray crowns using the roughening technique.
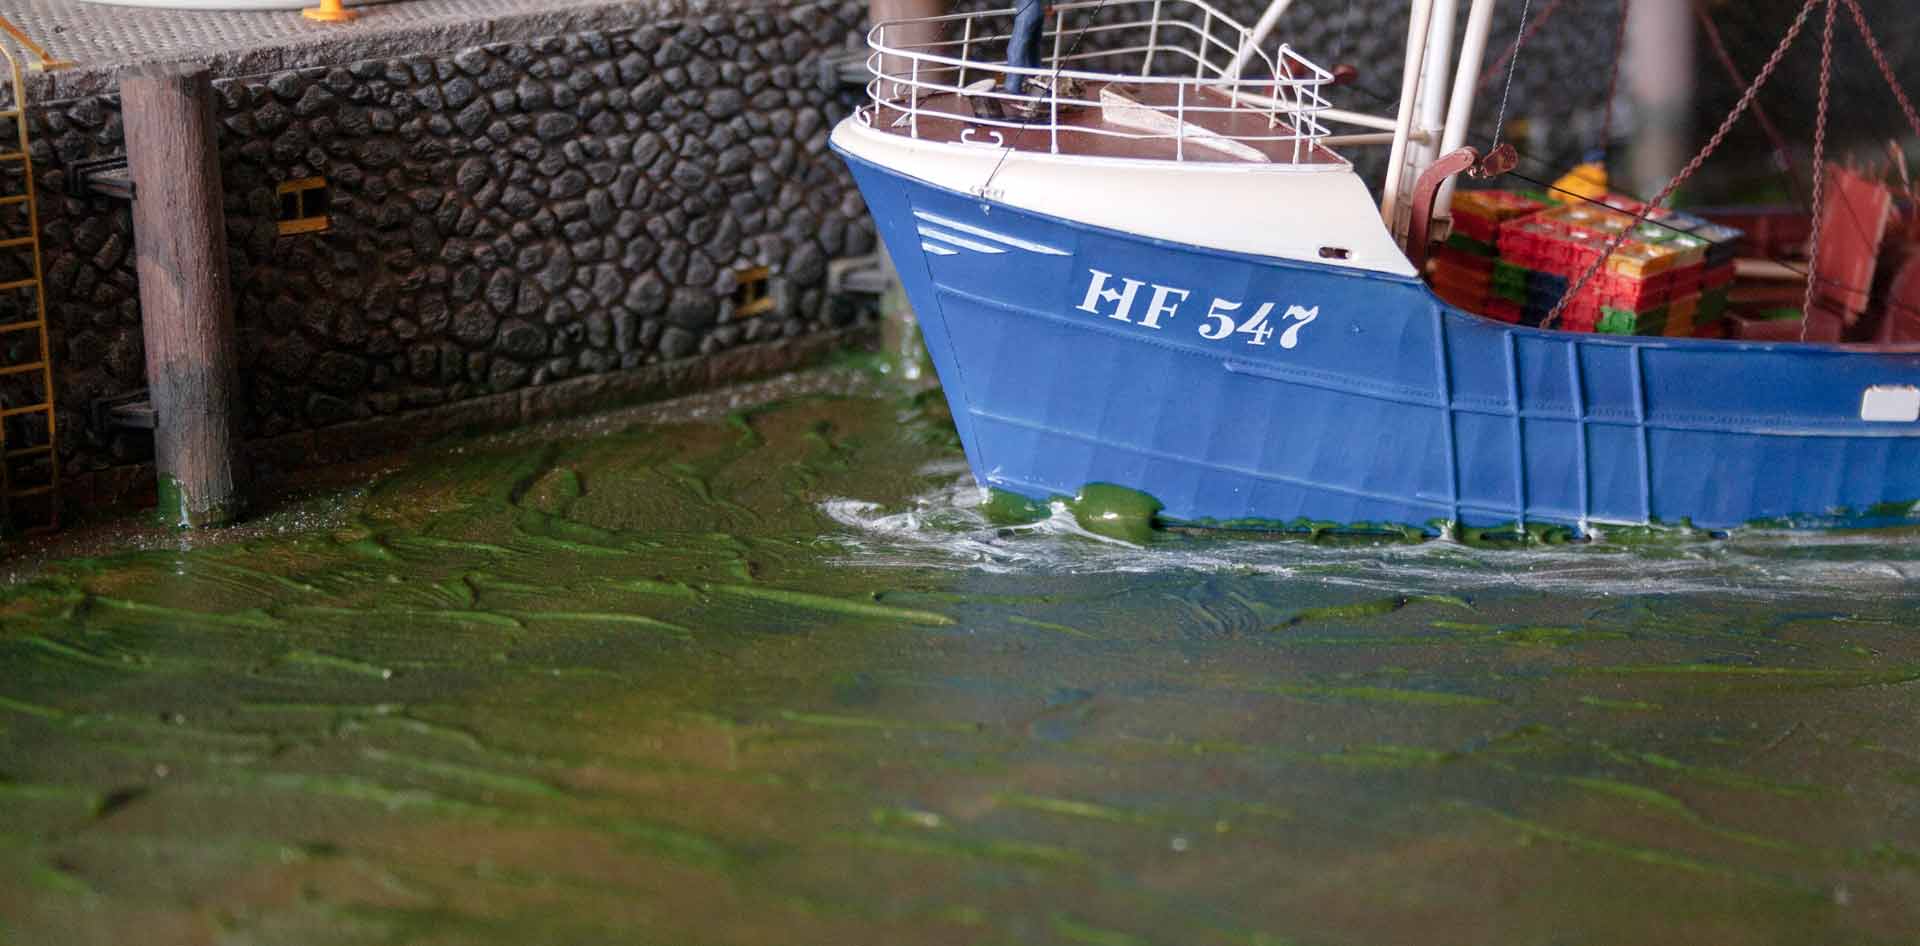
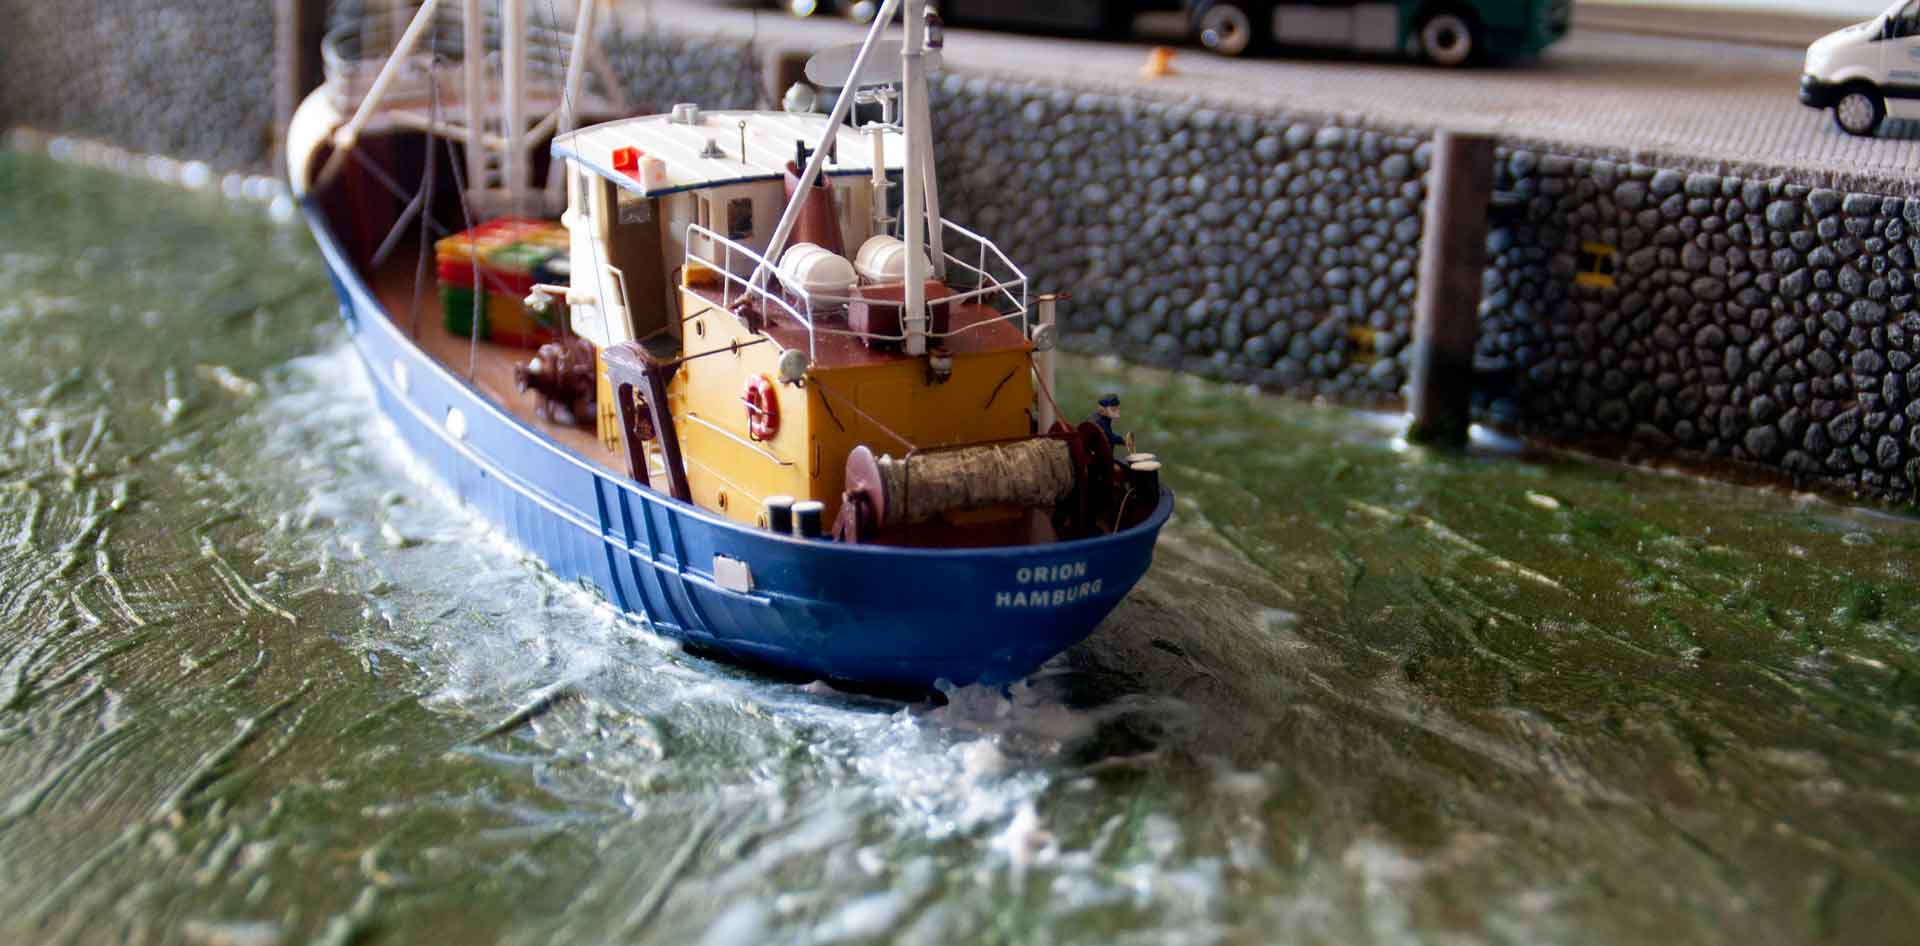
The bow wave is modeled with Water Effects (AK), and the foam crowns are created with AirbrushColor4you.
Finish
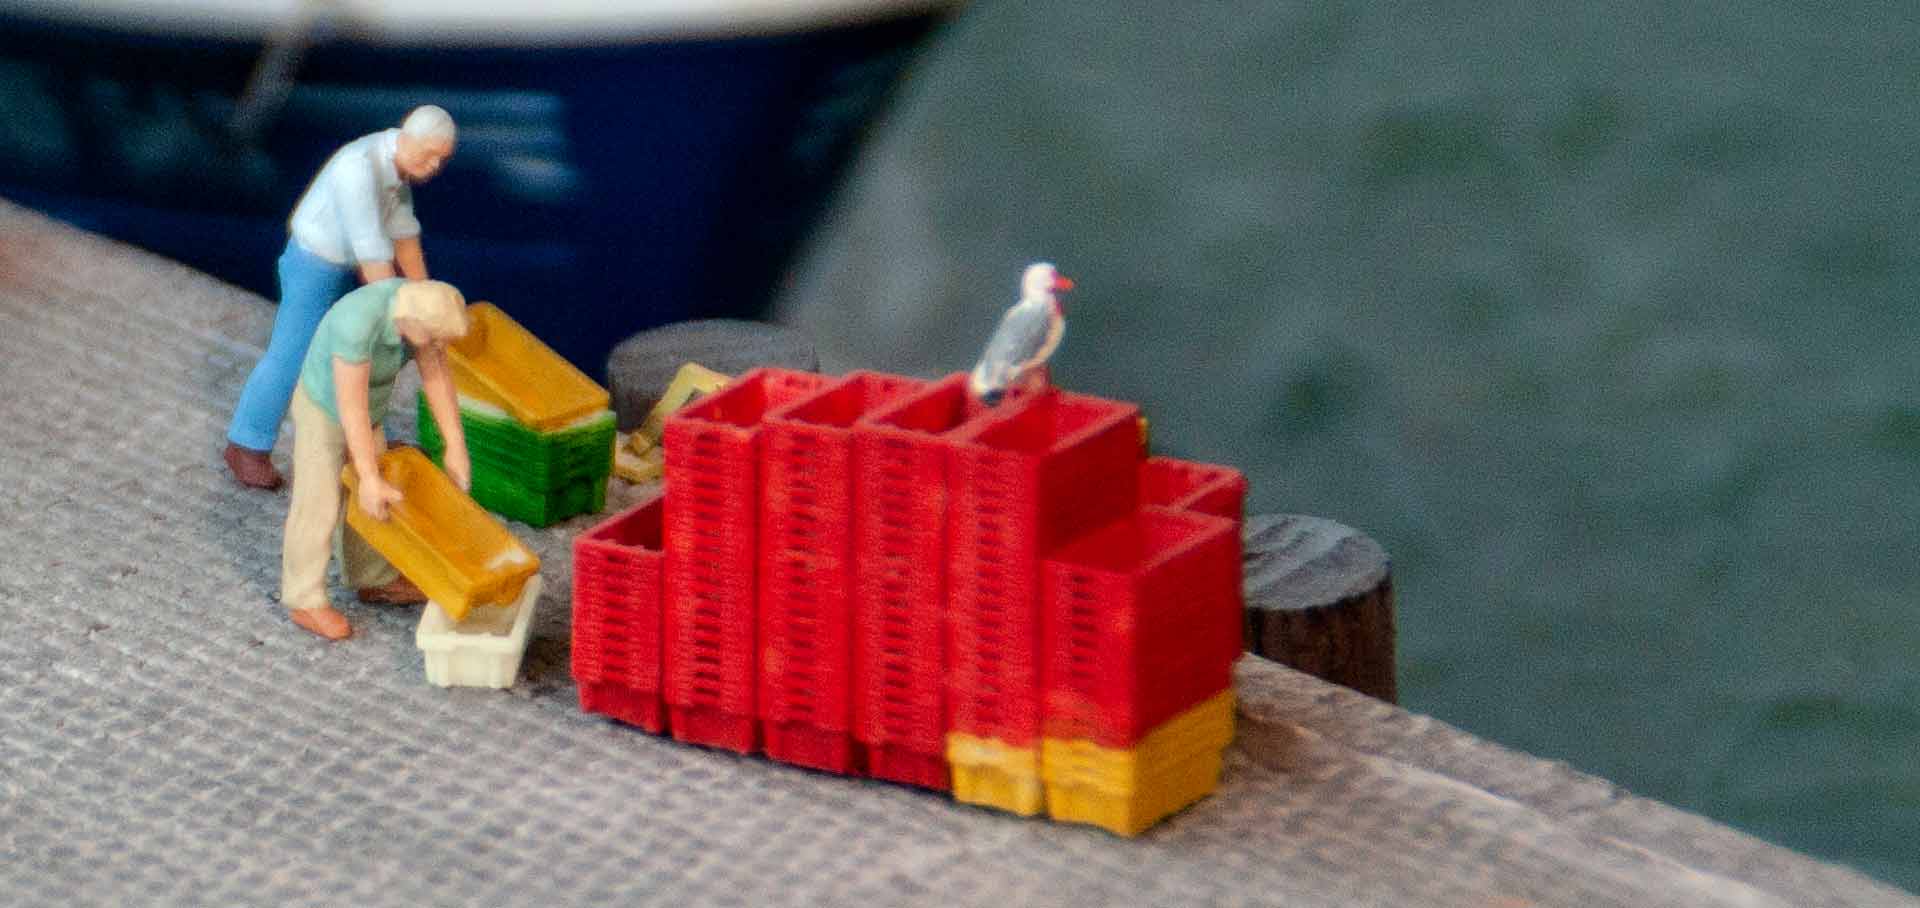
The bollards for mooring the ships along the quay wall are from Artitec and are given a yellow warning coating before being glued into the showpiece. In addition, refrigerated vehicles are waiting at the dock to take over the full fish boxes after the trawler has docked, and bring them to the auction or perhaps directly to the consumers. Furthermore, a sales truck (food truck) of the shipping company also finds its place. The interior including the fish is made by mmh-Modellbau. Here, several mini people are waiting to be served. On certain days, the fish delivered by the cutters are sold directly to private customers. This is possible in this harbor basin, as the harbor railroad has already been shut down. Another car – presumably that of the shipping company’s operations manager – also finds its place. In the mooring area, the empty fish boxes are already ready for loading, because this ship is to set sail again after a short time. The full as well as the empty fish boxes come from Artitec and are painted individually. In the background, another crew member arrives – presumably the relief of a fisherman. The builder has also arrived on the quay with his family. This is made possible by Schrumpfmich.de. The “shrinkers” model miniature people according to a model photo and the indication of the size of the persons concerned: a highlight on every diorama. All lettering and license plates used on the road vehicles come from mmh-Modellbau, who produce them to order. This also adds a bit of individuality to the picture. And one thing must not be missing on a harbor diorama: seagulls! Here, we have the large silver seagulls from Artitec – the so-called Seagullus Artitecus.
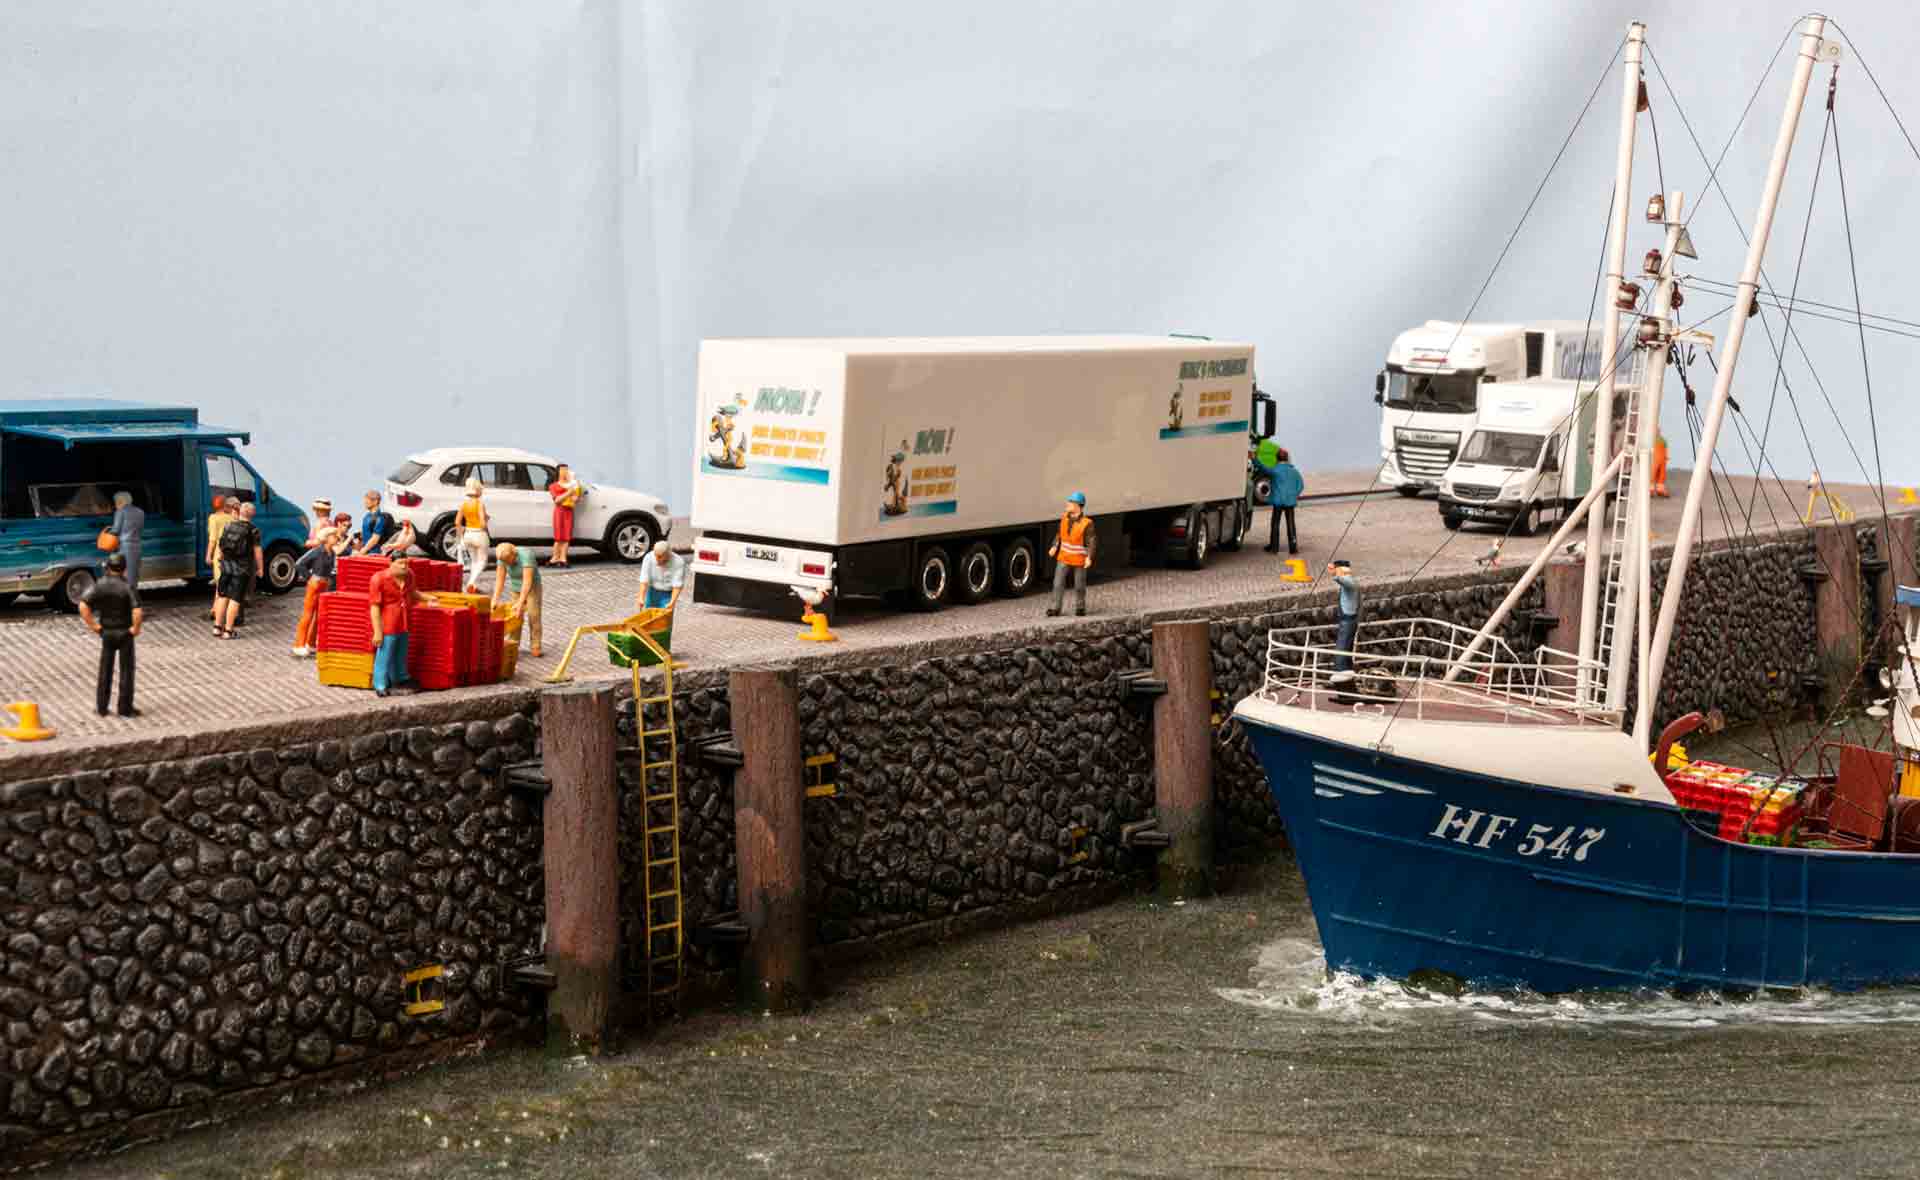
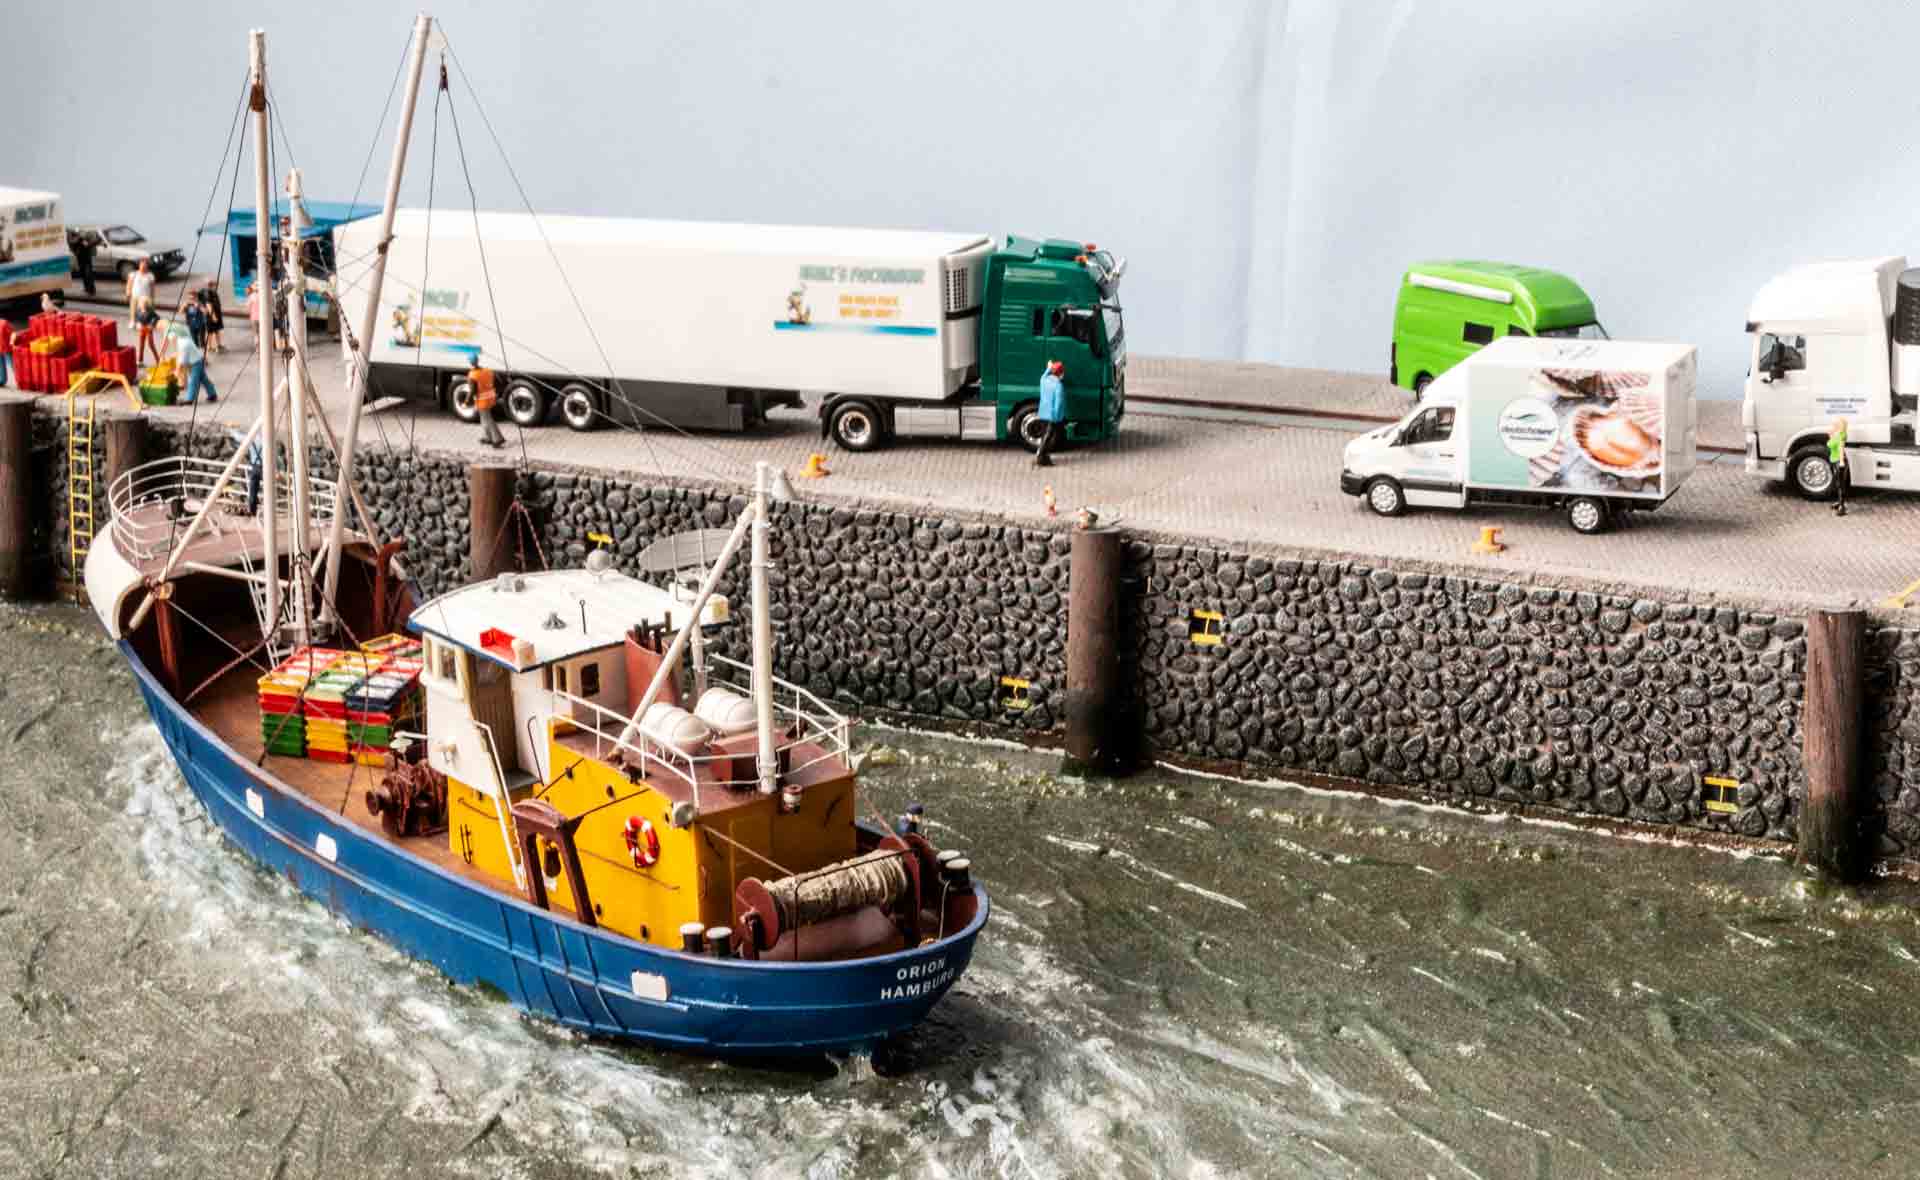
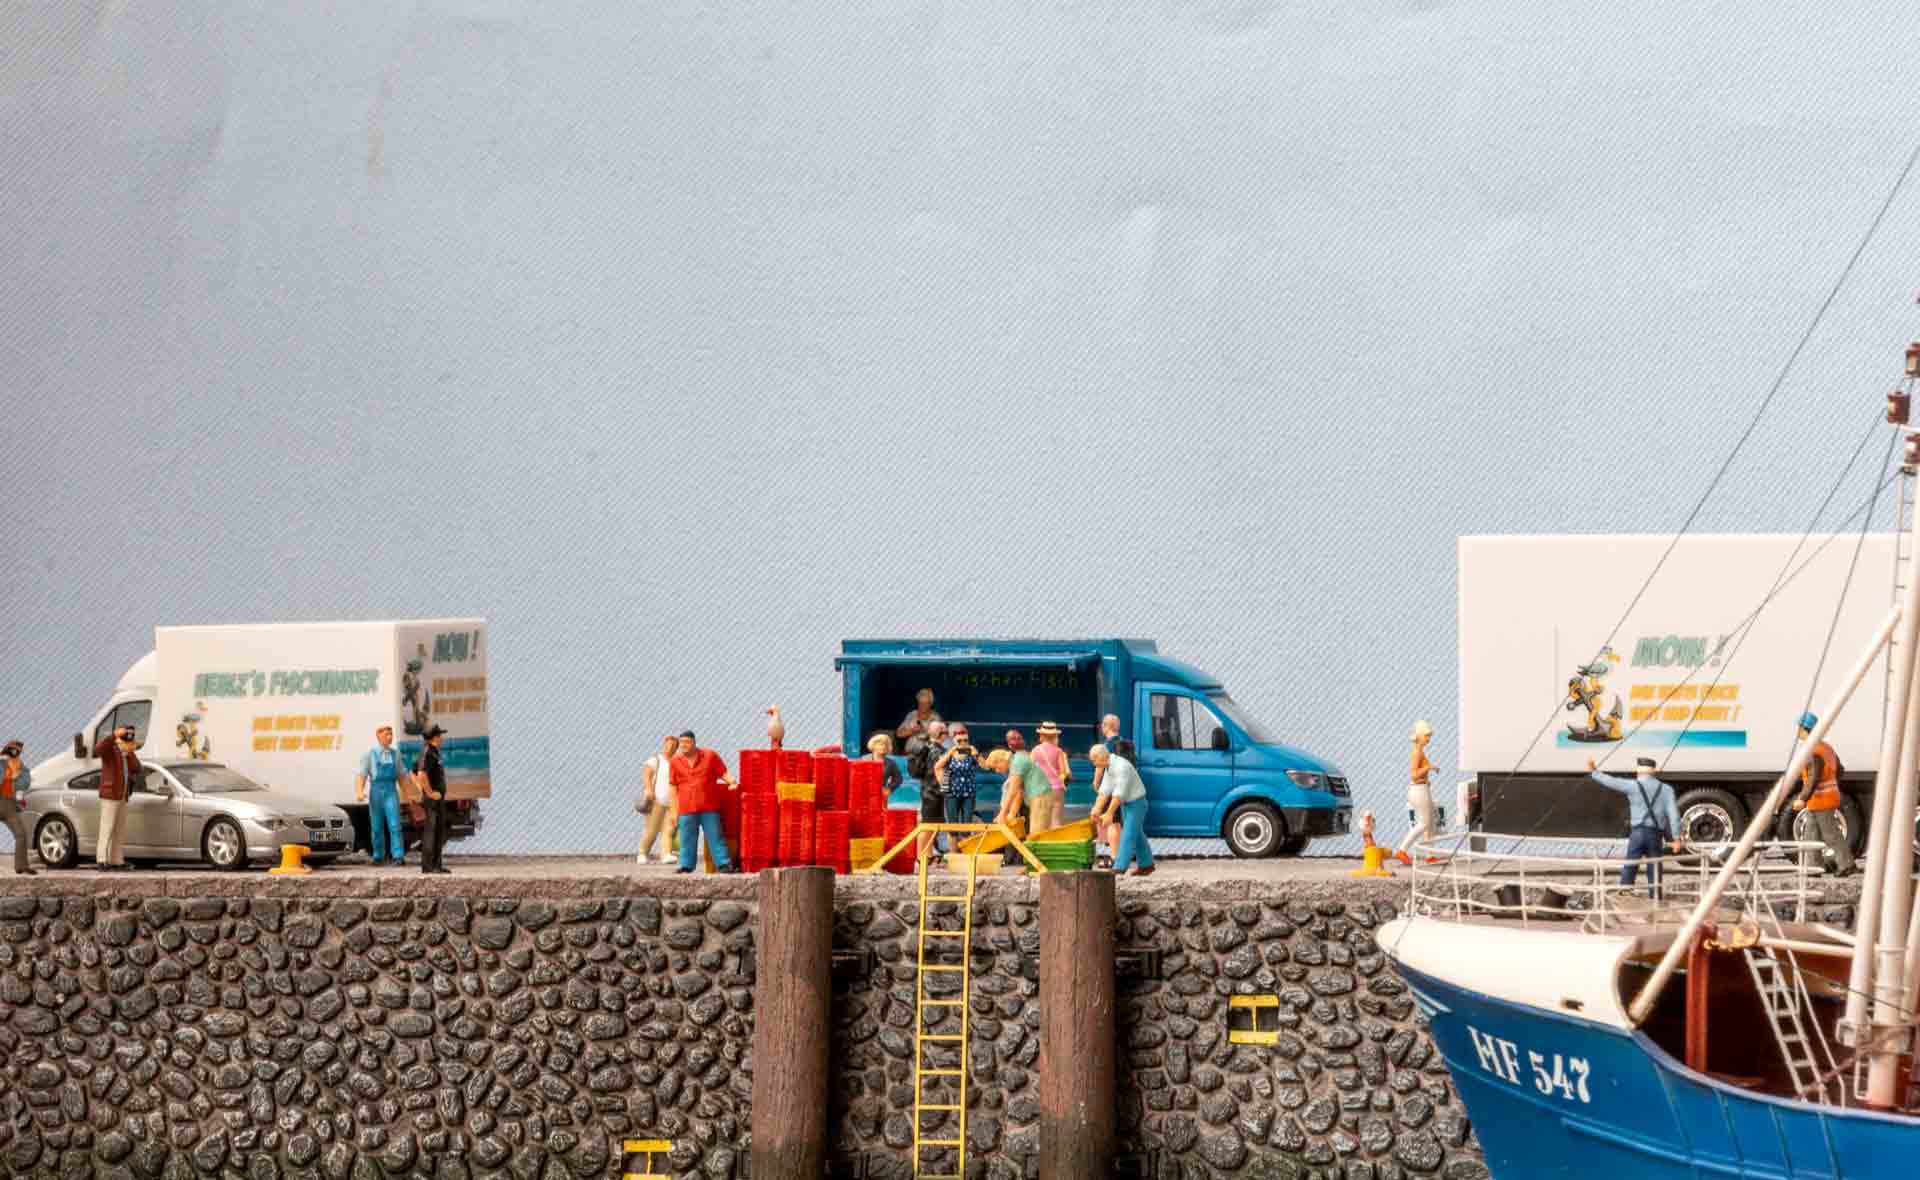
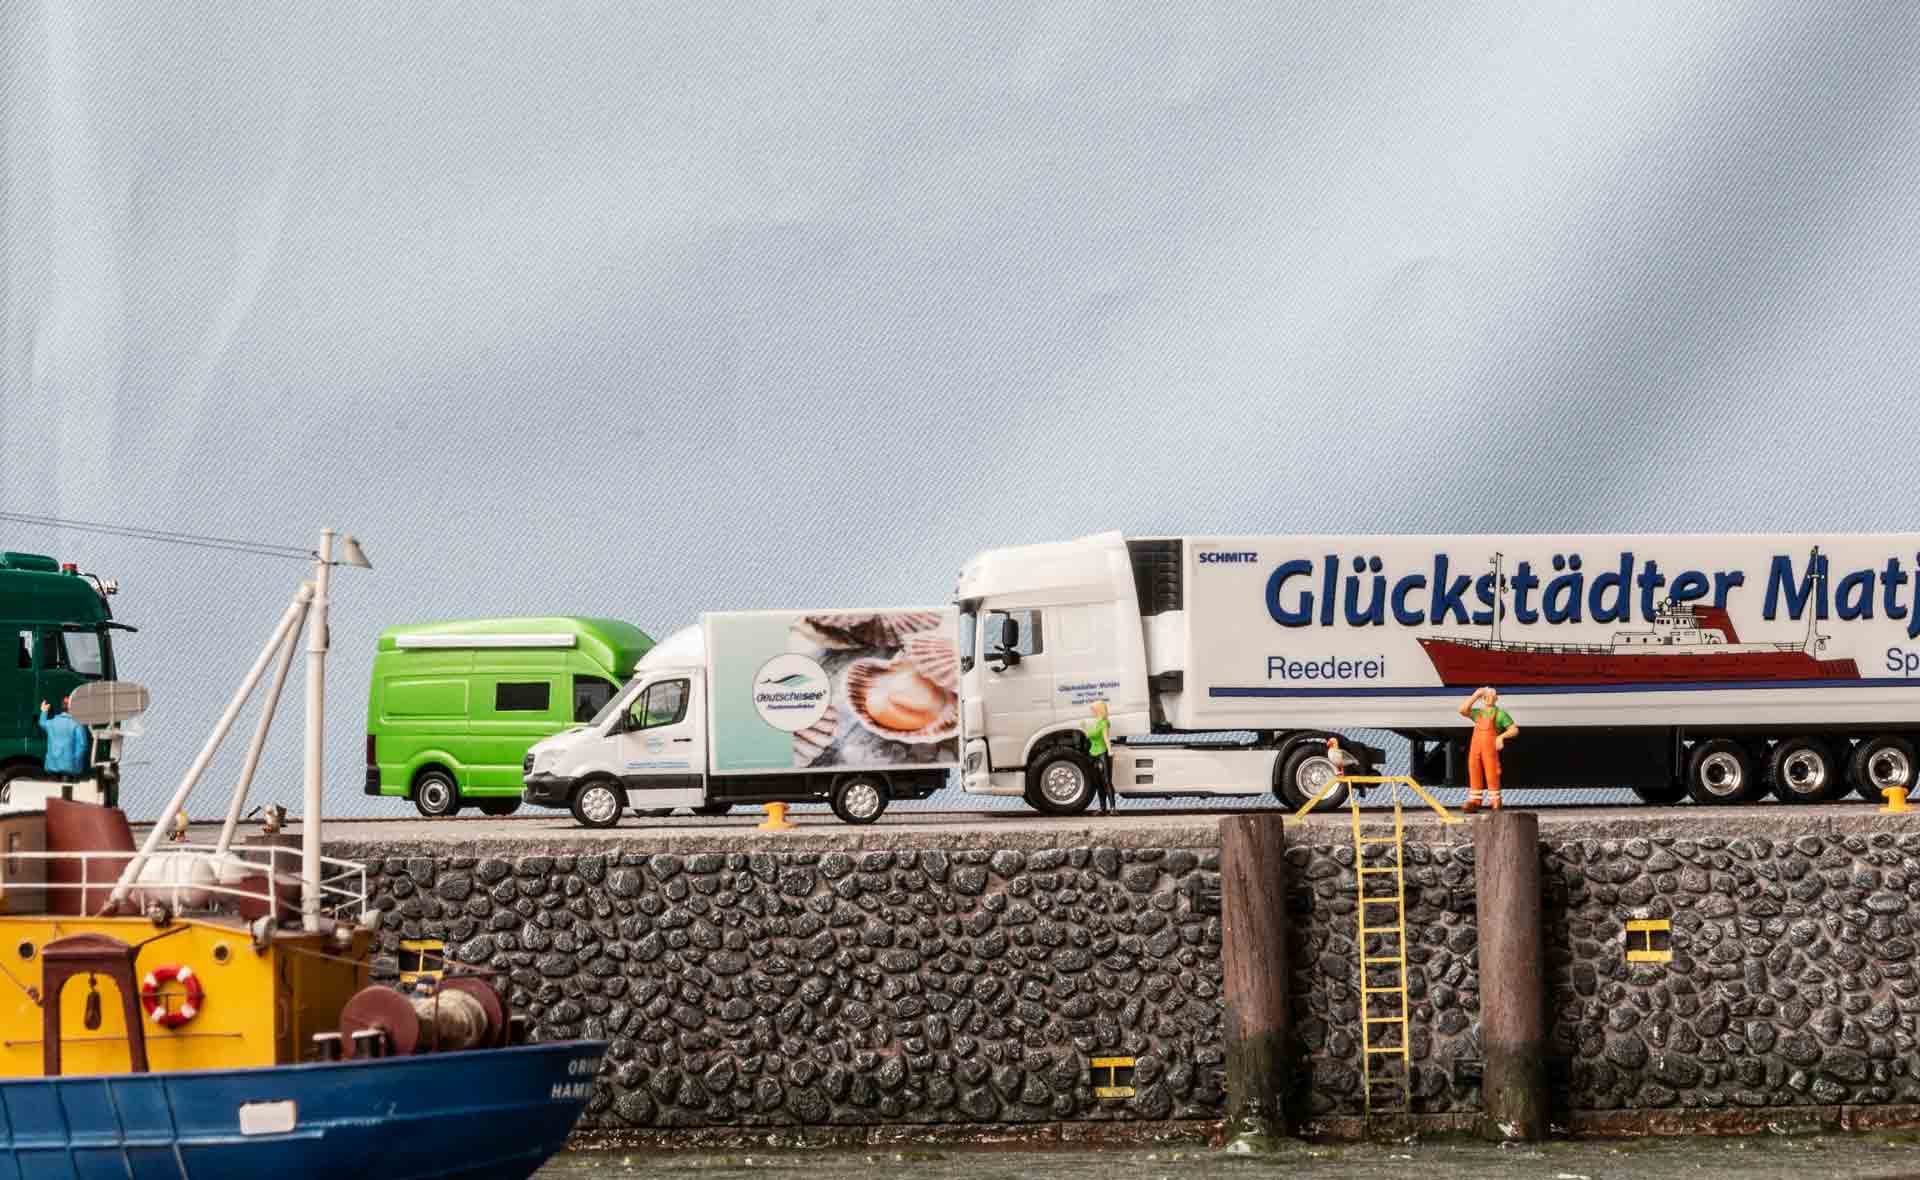
Freshly caught fish is sold at the sales cart. The modeler’s family also buy their fish here, thanks to Schrumpfmich (shrink me). The soused herring from Glückstadt is already waiting. It was not possible to find out whether the truck driver is a “Trucker Babe”.
Model making, text, and photos: Heinz Hofmann
Materials used
AK.interactive: Water Gel, all kinds www.ak-interactive.come
Artitec: Seagullus Artitecus, bollards on the quay wall and trawler www.artitecshop.com
Herpa: Model vehicles www.herpa.de
Herterich Products: Colors Airbrushcolor4you and Model Tones colors www.airbrush4you.de
Juweela: Flexyway pavement www.juweela.de
mmh-Modellbau: Decals/license plates www.3d-decalsandmore.de
Preiser: Figures, series models www.preiserfiguren.de
Sansys: Styrodur www.sansys.de
Schrumpfmich: Figures builder and family www.schrumpfmich.de
Vampisol: Quay wall www.vampisol.de